


.png)



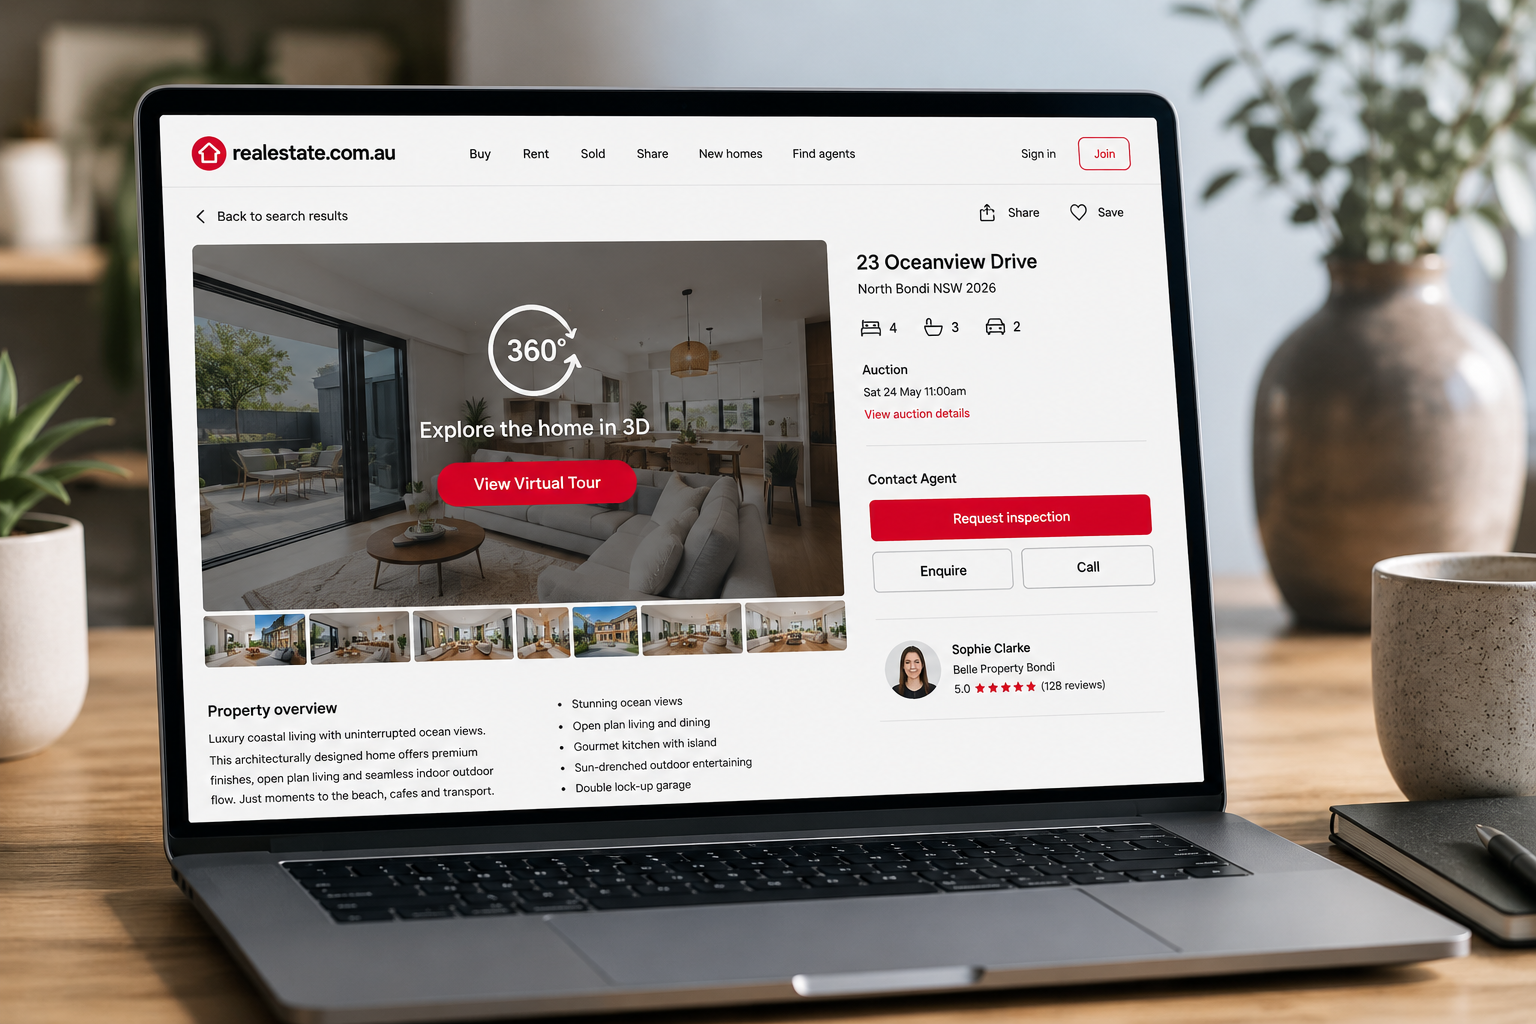
A beautifully shot virtual tour sitting unpublished, or buried in a listing where nobody notices it, delivers exactly zero value to the agent or the seller, no matter how much effort went into producing it. Knowing how to publish virtual tour on realestate.com.au listings — and doing it in a way that's actually optimized for buyer engagement — is what turns a well-produced tour into a genuine marketing asset rather than wasted production effort.
This is the master reference for this entire realestate.com.au virtual tour guide cluster's publishing side: how the process generally works, what "optimized" actually means in practice, and how to make sure the tour a buyer clicks into does the best possible job of representing the property, from the very first frame they see. If you haven't shot and stitched your tour yet, the complete guide to creating a professional virtual tour covers that earlier stage in full — this article picks up once you have a finished, polished tour ready to go live.
Before diving into optimization, it helps to understand the basic mechanics of getting a tour live. Most virtual tour software generates either a shareable link or an embeddable snippet once your finished tour has been shot, stitched, and reviewed. From there, that link or embed typically gets added to the listing's media section alongside your standard photo gallery — virtual tours generally complement rather than replace still photography, since some buyers prefer scanning static images first before committing to a full walkthrough.
Because listing platforms periodically refine their accepted formats and upload processes, the exact steps for adding a tour to a specific listing are covered in dedicated detail elsewhere in this cluster — the short version here is: export your finished tour as a link or embed code from your software, then add it to the listing's media section following the platform's current submission process.
It's worth building a habit of double-checking this process periodically rather than assuming it stays fixed indefinitely. Listing platforms occasionally adjust their media requirements, accepted file types, or upload interfaces, and a workflow that worked perfectly on your last dozen listings can quietly break if a platform changes something on its end. A quick test upload on a low-stakes listing after any platform update you notice is a small habit that prevents a much more visible problem — a broken tour link on a live, actively marketed property.
Before you even get to the technical upload step, a few basics determine whether a tour will actually help the listing once it's live. Make sure the finished tour is fully complete and reviewed — no missing rooms, no obvious stitching errors — before you add 360 tour to property listing media, since a flawed tour published live is worse for a listing's impression than no tour at all.
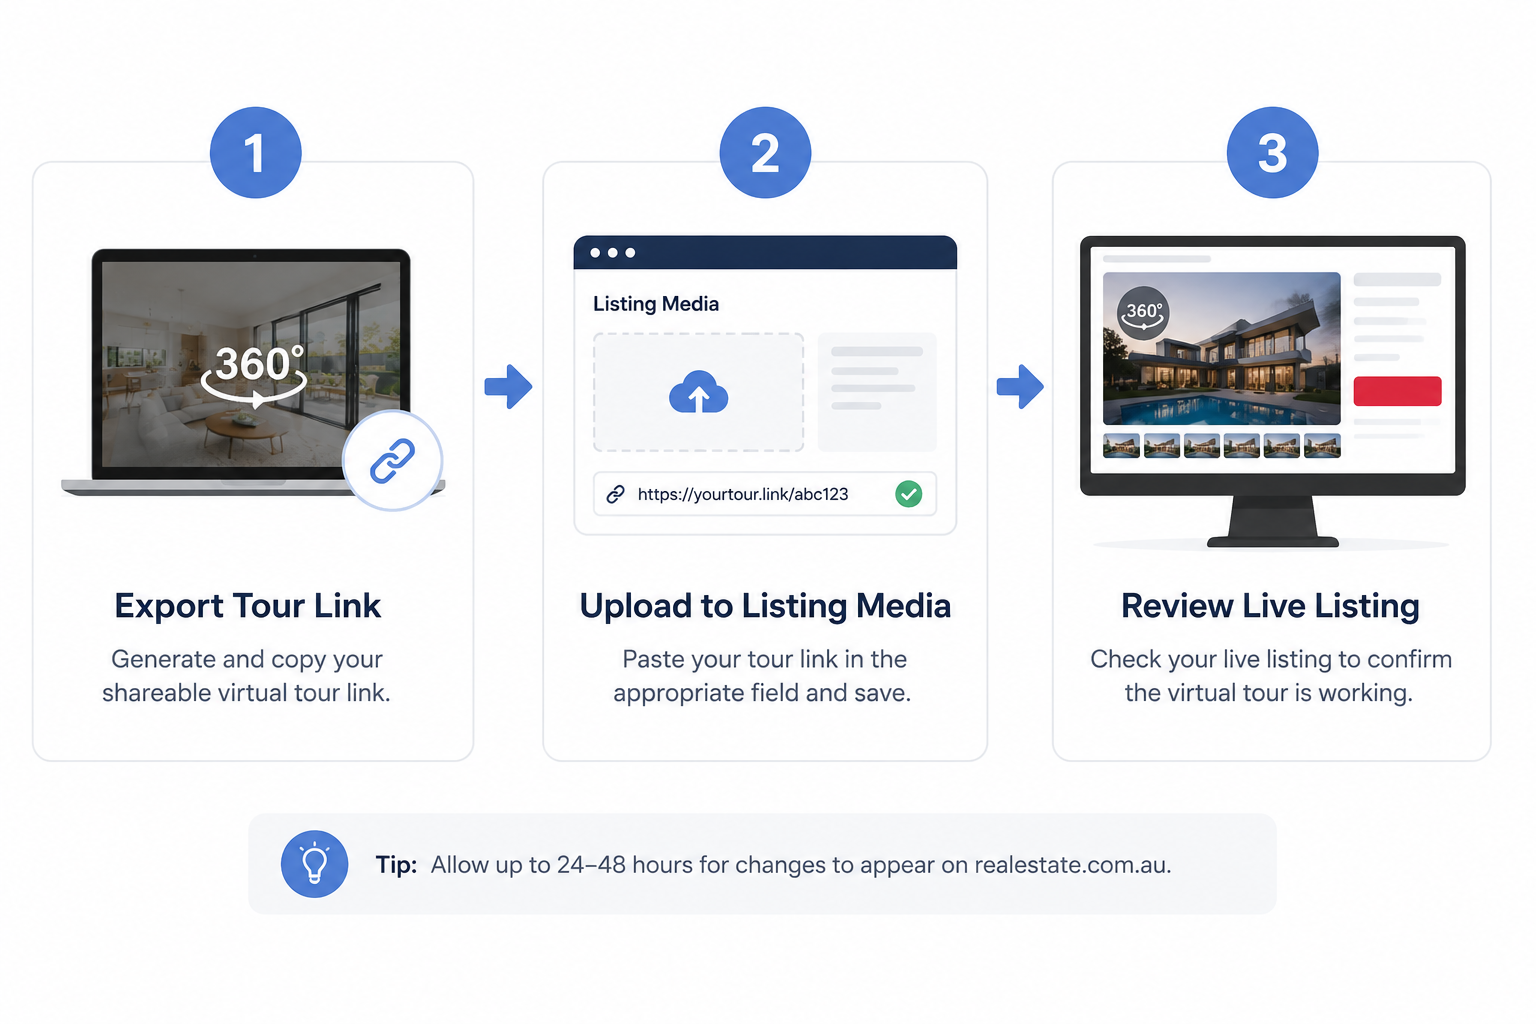
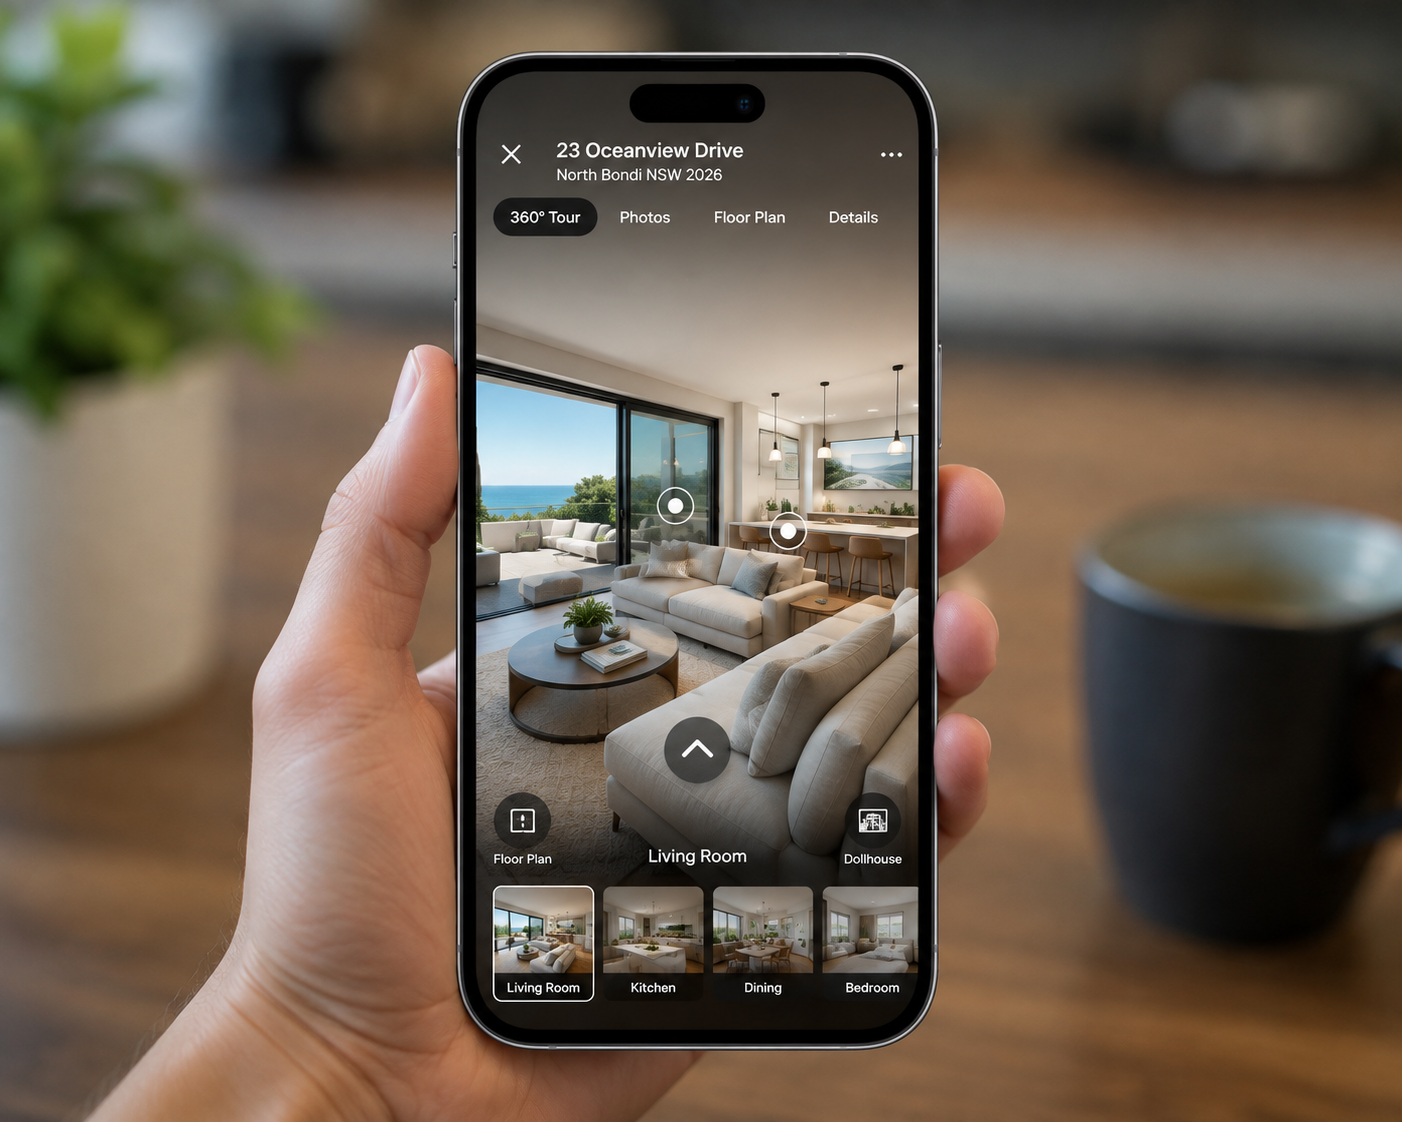
Check that your tour's starting point opens on the property's strongest feature — typically the entry or main living space — rather than an awkward angle of a hallway, since first impressions matter enormously and most viewers won't manually reset a tour's opening view even if a better one is just a few clicks away. And confirm the tour is mobile-friendly, since a significant share of buyers browse listings on their phone, and a virtual tour that only works well on a desktop screen loses a meaningful part of its potential audience.
It's also worth checking load time and file size before publishing, particularly for buyers on slower mobile connections. A tour that takes a long time to load or stutters through its transitions creates a worse impression than no tour at all, since it reads as a technical failure rather than a deliberate choice. Most quality virtual tour software optimizes this automatically, but it's worth doing a real-world test on a mobile connection yourself rather than assuming it will perform the same way it does on a fast office Wi-Fi connection during editing.
Simply having a virtual tour live on a listing is a reasonable start, but learning to genuinely optimize real estate listing with virtual tour placement and presentation is what separates an adequate result from a genuinely strong one. Positioning matters: a tour placed prominently near the top of the listing's media gallery, rather than buried after dozens of static photos, gets meaningfully more engagement simply because more viewers reach it before losing interest.
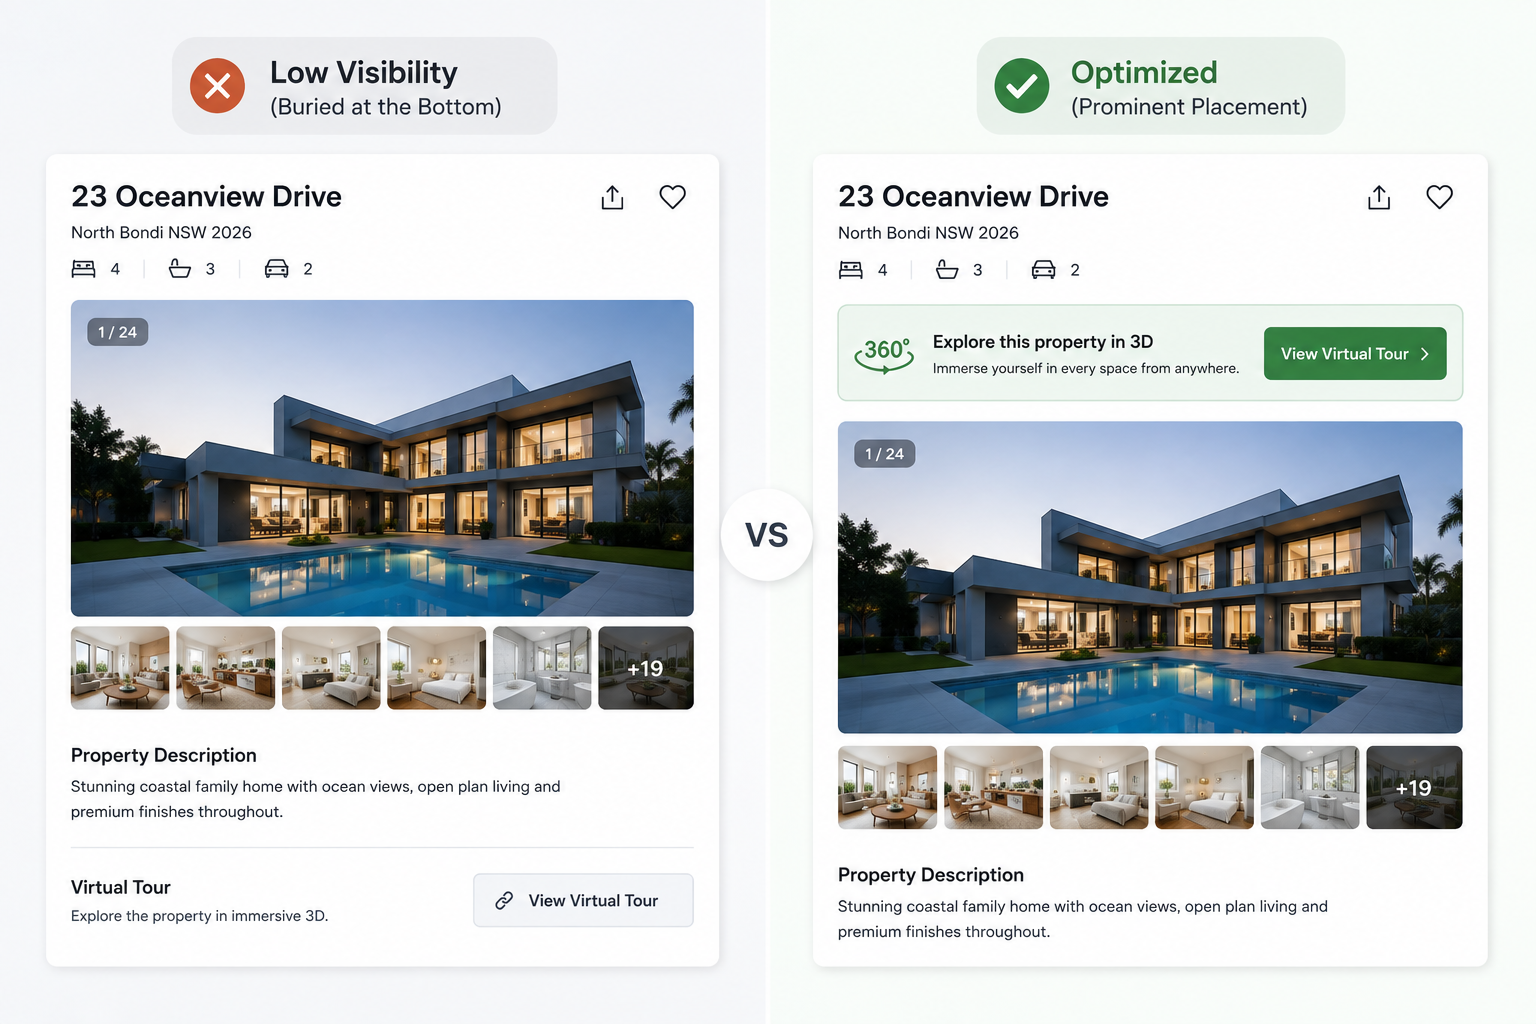
Labeling matters too — a clear call-to-action like "View Virtual Tour" rather than an unlabeled thumbnail helps buyers understand what they're clicking into before they commit the time. If your tour software supports a floor-plan or dollhouse overview, including it gives buyers a spatial reference that a linear walkthrough alone can't provide, particularly valuable on larger or unusually laid-out properties. And consistency between your tour's visual style and your still photography — similar lighting, similar styling — makes the whole listing feel cohesive rather than like two disconnected media sets bolted together.
Timing your publishing matters more than it might seem, too. Getting the tour live at the same time the listing itself goes live, rather than adding it days later as an afterthought, means it's available to every early viewer rather than only those who happen to check back on the listing after it's already been up for a while. Early viewers are often the most motivated ones — buyers actively watching a specific suburb or property type — so making sure the tour is ready at launch rather than trickling in afterward captures that initial wave of attention when it matters most.
A handful of avoidable mistakes show up repeatedly even with genuinely well-shot, well-produced tours. Publishing a tour without a final buyer's-eye review is one of the most common — catching a broken hotspot or a confusing navigation dead-end before a buyer does is far better than discovering it from a seller's complaint after the listing has already been live for days. Burying the tour link deep in a gallery where casual browsers never reach it wastes the production effort that went into creating it in the first place.
Failing to update or remove a tour when a listing's status changes — a price update, a relist after a failed sale — is another common oversight, since an outdated or broken tour reflects poorly on the current marketing even if the original production was excellent. And neglecting mobile testing specifically is worth calling out again here, since it's consistently one of the most overlooked steps despite how much listing traffic now comes from phones.
Once a tour is live and optimized, it's worth paying attention to whatever engagement signals are available — view counts, time spent in the tour, or enquiry volume compared to similar recent listings, depending on what your specific software and the listing platform expose. This isn't about obsessing over every metric, but a general sense of whether tours are correlating with stronger engagement helps validate whether your production and optimization choices are actually paying off, or whether something in the process — positioning, starting point, mobile experience — is worth revisiting.
It's worth comparing performance across a handful of listings rather than judging based on a single property, since individual listing performance varies enormously based on price point, location, and general market conditions that have nothing to do with the quality of your tour. Looking for a consistent pattern across several listings — tours reliably associated with stronger engagement or faster enquiries — gives you a far more reliable signal than reacting to any single result, whether unusually strong or unusually weak.
Learning how to publish virtual tour on realestate.com.au listings well goes beyond simply getting a link live — it means getting the basics right before publishing, positioning and labeling the tour thoughtfully within the listing, and catching common mistakes before a buyer or seller does. None of this requires advanced technical skill, just a consistent checklist you run through on every listing, every time, regardless of how routine the job feels.
Once you're confident your tours are being published and optimized well, selling this as a service to agents once you can prove it works is the natural next step — a track record of well-optimized, well-performing tours is one of the strongest arguments you can bring to a pitch, far more persuasive than any description of your process could be on its own.
If you're ready to streamline this entire publishing workflow, CloudPano is built to make sure the tour you worked hard to shoot actually reaches buyers looking their best — fast to load, easy to navigate, and positioned exactly where it can do the most good on the finished listing.
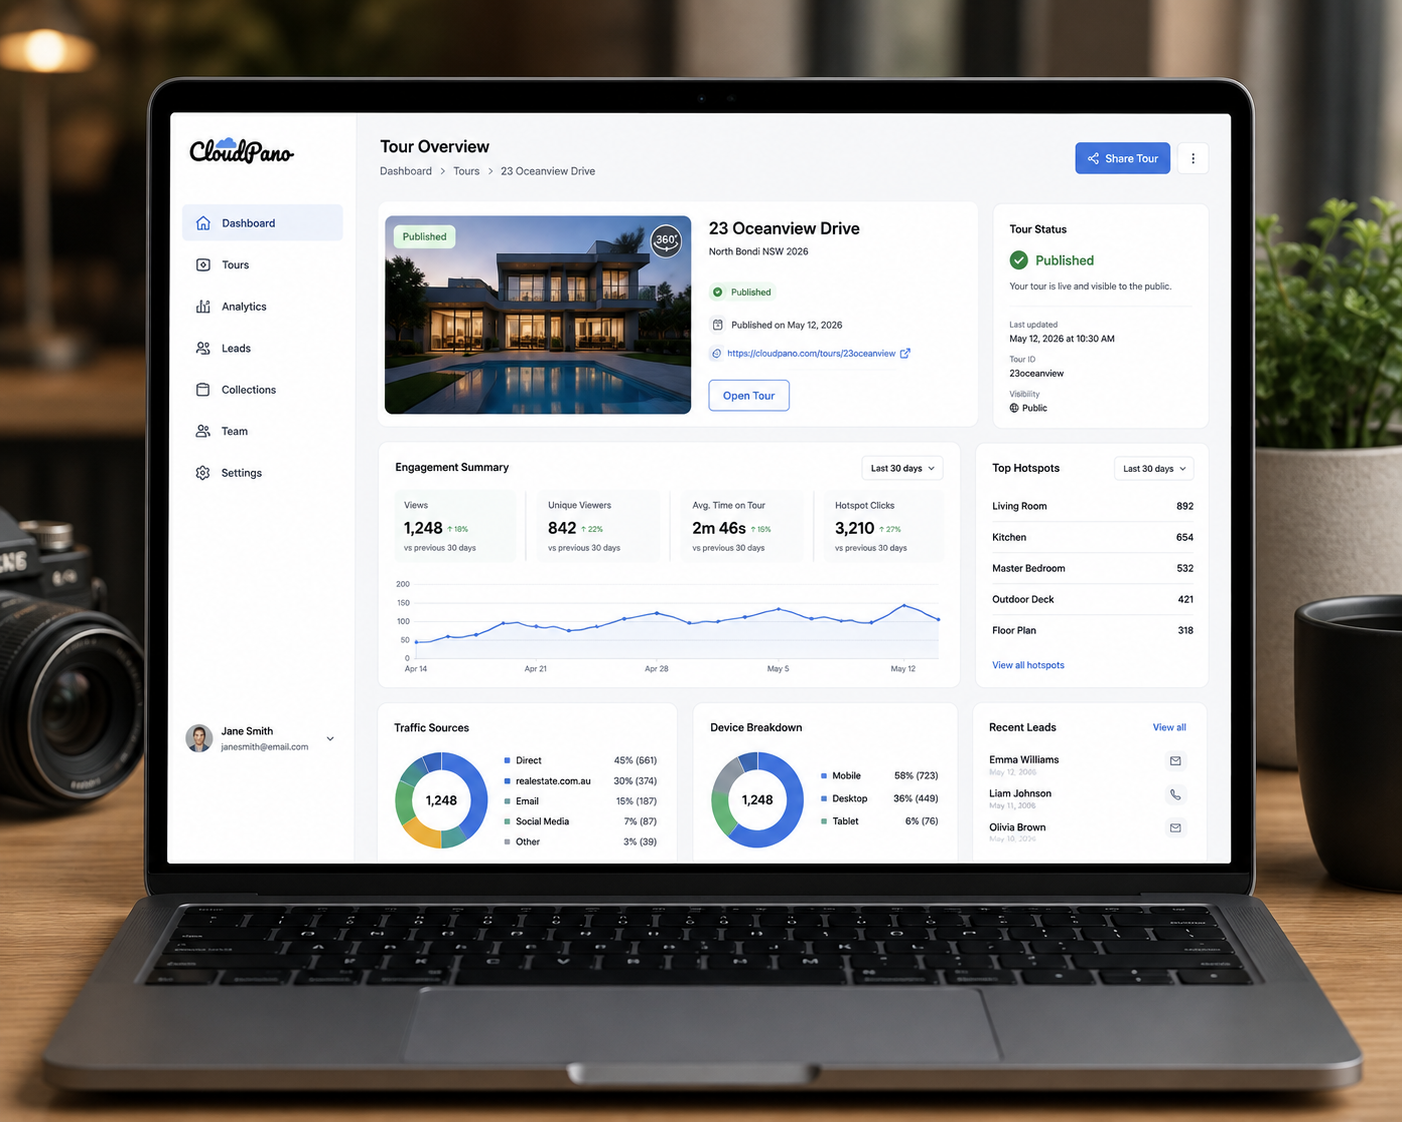


Compact, ready to go anywhere
Interchangeable lens that’s upgradeable
Dual 1-inch sensors for improved clarity and low light performance
Dynamic range and 6K 360° capture
360° photo resolution at 21MP

8K 360° video recording for ultra-detailed visuals.
4K single-lens mode for traditional wide-angle shots.
Invisible selfie stick effect for drone-like perspectives.
2.5-inch touchscreen with Gorilla Glass protection.
Waterproof up to 33ft for underwater shooting.

360° photo resolution in 23MP
Slim design at 24 mm thick
Built-in image stabilization for smooth video capture.
Internal 19GB storage for photo and video storage.
Wireless connectivity for remote control and sharing.

60MP 360° still images for high-resolution photography.
5.7K 360° video recording at 30fps.
2.25-inch touchscreen for intuitive control.
USB Type-C port for fast charging and data transfer.
MicroSD card slot for expandable storage.
.png)

.png)

Try it free. No credit card required. Instant set-up.





.svg)


.svg)