How To Create a Virtual Tour
The Ultimate Guide

Ready to learn how to create a 360º/3D virtual tour? This guide will show you step-by-step how to capture, create and optimize a virtual tour. You can use a 360º camera, 3D scanner or just a mobile phone app that uses your iPhone camera (all are compatible with CloudPano).

Use this guide to get started and reference as you learn virtual tour creation and optimization for your business.

To take full advantage of all the features shared here, upgrade your account to Pro Plus today.

Get Started

How CloudPano Works

Create a 360° virtual tour with our easy three-step process.

cloudpano-capture

Capture

Use any 360º camera
or the CloudPano mobile app

The Best 3D Virtual Tour Software For Real Estate

Create

Upload to CloudPano.com and create your tour

The Best 3D Virtual Tour Software For Real Estate
cloudpano-publish

Publish

Share your tour with the world

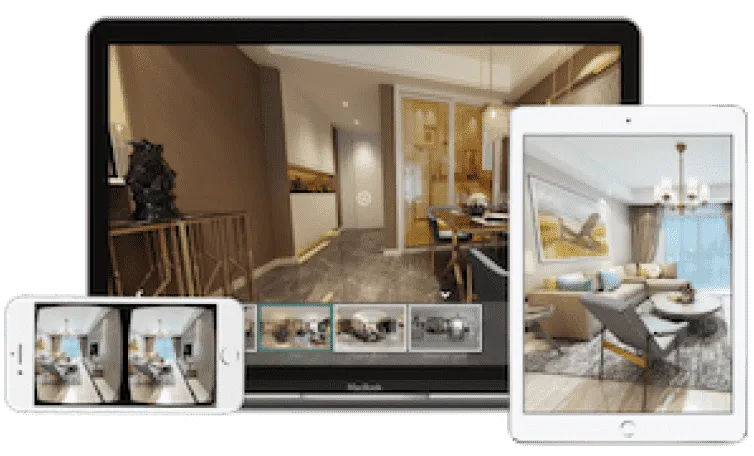
What is a virtual tour?

A virtual tour is an online experience to tour or view space, property, vehicle, showroom, commercial property, in a interactive 360º or 3D environment. 
It’s an online way to walk through a tour or go to a location physically.

There are different types of virtual tours. First, we have the "360 virtual tour." A 360 virtual tour is series of 360 photos placed together in a connected series so a viewer can navigate and view a space immersively. You can look fully up, fully down, and rotate your way into scenes

Next, the 2D virtual tour. With CloudPano, you can place 2D or still images and create a 2D virtual tour. Thumbnails will be replaced with 2D still images.

Anim pariatur cliche reprehenderit, enim eiusmod high life accusamus terry richardson ad squid. 3 wolf moon officia aute, non cupidatat skateboard dolor brunch. Food truck quinoa nesciunt laborum eiusmod. Brunch 3 wolf moon tempor, sunt aliqua put a bird on it squid single-origin coffee nulla assumenda shoreditch et.

Lastly, is the 3D tour. Sometimes, 3D just means it's a synonym or equivalent to 360. Sometimes it means that there is a 3D model involved in that 3D tour technology.

On CloudPano, you can upload a 3D model dollhouse views and CloudPano can even take the 360 virtual tour and create a 3D model for you. You can connect each room and navigate the space in full 3D.

Read more

What is a 360º virtual tour?

A 360 virtual tour platform is where you can create 360 experiences of real estate, vehicles, RV, builder homes, 3D models, etc. You can do a lot of really cool things, and basically, 360 virtual tours are marketing tools. You can create immersive experiences. If you have a nursing home and you want to create a virtual tour, if you have a multi-family property you can create a virtual tour, and help pre-lease it or pre-sell it before someone comes to the location.

This helps the buyers, renters, or the people looking to make a transaction and have full awareness of what is here what it looks like and be able to make an educated decision.  That's what a 360 virtual tour is, it's a series of three 360 photos gathered together. You can customize the names of the images, you can customize the theme and the skin of how it looks. You can connect them via hotspots and add info spots. What you need to do is, upload 360 photos, organize them, click publish, and now you have a virtual tour!

Anim pariatur cliche reprehenderit, enim eiusmod high life accusamus terry richardson ad squid. 3 wolf moon officia aute, non cupidatat skateboard dolor brunch. Food truck quinoa nesciunt laborum eiusmod. Brunch 3 wolf moon tempor, sunt aliqua put a bird on it squid single-origin coffee nulla assumenda shoreditch et.

Read more

What is a 3D virtual tour?

In this video, I'm going to highlight what a 3D virtual tour is. It's totally okay to consider 360 a kind of 3D because it is in a sense you can move up and down and it has more kind of dimensions to it.

3D models that are created, are oftentimes associated with 3D floor plans that look like on the video.
This is created from this home. It’s a 3D floor plan. And as I drag it left and right the home and move around, I'll have a full understanding or a full feel for what does the house really looks like.

You can create the 3D model easily on CloudPano. Literally, just take some photos of the interior of a space, say it's a real estate home. You capture all of the locations or all the rooms, you have them taken at the same height of your monopod or on your camera stand.

You can just have our team build these 3D models for you and in a couple of days later, you'll have a 3D model built and you can deliver that to your clients for their marketing purposes.

Anim pariatur cliche reprehenderit, enim eiusmod high life accusamus terry richardson ad squid. 3 wolf moon officia aute, non cupidatat skateboard dolor brunch. Food truck quinoa nesciunt laborum eiusmod. Brunch 3 wolf moon tempor, sunt aliqua put a bird on it squid single-origin coffee nulla assumenda shoreditch et.

Read more

What is a 360º image?

A 360 image is a 2:1 photo. The X-axis is two times as long as the Y-axis and that makes the shape of the photo equirectangular. It is basically a 360 fully immersive photo.

In the video, Zach shows a sample of a 360 image. The carpet looks really bent and weird. The couch and skyline are kind of flaring out and even the table looks like it's bent and strange-looking. This is not how the room actually looks. It is a 360 photo of that room. So what you need to do is, upload the room photo to CloudPano.The app centralizes the viewer, wraps that photo around the viewer, so that you can see a 360 photo. Then you’d get the full immersive view of what that room looks like. You can capture all types, different cameras in photo processes, but the easiest way is with a 360 camera.  Also, there’s a free app on the Apple app store for CloudPano and you can create them from your iPhone.

Anim pariatur cliche reprehenderit, enim eiusmod high life accusamus terry richardson ad squid. 3 wolf moon officia aute, non cupidatat skateboard dolor brunch. Food truck quinoa nesciunt laborum eiusmod. Brunch 3 wolf moon tempor, sunt aliqua put a bird on it squid single-origin coffee nulla assumenda shoreditch et.

Read more

How do you photograph a 360 image?

Learn How To Shoot A 360 Virtual Tour

When shooting a 360 virtual tour, it's best if you first walk around the entire home. Then make sure to maximize the light by keeping blinds and lightings open. Also, make sure there are no greater movements, such as flipping the drawer before you start.

Next, firmly place your 360 camera onto the stand and make sure everything's tight and not too loose.
Turn on the camera and check if you are in the right setting to shoot an optimal 360 tour.
Place the camera in the center of the room and make sure it has always the same height. 
A timer is suggested to delay the shot for 5 to 10 seconds and allowing you to leave the room and hide. 
Once the photo has been, taken you can now proceed to the next room. After shooting, put them on the computer, connect them, and start creating your beautiful virtual tour.

Anim pariatur cliche reprehenderit, enim eiusmod high life accusamus terry richardson ad squid. 3 wolf moon officia aute, non cupidatat skateboard dolor brunch. Food truck quinoa nesciunt laborum eiusmod. Brunch 3 wolf moon tempor, sunt aliqua put a bird on it squid single-origin coffee nulla assumenda shoreditch et.

Read more

How to create a 360 virtual tour from your phone?

Taking 360 photos is now quick and easy without unnecessary hardware needed. It is all on your phone using Cloudpano mobile application. You can use it hands-free and with a rotator to get the best 360 photos you possibly can. 

The CloudPano camera app is currently available on the iOS operating system. Download the app in the app store and once downloaded, you may proceed to capture 360 photos. When you click on the top right it will give you detailed instructions on how to use the app.  

While capturing, The Yin and Yang or circle puzzle pieces you see on the screen must come together to create a portion of the photo. When they close, pause, and wait for the capture to complete. Repeat the process until you have captured the entire room. Your output will appear immediately on the screen. You may upload these to app.cloudpano.com and start creating your virtual tour

Anim pariatur cliche reprehenderit, enim eiusmod high life accusamus terry richardson ad squid. 3 wolf moon officia aute, non cupidatat skateboard dolor brunch. Food truck quinoa nesciunt laborum eiusmod. Brunch 3 wolf moon tempor, sunt aliqua put a bird on it squid single-origin coffee nulla assumenda shoreditch et.

Read more

How to create a 360 virtual tour with the insta360 one x2?

To create a 360º virtual tour with insta360 One X, first you need to take 360º photos of the property, followed by post-production.There are steps to export photos from Insta360 One X to your computer. Below is a bulleted list of the process from exporting photos to uploading to CloudPano.

Steps to Export Photos from Insta360 One X camera to your Computer

Anim pariatur cliche reprehenderit, enim eiusmod high life accusamus terry richardson ad squid. 3 wolf moon officia aute, non cupidatat skateboard dolor brunch. Food truck quinoa nesciunt laborum eiusmod. Brunch 3 wolf moon tempor, sunt aliqua put a bird on it squid single-origin coffee nulla assumenda shoreditch et.

  • Click on your camera
  • Scroll down and select Insta360 Studio editing software (The year changes and depend on the specific time)
  • Download the software based on compatibility (Windows, macOS, LUT)
  • Open Insta360 Studio
  • click File Tab and choose Open Files 
  • Select the .insp files that needs to be converted 
  • You may convert photos into batches and may take a few minutes
  • Before exporting photos to JPG, check on the stabilization menu that the toggle box has a check for “automatic horizontal correction”
  •  It makes sure that your 360 photos are horizontal otherwise it will have a slight angle. A lot of photographers are very particular about making sure their photos are well-aligned
  • After checking “automatic horizontal correction", right click on the selected photos and choose start export
  • A pop up menu appears that says Image Export Settings
  • In here you may edit the File name and File Path
  • Click OK and wait for it to finish
  • The photos are now converted to JPG file and are located in your chosen folder.
  • You may now upload your photos to CloudPano.

Uploading a Virtual Tour to CloudPano

  • Go to CloudPano.com and login
  • Click Create a Tour
  • Add File Name and Click Next
  • Upload the photos you just converted into jpg files
  • Once uploaded, set initial view/north point
  • Click Publish and you are all set sharing your tours!
Read more

How to create a 360 virtual tour with a Ricoh theta z1?

Ricoh Theta Z1 is a special camera that has two 180 degree lenses to shoot photos and videos of the entire space. To create a virtual tour with Rico Theta Z1 the first is to turn on the camera and download the Ricoh Theta app on the app store. When you download the application, you can control the camera from your phone which makes it really simple and nice.

To connect the camera to your phone get the serial number and connect that to seal the number to the application.

Turn on the camera and below the power button, you’ll see a dual function connectivity button. You want to make sure your wi-fi capability is on. That is the setting whenever you are trying to connect your camera. You’ll see it blinking on the screen if the wi-fi mode is on. You may now connect your phone to the camera.

Using Ricoh Theta Z1 on mobile phone

Anim pariatur cliche reprehenderit, enim eiusmod high life accusamus terry richardson ad squid. 3 wolf moon officia aute, non cupidatat skateboard dolor brunch. Food truck quinoa nesciunt laborum eiusmod. Brunch 3 wolf moon tempor, sunt aliqua put a bird on it squid single-origin coffee nulla assumenda shoreditch et.

  • Click on the center that says shooting and it will ask you to register the camera. Use the serial number underneath the camera and connect it to the app.
  • Try Joining the network and wait for the app to get connected.
  • When connected, you will see the camera on the phone screen. 

Basic Shooting Settings

  • Click on the top-right gear icon
  • The shooting method is normal shooting
  • Add a self-timer so you can go leave and hide
  • Turn on Camera Visibility Reduction
  • The file format is JPEG
  • The file size keep it to default
  • ISO setting depends on what you want 
  • Then click Done and it will go back to the camera viewer on your phone screen.  
  • On the camera viewer, below there are options to choose from, so please select HDR Rendering. (This is one of the best lighting settings)
  • Edit EV based on the lighting. The brighter the better.
  • You can now proceed in capturing a photo. Press the white round button and wait for it to synthesize.
  • After taking photos, click the bottom left corner and it will take you to the images that are not transferred. It means they are still on your camera. Just tap the image and it will send the image to your device or to your phone.  

How to Upload From Phone to CloudPano

  • Once your images are transferred onto your phone, they will be in your phone’s folder. 
  • Go to app.cloudpano.com using your mobile browser. 
  • Upload the 360 photos that you just took. 
  • You may now edit your tour or finish the editing on your computer.
  • Hit publish and share your tour.
Read more

How to create a 360 virtual tour with any 360 camera?

When you visit app.cloudpano.com you’ll be taken to the software application. You can get started quickly, and may try the demo to get an overview of how the app works. If you have your 360 photos ready, you can easily upload your photos and start creating your virtual tour. To create a walkthrough experience, you need to set each initial view or Northpoint. This lets the viewer see a certain direction. Make sure to link the hotspots correctly and add info spots to your tour. After that, you can now publish and share your tour on social media sites. This is 'how to create a virtual tour' with any 360 camera.

How to upload 360 photos to virtual tour software?

Uploading 360 photos is quick and easy with CloudPano.com. To get started, go to app.cloudpano.com to sign in or create an account. Then log in and start creating your virtual tour. On your dashboard, click Create New Tour. Then, enter the tour name and click the Continue button. A pop-up appears, click on it and you can now upload your 360 photos from your computer or phone. Next, is to select the images, and after that, all the photos will appear on the tour editor. Now, you are all set to create your virtual tour.

How to connect 360 photos with hotspots?

When you log in to CloudPano and you have uploaded your 360 photos, the next step you might want to do is to connect those photos to each scene. To do this, click on the Link Hotspot button and the + sign cursor will appear. Place and click the cursor to go to the next location. A Hotspot Editor will appear on the right, make sure to edit the title, scale, opacity, and hotspot rotation if needed. Next, click on the image to attach the hotspot and hit the Save Hotspot button. That’s it, hope you enjoy creating tours.

How to connect 360 videos with hotspots?

When you log in to CloudPano and you have uploaded your 360 photos, the next step you might want to do is to connect those photos to each scene. To do this, click on the Link Hotspot button and the + sign cursor will appear. Place and click the cursor to go to the next location. A Hotspot Editor will appear on the right, make sure to edit the title, scale, opacity, and hotspot rotation if needed. Next, click on the image to attach the hotspot and hit the Save Hotspot button. That’s it, hope you enjoy creating tours. 

How to embed videos inside your 360 virtual tours?

Embedding allows you to play videos inside your virtual tour. Just click on Add Infospot, and select pop-up HTML Window to embed content. For detailed steps, check the bulleted list below.

How To Embed Content Into Your Virtual Tour With CloudPano

Anim pariatur cliche reprehenderit, enim eiusmod high life accusamus terry richardson ad squid. 3 wolf moon officia aute, non cupidatat skateboard dolor brunch. Food truck quinoa nesciunt laborum eiusmod. Brunch 3 wolf moon tempor, sunt aliqua put a bird on it squid single-origin coffee nulla assumenda shoreditch et.

  • Go to your Tour Editor
  • On Edit Tour Tab, click Add Infospot
  • Drag the cursor and set the infospot to the desired location
  • A pop up on the right side will appear that says Edit Infospot
  • To embed content, select Pop-up HTML Window
  • If you need help writing HTML you may try it here https://html5-editor.net/
  • If embedding Youtube  you may check it out https://youtu.be/ZnuwB35GYMY
  • Copy the embed code. It is easy to identify the code as it has a tag saying <iframe> at the beginning
  • Paste it on the HTML description box
  • Save infospot 
  • Publish and watch the pop-up video play on your tour
Read more

How to add hotspots to the floor with 360 virtual tour software?

Adding a floor hotspot icon is easy, and to get started, visit app.cloudpano.com. Login to your account and start working on your virtual tour. On your tour editor, you can see below the 'Link Hotspot button'. This lets you connect to the next scene where you want to be or links you to other rooms in your virtual tour. When you click the Hotspot Button, an editor shows on the right side. On the editor, you can customize the title, scale, opacity, and rotation of the hotspot icon. Next is to click the image of where you want to link or go next. Then if the placement of your icon is appearing low enough, you can use the floor icon to better suit the placement. Just click save and publish the tour to preview it.

How to create floor plans for your 360 virtual tours?

When you decide to add a floor plan to your tour, go to the Floor Plan tab on the Tour Editor. You may order or upload your own floor plan. Once you have your floor plan ready, click on the floor plan image to link a scene. Next, click on the specific area of the floor plan. A pop-up appears where you can find the picture that matches your floor plan, then click Save. This lets you quickly connect the floor plan on your 360º virtual tours. 

HOW TO UPLOAD YOUR OWN FLOOR PLAN:

  • Log in to CloudPano account
  • Create a virtual tour
  • Go to the Floor Plan tab scroll down below and click Upload Floor Plan
  • Browse through the images on your computer and click Open
  • Once uploaded, you click the floor plan and link the scenes.
  • Hit save and publish to view the virtual tour.

HOW TO ORDER A FLOOR PLAN:

Anim pariatur cliche reprehenderit, enim eiusmod high life accusamus terry richardson ad squid. 3 wolf moon officia aute, non cupidatat skateboard dolor brunch. Food truck quinoa nesciunt laborum eiusmod. Brunch 3 wolf moon tempor, sunt aliqua put a bird on it squid single-origin coffee nulla assumenda shoreditch et.

  • Log in to CloudPano account
  • Create a virtual tour
  • Link hotspots and publish the tour; it is vital to publish the tour first so you can order a floor plan
  • Click the Edit icon to go back to the Tour Editor
  • Go to the Floor Plan tab located on the left side
  • Click Order a Floor Plan; We have three types of Floor Plans you can choose from - 2D Black & White, 2D Colored, and 3D
  • Select the Floor Plan Type, add floor levels, include logo (optional), and add special instructions if needed 
  • Click the Next Step button
  • The Payment options appear, and if the payment is successful, you will receive an email notification that the order is processed
  • You may check the status of your order by going to the "Orders tab" on the upper portion beside My Floorplans
  • Once the floor plan is delivered, click on the floor plan image and review the floor plan
  • If you are satisfied, click the Accept button, and if there are errors, click Deny
  • If the floor plan is accepted, click the image to link the scenes
  • Then hit publish and view your virtual with floor plan
Read more

How To Customize Your Floor Plan Icon Text

  • Go to your Tour Editor
  • Proceed to Floor Plan Tab
  • Upload your floor plan image or if you have already uploaded one, proceed to 4
  • Scroll down to Customize Icon Text
  • Add Title on the text box then hit save
  • Publish your virtual tour and drag the mouse to the left side and see that the floor plan icon text has been changed

How to connect floor plans on your 360º virtual tours?

When you decide to add a floor plan to your tour, go to the Floor Plan tab on the Tour Editor. You may order or upload your own floor plan. Once you have your floor plan ready, click on the floor plan image to link a scene. Next, click on the specific area of the floor plan. A pop-up appears where you can find the picture that matches your floor plan, then click Save. This lets you quickly connect the floor plan on your 360º virtual tours. 

How to customize your icons, hotspots, info spots and logos on your virtual tour software?

How to Use Custom Icons and Images On Virtual Tours With CloudPano Library

As on the video, Zach does a quick demo where you see an add to cart button on the virtual tour. This is not a button, but it's a custom infospot.

 Here are the steps to apply this to your CloudPano 360 virtual tour:

Anim pariatur cliche reprehenderit, enim eiusmod high life accusamus terry richardson ad squid. 3 wolf moon officia aute, non cupidatat skateboard dolor brunch. Food truck quinoa nesciunt laborum eiusmod. Brunch 3 wolf moon tempor, sunt aliqua put a bird on it squid single-origin coffee nulla assumenda shoreditch et.

  • Log in to CloudPano and create a virtual tour
  • Click add infospot
  • When the infospot tab shows up, click "Open Library"
  • When the type of scene selection pops up, you may choose Mine to upload your image or choose the community tab for other icons.
  • If you upload your icon, click Add New and wait for your uploaded image to appear on the Hotspot Icons tab.
  • Scroll down on the Hotspot icon tab to check the image you uploaded.
  • When you see the image on the Hotspot icon tab, select and click Use this icon.
  • Click Confirm, add Preview Text, and add Save Infospot

If you want your Custom Icon Info Spots to be similar to an add to cart button where you click the icon and go to a payment link, you may do these steps below:

  • Log in to CloudPano and create a virtual tour
  • Click add infospot
  • When the infospot tab shows up, click "Open Library"
  • When the type of scene selection pops up, you may choose Mine to upload your image or choose the community tab for other icons.
  • If you upload your icon, click Add New and wait for your uploaded image to appear on the Hotspot Icons tab.
  • Scroll down on the Hotspot icon tab to check the image you uploaded.
  • When you see the image on the Hotspot icon tab, select and click Use this icon.
  • Click confirm, add preview text, add the "Hyperlink URL", and then select "Open link in a new window"
  • Save Infospot and Publish
Read more

How to use live video chat with your virtual tour software CloudPano?

CloudPano Live lets you share your screen and guide your participants through the virtual tour. To use CloudPano Live Chat, click on the video icon on the right side of the tour. Then, enter your name in the CloudPano Live lobby and click Connect. The camera and microphone settings pop up, so make sure to allow access. You’ll then head to the CloudPano Live Chat Room. On the right sidebar, you can easily type in your text to chat with other participants. Below you will see other buttons that let you share screen, mute, draw, and leave.

Anim pariatur cliche reprehenderit, enim eiusmod high life accusamus terry richardson ad squid. 3 wolf moon officia aute, non cupidatat skateboard dolor brunch. Food truck quinoa nesciunt laborum eiusmod. Brunch 3 wolf moon tempor, sunt aliqua put a bird on it squid single-origin coffee nulla assumenda shoreditch et.

  • Create a CloudPano virtual tour
  • On your tour editor, go to Live Tab
  • Turn on CloudPano Live
  • Turn on notifications and add the name and email of the person to be notified.
  • If you want to book via Calendly, scroll down and add your Calendly URL.
  • Once done, hit publish and you will see a camera icon on the right side of the tour.
  • Share the tour link so users can join the Cloudpano Live Chat.
Read more

How to add virtual tours together and combine the experience with virtual tour software?

To add virtual tours together, you need to create a collection. Collections are like folders - they allow you to organize and share multiple tours as a group in one tour link. The images on the ribbon, when clicked, will show all the photos for that specific tour, which will appear at the bottom.

How to Create Collections: 

Anim pariatur cliche reprehenderit, enim eiusmod high life accusamus terry richardson ad squid. 3 wolf moon officia aute, non cupidatat skateboard dolor brunch. Food truck quinoa nesciunt laborum eiusmod. Brunch 3 wolf moon tempor, sunt aliqua put a bird on it squid single-origin coffee nulla assumenda shoreditch et.

  • Go to CloudPano Dashboard app.cloudpano.com/tours
  • Click purple + button that says Create New Collection
  • Start creating your collections, you add the title and description
  • Choose tours, the order which you click will determine the order in which they are added.
    • -Google Street View Tours can be added on collections as well
  • After selecting the tours, click add.
  • A tour link is generated, and you can customize the link.
    • To customize link, Click Edit details on the upper right of the Collection Dashboard
    • On the Link description box, type in the link title you wanted
    • Add Whitelabel URL(optional)
  • Click the copy link icon and share your collections.
Read more

How to white label or private label your virtual tours and use your own website domain?

  • Go to your dashboard and click on Manage White Label URLs located on the left sidebar
  • Click + Add New White Label
  • A pop-up shows to configure your domain, so please add your URL.
    Take Note: Make sure your URL is already pointed to CloudPano.
  • If your URL has been properly configured, you will wait for the SSL certificate.
  • After 24-48 hours, it will get approved and you can now use your URL to Whitelabel your virtual tours.

How to private label your virtual tour collections with your virtual tour software?

When you create a virtual tour collection, you will see a group of tours on the ribbon view. To private label your virtual tour collections, you can customize the generated tour ID and use your Whitelabel URL. The first you want to do is create a virtual tour collection, and here are the steps:

Anim pariatur cliche reprehenderit, enim eiusmod high life accusamus terry richardson ad squid. 3 wolf moon officia aute, non cupidatat skateboard dolor brunch. Food truck quinoa nesciunt laborum eiusmod. Brunch 3 wolf moon tempor, sunt aliqua put a bird on it squid single-origin coffee nulla assumenda shoreditch et.

  • Go to CloudPano Dashboard app.cloudpano.com/tours
  • Click the purple + button that says Create New Collection
  • Start creating your collections, you add the title and description
  • Choose tours, the order which you click will determine the order in which they are added.
    • -Google Street View Tours can be added on collections as well
  • After selecting the tours, click add.
  • A tour link is generated, and you can customize the link.
    • To customize link, Click Edit details on the upper right of the Collection Dashboard
    • On the Link description box, type in the link title you wanted
    • Add Whitelabel URL(optional)
  • Click the copy link icon and share your collections.
Read more

How to rotate hot spots arrow with your virtual tour software?

When you upload your 360 photos, 2D photos, or videos to your CloudPano virtual tour editing software, you want to connect them with some hotspots. In order to do this, you select the desired scene you want to edit, then click the link hotspot. You select on the screen where for the hotspot to be in this case. Then the hotspot editor shows on the right side. You can edit the title, scale, opacity, and rotation. A brief explanation, Scale lets you resize the hotspot icon. Opacity is the transparency of the icon. Rotation lets you face the movement of the arrows for your hotspot icon. Once you have edited the hotspot don’t forget to link to an image and click save hotspot.

How to add transparency to your icons with your virtual tour software?

  • Login to CloudPano at app.cloudpano.com
  • Create or edit your virtual tour
  • On your tour editor, add infospot
  • Click open Library
  • Upload the icon from your computer or community library
  • If you have added the icon to your tour, you can make it look smooth and see-through by clicking and dragging your chosen opacity level.
  • That’s how to add a transparent icon, hit publish and share your tour!

How to create walkthrough virtual tours with your 360 virtual tour software?

Natural Movement Navigation aligns the initial heading in a scene to match the heading from the previous scene. This makes the user feel as if they are actually “walking through” the tour, greatly enhancing immersion. For natural movement navigation to work, don’t forget to set the North Point of all your photos.

How to Set Up Automatic Walkthrough Navigation On Your Virtual Tour Software

Anim pariatur cliche reprehenderit, enim eiusmod high life accusamus terry richardson ad squid. 3 wolf moon officia aute, non cupidatat skateboard dolor brunch. Food truck quinoa nesciunt laborum eiusmod. Brunch 3 wolf moon tempor, sunt aliqua put a bird on it squid single-origin coffee nulla assumenda shoreditch et.

  • Login to app.cloudpano.com
  • Create a virtual tour
  • Go to Settings> Navigation tab>Change Navigation mode>Click the drop-down bar and pick your Navigation setup
  • Set the North Point or Initial view of all your photos
  • Publish and Share your tours

Aside from Natural Movement, we also have other two navigation modes: Initial view navigation and Hybrid movement navigation.
Initial View navigation ensures the user always looks at the same initial view of a scene, no matter where they come from. This view is great for ensuring each scene always opens with the user facing in a certain direction. This is CloudPano`s classic navigation.
Hybrid Movement Navigation allows the user to combine the two modes together. If the user comes to the scene through the hotspot, mode Natural Movement Navigation is used. But if the user comes to the scene through the UI Ribbon, then the Initial View Navigation is used. This can give users the best of both worlds.

Read more

How to use 360º drone photos in your virtual tours?

Drone images can create a relaxed setting for the viewer, letting them know where they are and where they are going, especially for significant locations and big projects. All you need are some 360º photos from your drone. In post-production, you can stitch the images together with your camera’s software to create full 360º images.And you are ready to get started, visit app.cloudpano.com to create your virtual tour.

How to upload virtual tours to Google Street View?

How To Upload Virtual Tours To Google Street View

Anim pariatur cliche reprehenderit, enim eiusmod high life accusamus terry richardson ad squid. 3 wolf moon officia aute, non cupidatat skateboard dolor brunch. Food truck quinoa nesciunt laborum eiusmod. Brunch 3 wolf moon tempor, sunt aliqua put a bird on it squid single-origin coffee nulla assumenda shoreditch et.

  • Create and publish a virtual tour
  • Go back to the CloudPano tour editor, on the left side bottom click on the little Man icon on the lower left side tab. 
    • -it will direct to the Google Street View Editor
  •  Click the green button that says Start Building A Tour
  • Type in the Business Name to sync the address with Google My Business and the map will load to the location. Then Click Next Step. 
  • Select the images and click the next step. 
  • Review the information posted, and once done, proceed to the Street View Editor 
  • Add a scene by selecting the photo on the right side and review the position of the spot on the map. It should be on the same spot. 
  • Add another photo and check on the map. Click and drag the icon to change the position and adjust if needed.
  • Continue adding photos, adjusting the position, and set North.
  • To connect images to their location, click the plus sign on each of the images you want to be connected to.
  • Once done, click Publish to GSV.
  • A notification pops up that your tour is uploading. 
    • Take note, it takes Google to process your virtual tour.
  • Wait for the email that your tour has been published on Google Street View
Read more

How to connect virtual tours to a business on Google Maps?

How to connect virtual tours to a business on Google Maps?

Anim pariatur cliche reprehenderit, enim eiusmod high life accusamus terry richardson ad squid. 3 wolf moon officia aute, non cupidatat skateboard dolor brunch. Food truck quinoa nesciunt laborum eiusmod. Brunch 3 wolf moon tempor, sunt aliqua put a bird on it squid single-origin coffee nulla assumenda shoreditch et.

  • Create and publish a virtual tour
  • Go back to the CloudPano tour editor, on the left side bottom click on the little Man icon on the lower left side tab. 
    • -it will direct to the Google Street View Editor
  •  Click the green button that says Start Building A Tour
  • Authorize your Google Account
  • Type in the Business Name to sync the address with Google My Business and the map will load to the location. Then Click Next Step. 
    • -If the business name does not show up on the address bar, check if Google My Business has been set up. This is needed to sync to Google Maps.
  • Select the images and click the next step. 
  • Review the information posted, and once done, proceed to the Street View Editor 
  • Add a scene by selecting the photo on the right side and review the position of the spot on the map. It should be on the same spot. 
  • Add another photo and check on the map. Click and drag the icon to change the position and adjust if needed.
  • Continue adding photos, adjusting the position, and set North.
  • To connect images to their location, click the plus sign on each of the images you want to be connected to.
  • Once done, click Publish to GSV.
  • A notification pops up that your tour is uploading. 
    • Take note, it takes Google to process your virtual tour. 
  • Wait for the email that your tour has been published on Google Street View
Read more

How to add logos to your virtual tours?

  • Create a virtual tour first on app.cloupano.com
  •  On your Tour Editor, click add infospot
  • The Infospot tab pops up, click on Open Library
  • Once you click on the Library icon, a screen will pop up. You have four option tabs available: Sounds and Music, Images, Hotspot Icons, and Logos.
  • Select Logos and click on the green plus sign to upload an image
  • Under Images or Hotspot Icons, choose an image to use and click on it. Under the Short Text tab, you can type something to describe the image. Then click SAVE to add that Info Spot into your tour.
  • Hit Publish to see your Logo/Custom Icon

How to overlay information on your virtual tours?

Overlay information is consistent on every image of the virtual tour. This information is oftentimes used for the name, email, phone number, address, or other information. To access this, you must first create a virtual tour on app.cloudpano.com. Then on your tour editor, go to the Edit Tour tab and click on the drop-down arrow of Tour Properties. You can place the information you wanted, such as name, phone number, email and etc. This is customizable and above the information will be the logo. If you want to add a logo, go to the Brandkit tab and upload your own logo. You publish and check the output, and that's how you overlay information on your virtual tours on CloudPano.com.

How to add phone numbers to the top of your virtual tours?

Adding a phone number to your virtual tour is easy with CloudPano.com 

Anim pariatur cliche reprehenderit, enim eiusmod high life accusamus terry richardson ad squid. 3 wolf moon officia aute, non cupidatat skateboard dolor brunch. Food truck quinoa nesciunt laborum eiusmod. Brunch 3 wolf moon tempor, sunt aliqua put a bird on it squid single-origin coffee nulla assumenda shoreditch et.

  • First, log in to app.cloudpano.com. 
  • Start creating or editing your tour
  • Go to the Tour Editor tab. 
  • Click on the drop-down arrow of Tour Properties
  • Add the  Phone number  
    • Take note that the Phone number is clickable on the virtual tour. You can easily access the phone number and contact the person. 
  • Continue adding the overlay information and editing your tour.
  • Once done, click publish and share your tour. 
Read more

How to password protect your virtual tours?

Password-Protect your Tour

On CloudPano.com you can add passwords for tour access. Create, share and secure your virtual tours. A simple solution to add robust security to your virtual tours

Step-by-Step

Anim pariatur cliche reprehenderit, enim eiusmod high life accusamus terry richardson ad squid. 3 wolf moon officia aute, non cupidatat skateboard dolor brunch. Food truck quinoa nesciunt laborum eiusmod. Brunch 3 wolf moon tempor, sunt aliqua put a bird on it squid single-origin coffee nulla assumenda shoreditch et.

  • Log in to your account at app.cloudpano.com
  • Click 'Go to Dashboard'
  • Select a tour
  • Click 'Edit'
  • Click 'Settings' icon
  • Click dropdown button to select privacy level options
Read more

How to change your theme of your virtual tours?

How To Customize Or Choose Skins For You Your Virtual Tours

Anim pariatur cliche reprehenderit, enim eiusmod high life accusamus terry richardson ad squid. 3 wolf moon officia aute, non cupidatat skateboard dolor brunch. Food truck quinoa nesciunt laborum eiusmod. Brunch 3 wolf moon tempor, sunt aliqua put a bird on it squid single-origin coffee nulla assumenda shoreditch et.

  • Go to app.cloudpano.com/dashboard
  • Create a tour or edit an existing tour
  • On your tour editor, go to Brandkit
  • Scroll down below and select a Theme based on your preferences
  • Hit Publish and show off your virtual tour

Kinds of Themes:

Classic Theme
-Square boxes and occupies at the bottom
-Thumbnails on the bottom and the images are aligned to the left side.

Flow
-Thumbnail on the bottom have rounded sides and images are aligned at the center
-Different style of field when hovered

ModernI
t’s a bit similar to Flow but a different type of animation style and the images appear aligned to the left side.

Cascade
- The Thumbnail is on the left side of the screen that looks like a menu style

Read more

How to customize your sharing image to your virtual tours?

To customize your sharing image on social media sites, first, visit app.cloudpano.com.Then create or edit your virtual tour. On your tour editor, go to the Brand kit Tab and scroll down to see some preview image icons. You can also upload your own image to be your cover image when you paste the tour link to social media sites. That's it, don't forget to publish and share your tour.

How to add a watermark to your virtual tours?

  • Login to your Cloudpano account
  • Go to your dashboard and edit your tour 
  • On your tour editor, you can add your watermark on the Brandkit tab. 
  • On the Brandkit tab, just scroll down and you can place your own watermark.  
  •  Add a message/title and link below to direct it. 
  • Click save and it will appear on the right lower side of your tour. 
  • Hit publish and share your tour.

How to add Google analytics to your virtual tours?

Get all the tracking you need from your virtual tours with Google Analytics:

Anim pariatur cliche reprehenderit, enim eiusmod high life accusamus terry richardson ad squid. 3 wolf moon officia aute, non cupidatat skateboard dolor brunch. Food truck quinoa nesciunt laborum eiusmod. Brunch 3 wolf moon tempor, sunt aliqua put a bird on it squid single-origin coffee nulla assumenda shoreditch et.

  • First, log in and create your account with Google Analytics. 
  • On your Google Analytics dashboard, click Create Property and add all the details and answer all questions then click Create. 
  • Next step, you'll be asked to set up a data stream to start collecting data. Select Web and continue adding your Website URL. In this case, if you want to keep track of your tour URL, so add your tour link and unique stream name to get it done. 
  • Next is to get the Tracking ID. To do this, go back to the Google Analytics dashboard. On the lower left side, click the settings icon and proceed to the Property you recently added. 
  • Click Tracking Info and look for the Traffic code. 
  • Copy the Tracking ID or the UA code and go back to the CloudPano Tour Editor. 
  • In the CloudPano tour editor, go to Settings, scroll down to Google Analytics and paste the UA code, then hit save. 
  • Publish the tour and you're done. You can now start tracking and create automatic reports for yourself and your clients.
Read more

How to add custom music to your virtual tours?

How To Add Custom Music and Sounds To Your Virtual Tour Software - CloudPano

Anim pariatur cliche reprehenderit, enim eiusmod high life accusamus terry richardson ad squid. 3 wolf moon officia aute, non cupidatat skateboard dolor brunch. Food truck quinoa nesciunt laborum eiusmod. Brunch 3 wolf moon tempor, sunt aliqua put a bird on it squid single-origin coffee nulla assumenda shoreditch et.

  • Go to your dashboard to create or edit your tour.
  • On your tour editor > go to settings >  add ambient soundscape > click on the drop-down arrow
  • To upload your own music, click Choose from the library
  • When the pop-up tab appears go to the Sounds and Music tab and click on the green plus sign icon to upload your own music 
  • Select the sound from your computer and upload it
  • When the sound has been uploaded, click on Use this sound and click confirm
  • Publish and check if the sound auto-plays in the tour
  • On the right sidebar of the published tour, you may click the speaker icon to toggle the ambient sound
Read more

How to add background nosies to your 360 virtual tours?

How To Add Background Noises To Your 360 Virtual Tours

Anim pariatur cliche reprehenderit, enim eiusmod high life accusamus terry richardson ad squid. 3 wolf moon officia aute, non cupidatat skateboard dolor brunch. Food truck quinoa nesciunt laborum eiusmod. Brunch 3 wolf moon tempor, sunt aliqua put a bird on it squid single-origin coffee nulla assumenda shoreditch et.

  • Go to your dashboard to create or edit your tour.
  • On your tour editor > go to settings >  add ambient soundscape > click on the drop-down arrow
  • Choose from the preset music
  • Hit publish and check if the sound auto-plays in the tour
  • On the right sidebar of the published tour, you may click the speaker icon to toggle the ambient sound
Read more

How to increase and decrease icon sizes on your virtual tours?

How To Increase And Decrease Icon Sizes On Your Virtual Tours

Anim pariatur cliche reprehenderit, enim eiusmod high life accusamus terry richardson ad squid. 3 wolf moon officia aute, non cupidatat skateboard dolor brunch. Food truck quinoa nesciunt laborum eiusmod. Brunch 3 wolf moon tempor, sunt aliqua put a bird on it squid single-origin coffee nulla assumenda shoreditch et.

  • Go to your dashboard
  • Create or Edit your tour
  • Add hotspot or infospot
  • The Edit hotspot/infospot tab appears and you go to scale, then drag to what size of hotspot icon you want
Read more

How To Swap a 360º Image Without Losing Data

Swap an Image without Losing Data

Imagine this scenario: You build your virtual tour, ship it to your client, only to find out they are dissatisfied with your post-processing or image quality. Improving images would typically require you to remake your entire tour with the new images.

Rather than remake your entire tour and waste hours, we provide an "Image Swap" feature that allows you to "swap" one image for another one for any given scene. Your hotspots, infospots, scene title, and all information is preserved. Just the image gets updated.

Swap an Image without Losing Data

Create a new tour or edit an existing one. Then, from Tour Editor...

Anim pariatur cliche reprehenderit, enim eiusmod high life accusamus terry richardson ad squid. 3 wolf moon officia aute, non cupidatat skateboard dolor brunch. Food truck quinoa nesciunt laborum eiusmod. Brunch 3 wolf moon tempor, sunt aliqua put a bird on it squid single-origin coffee nulla assumenda shoreditch et.

  • Select a certain image on the 'Edit Tour' tab
  • Click 'swap out' icon on the bottom right corner of an image beside 'trash bin/delete' icon
  • Click 'Select 360 Photo' button to upload images
  • Select .jpg, .png, .tiff 360 image and then click 'open'
  • Click 'Publish'
Read more

Add 360 virtual tours to your business, get unlimited access to our platform. Choose the plan thats right for you.

Get Started