


.png)

Understanding HDR Exposure Settings for Perfectly Balanced Images
If you want clean, natural-looking HDR photos, everything starts with your camera’s exposure settings. Editing can enhance a photo, but it can’t fix poor capture. That’s why learning the right HDR exposure settings is one of the most important skills in HDR photography.
In this guide, we’ll break down how ISO, aperture, and shutter speed work together, how they affect bracketed exposures, and how to set them properly for sharp, low-noise, professional HDR images.
Whether you shoot interiors, real estate, landscapes, or architecture, mastering these exposure fundamentals will dramatically improve your results. Let’s dive in. 🚀
HDR photography works by combining multiple exposures of the same scene. If those exposures aren’t captured properly, the final image can look noisy, blurry, or unnatural.
Correct HDR exposure settings help you:
✔ Preserve highlight detail
✔ Capture clean shadow information
✔ Maintain consistent sharpness
✔ Reduce noise in darker areas
✔ Make merging exposures easier
Great HDR starts in-camera.
Every photo is controlled by three settings:
1️⃣ ISO
2️⃣ Aperture
3️⃣ Shutter Speed
Together, they form the exposure triangle. In HDR photography, you’ll lock in two of them and adjust one to create bracketed exposures.
Let’s break each one down.
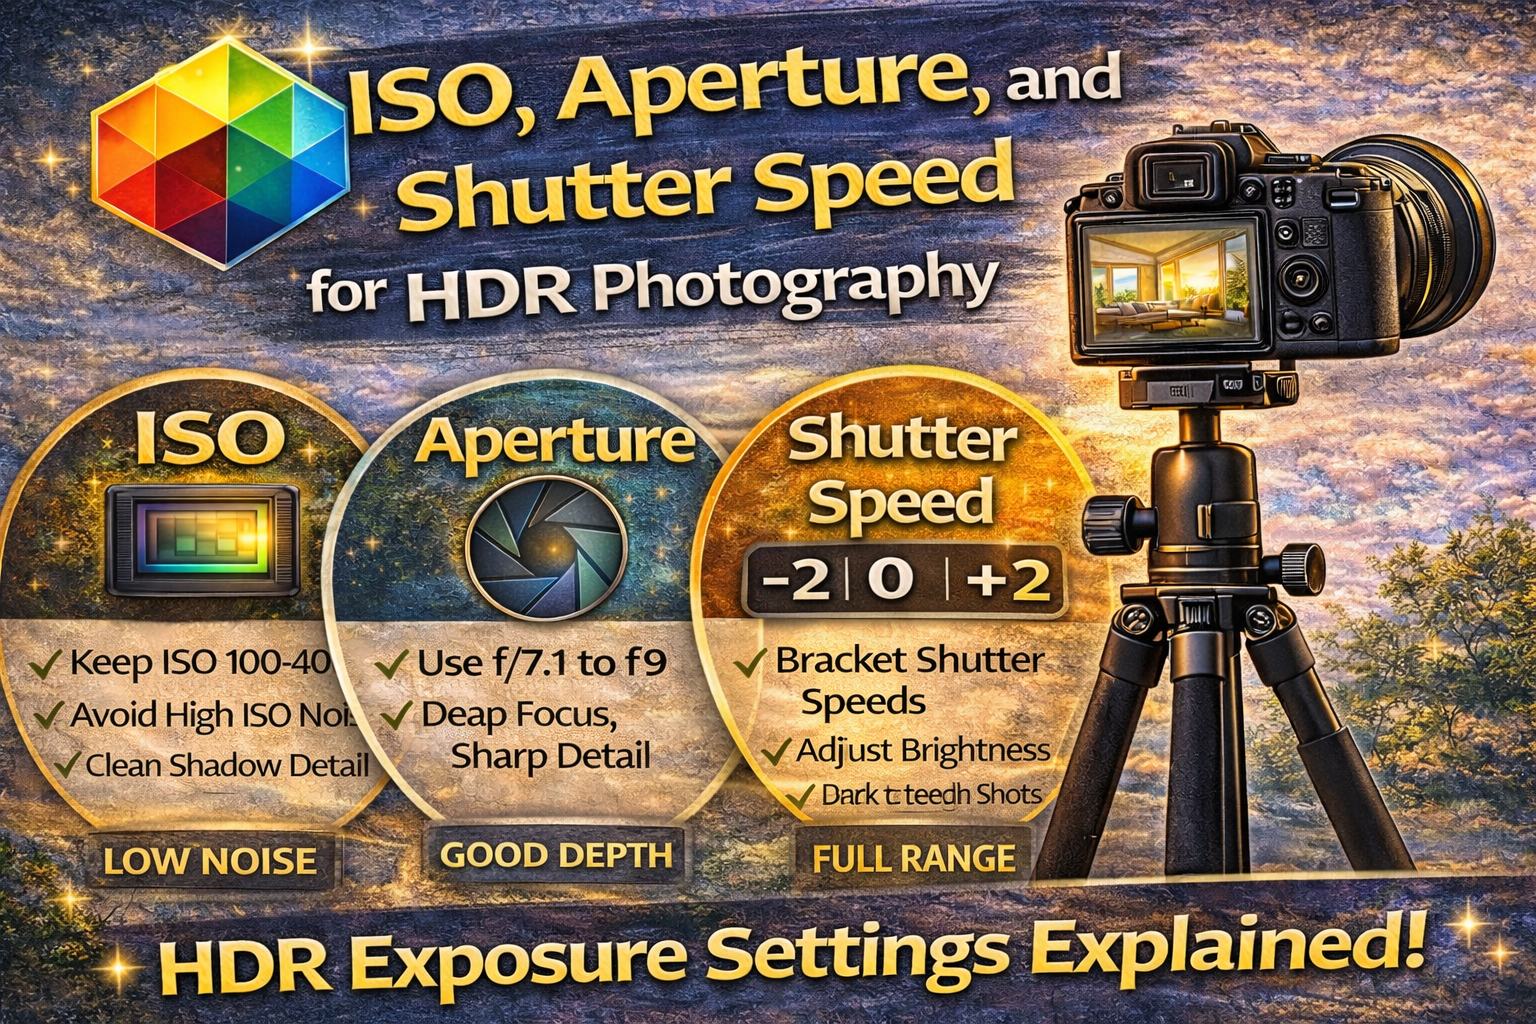
ISO controls your camera’s sensitivity to light. Higher ISO makes images brighter but adds grain and noise.
👉 ISO 100 is ideal
👉 ISO 200–400 if needed
Why keep ISO low?
HDR merging brightens shadow areas from darker exposures. If those shots were taken at high ISO, noise becomes very noticeable.
Low ISO ensures:
✔ Clean shadow detail
✔ Smoother HDR blends
✔ Less post-processing noise reduction
Avoid ISO 800+ for interiors unless absolutely necessary.

Aperture controls depth of field and overall sharpness.
For HDR, especially in real estate and architecture, you want most of the scene in focus.
👉 f/7.1 to f/9
This range gives you:
✔ Sharp detail across the room
✔ Good depth of field
✔ Minimal distortion
✔ Consistent image quality
Very wide apertures (like f/2.8) can create shallow focus and uneven sharpness. Very narrow apertures (f/16+) can soften images due to diffraction.
Balanced aperture = balanced HDR.
Shutter speed controls how long your camera sensor gathers light.
In HDR bracketing, shutter speed is the setting that changes between exposures.
For example:
📸 Fast shutter = darker image
📸 Medium shutter = balanced image
📸 Slow shutter = brighter image
These varying exposures capture the full dynamic range of the scene.
In most HDR situations:
• Aperture stays constant
• ISO stays constant
• Shutter speed changes
This keeps depth of field and noise consistent while allowing brightness to vary between bracketed shots.
That’s the foundation of proper HDR exposure settings.
Here’s a typical setup:
ISO 100
Aperture f/8
Shutter speeds might be:
1/125 sec (dark exposure)
1/30 sec (middle exposure)
1/8 sec (bright exposure)
These bracketed shutter speeds cover highlight and shadow detail.
Changing aperture would alter depth of field between shots.
Changing ISO would introduce different noise levels.
Shutter speed is the safest setting to adjust when bracketing, keeping everything else consistent.
That’s why shutter speed is the key component in HDR exposure settings.
Most photographers use:
📸 3 exposures for low contrast scenes
📸 5 exposures for standard interiors
📸 7+ exposures for high-contrast lighting
The more contrast in the scene, the wider the shutter speed range you’ll need.
Because some bracketed exposures use slow shutter speeds, a tripod is essential.
It allows:
✔ Low ISO shooting
✔ Sharp long exposures
✔ Perfect alignment between frames
A stable setup makes your HDR exposure settings more effective.
Slow shutter speeds can cause blur if something moves.
Watch for:
🌿 Curtains blowing
🚗 Cars passing
👤 People moving
If movement is unavoidable, you may need fewer brackets or a slightly higher ISO to shorten shutter times.
While not part of the exposure triangle, white balance affects color consistency.
Set a fixed white balance (Daylight or custom Kelvin) so all bracketed images have matching color tones.
Consistent white balance supports cleaner HDR merges.
RAW files retain more highlight and shadow detail than JPEGs.
This gives HDR software more data to work with, improving dynamic range and final image quality.
RAW is a must when working with HDR exposure settings.
Camera changes settings unpredictably.
Creates depth-of-field inconsistencies.
Introduces noise that HDR enhances.
Causes blur and alignment issues.
Avoiding these errors keeps your HDR workflow smooth.
Landscapes follow similar principles:
✔ Low ISO
✔ Mid-range aperture
✔ Bracketed shutter speeds
But landscapes may require wider exposure ranges when shooting sunrises or sunsets.
Indoors:
• Larger dynamic range from windows
• Often need more brackets
Outdoors:
• Usually fewer brackets unless shooting into the sun
Adjust your shutter speed range based on scene contrast.
Mastering HDR exposure settings means understanding how ISO, aperture, and shutter speed work together.
You’re not just adjusting brightness — you’re capturing the full range of light in a scene so it can be combined into one balanced image.
Perfect HDR images start before editing.
Use these core HDR exposure settings:
✔ ISO 100–400
✔ Aperture f/7.1–f/9
✔ Shutter speed for bracketing
✔ Tripod for stability
✔ RAW format
✔ Fixed white balance
Dial these in consistently, and your HDR photos will look cleaner, sharper, and more natural — with less time spent fixing issues later.
When exposure is done right, HDR becomes simple. 📸✨

Compact, ready to go anywhere
Interchangeable lens that’s upgradeable
Dual 1-inch sensors for improved clarity and low light performance
Dynamic range and 6K 360° capture
360° photo resolution at 21MP

8K 360° video recording for ultra-detailed visuals.
4K single-lens mode for traditional wide-angle shots.
Invisible selfie stick effect for drone-like perspectives.
2.5-inch touchscreen with Gorilla Glass protection.
Waterproof up to 33ft for underwater shooting.

360° photo resolution in 23MP
Slim design at 24 mm thick
Built-in image stabilization for smooth video capture.
Internal 19GB storage for photo and video storage.
Wireless connectivity for remote control and sharing.

60MP 360° still images for high-resolution photography.
5.7K 360° video recording at 30fps.
2.25-inch touchscreen for intuitive control.
USB Type-C port for fast charging and data transfer.
MicroSD card slot for expandable storage.
.png)
.png)

Try it free. No credit card required. Instant set-up.


