.png)

A Simple Bracketing Photography Tutorial to Improve Your Exposure
If you’ve ever taken a photo where the sky looked perfect but the foreground was too dark — or the room looked good but the windows were blown out — you’ve run into the limits of your camera’s dynamic range.
That’s exactly why bracketing photography exists.
In this beginner-friendly bracketing photography tutorial, you’ll learn what bracketing is, why photographers use it, how to set it up on your camera, and how it helps you capture better photos in challenging lighting.
Let’s make tricky lighting easier. 🚀
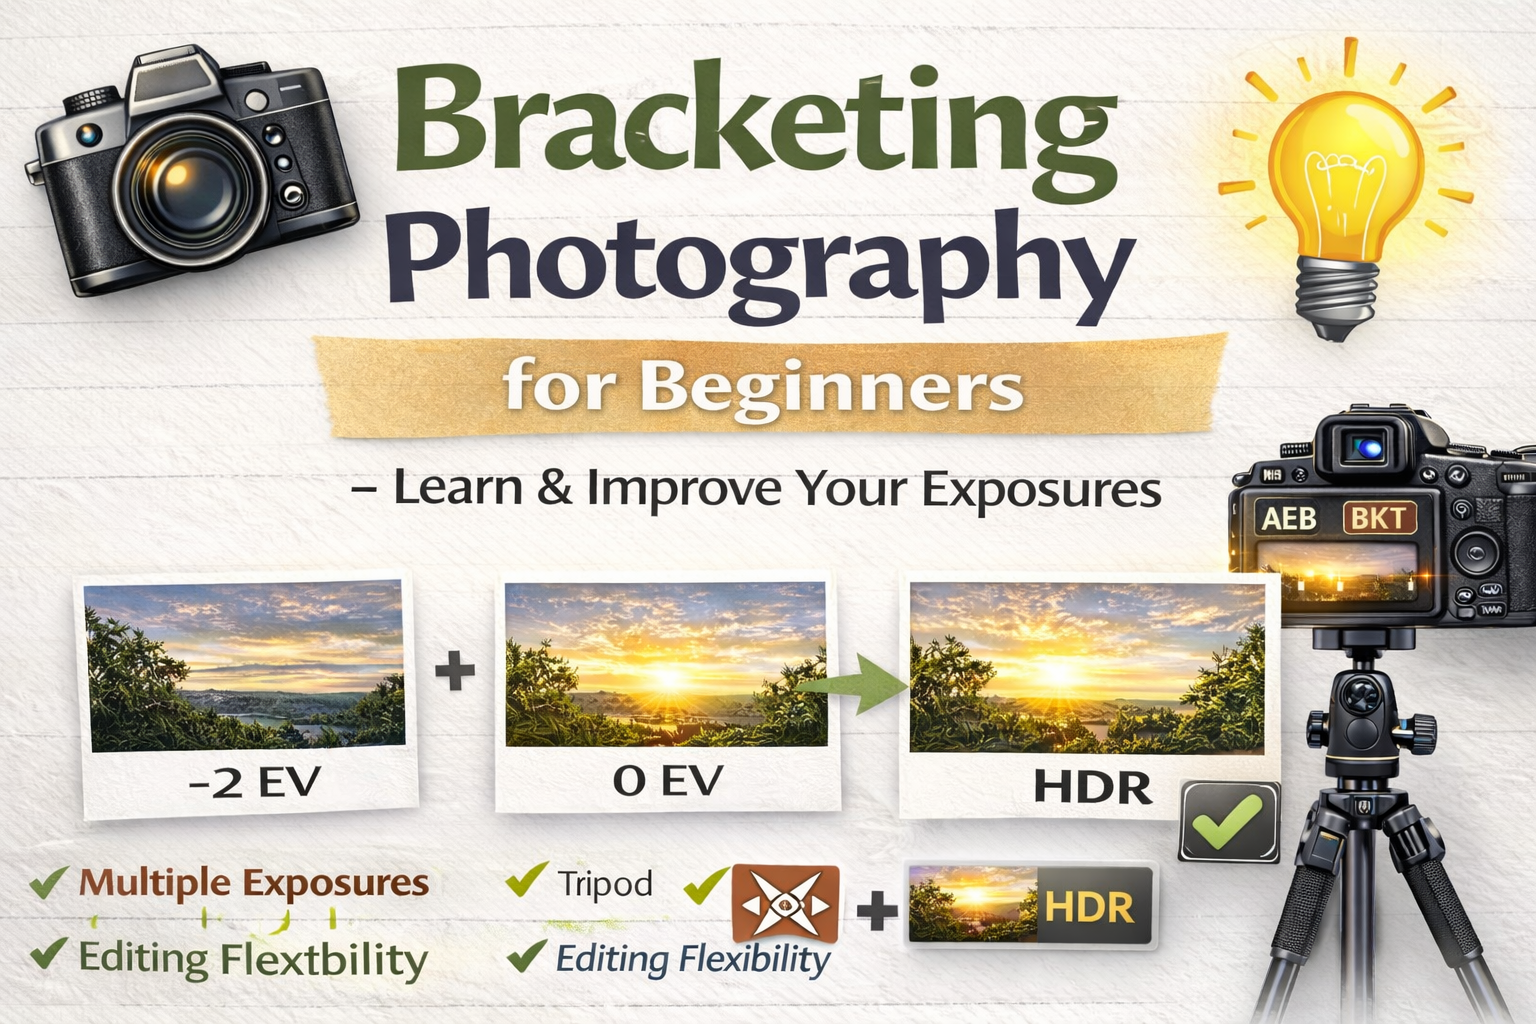
Bracketing photography means taking multiple photos of the same scene at different exposure levels.
Instead of relying on one photo, you capture a set like this:
📷 A darker image
📷 A normal exposure
📷 A brighter image
These images can then be blended together or used individually.
This technique ensures you capture details in both bright and dark areas — something a single shot often can’t do.
Your eyes can see a huge range of brightness. Cameras can’t.
Without bracketing, you might end up with:
❌ Overexposed skies
❌ Dark, shadowy interiors
❌ Loss of detail in highlights
❌ Flat-looking images
This bracketing photography tutorial helps you overcome those issues by capturing multiple exposures to cover the full range of light.
Bracketing photography is especially useful in scenes with high contrast.
Great beginner scenarios include:
🏡 Real estate interiors with bright windows
🌄 Landscapes at sunrise or sunset
🏙 City scenes with bright lights and dark shadows
🌳 Forest scenes with dappled sunlight
🏛 Architecture with strong highlights and shadows
Anytime a scene has very bright and very dark areas, bracketing helps.
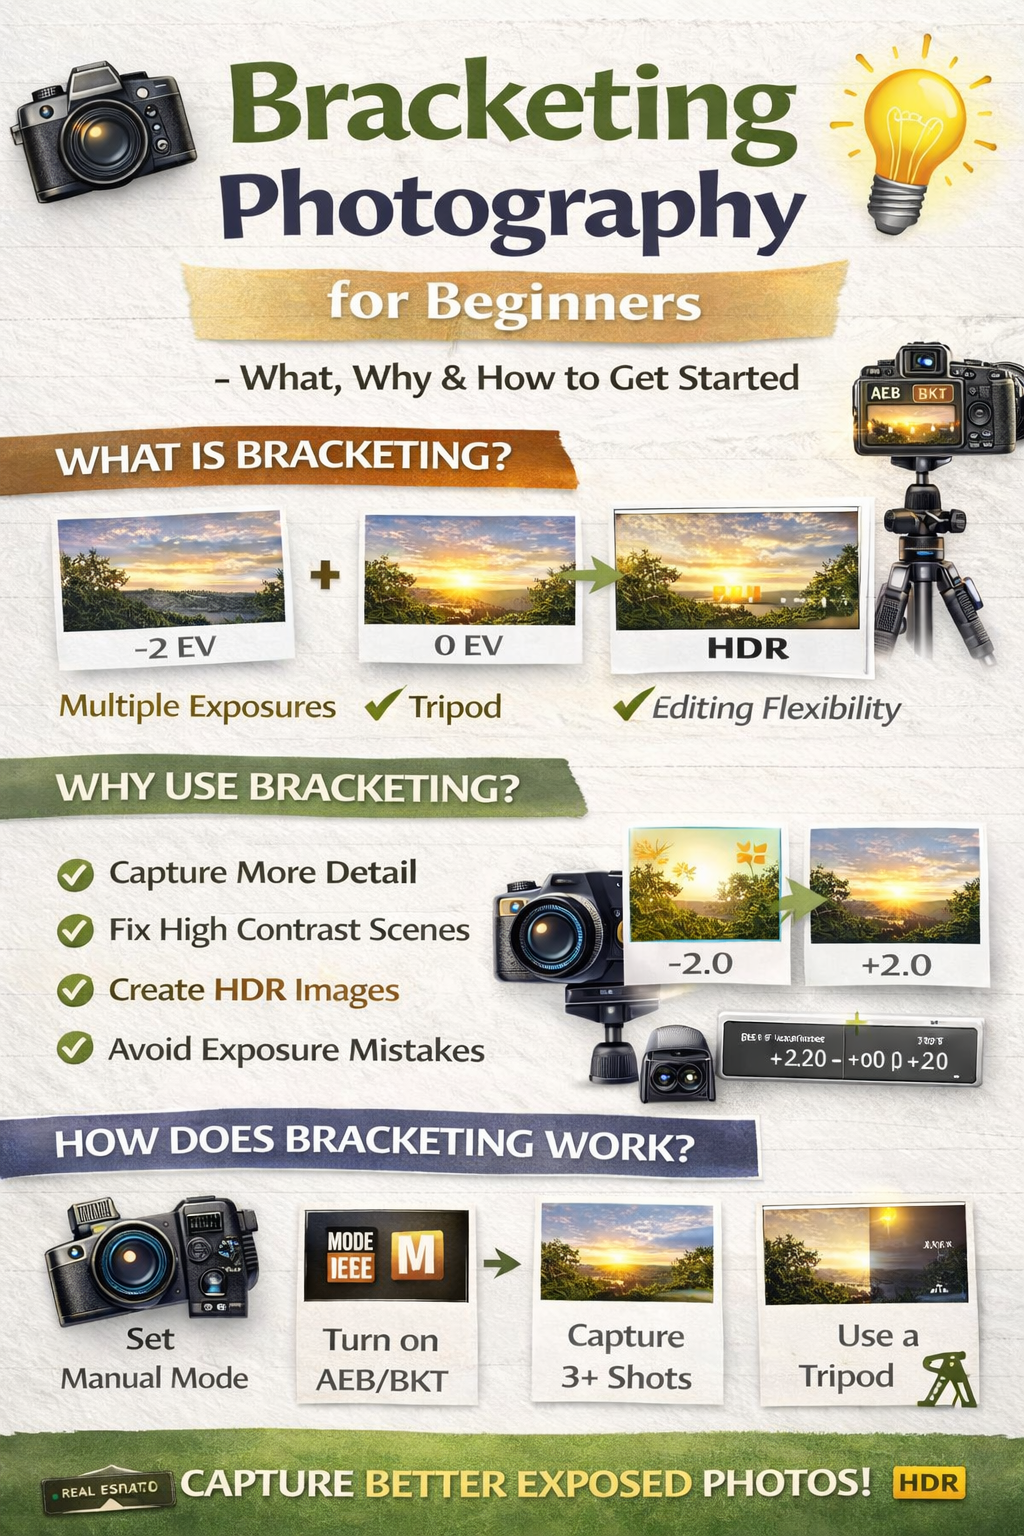
In bracketing, your camera takes multiple shots while adjusting exposure between each one.
Most cameras change shutter speed while keeping ISO and aperture the same.
This keeps noise levels and depth of field consistent.
So instead of guessing the perfect exposure, you capture a full range.
Manual mode lets you control aperture and ISO while the camera changes shutter speed for each bracket.
Set:
📌 ISO low (100–400)
📌 Aperture mid-range (f/7.1–f/9 for interiors)
This keeps your exposures clean and sharp.
Most cameras have a setting called:
AEB (Auto Exposure Bracketing)
BKT (Bracketing)
Exposure Bracket
Turn it on to begin this bracketing photography tutorial process.
For beginners:
📸 3 shots = good start
📸 5 shots = better for interiors
More shots capture more detail but also increase editing time.
EV controls how much brighter or darker each bracketed shot is.
Start with:
±2 EV
This spacing works well in most high-contrast scenes.
Bracketing often uses slower shutter speeds, especially for brighter exposures.
A tripod helps:
✔ Prevent blur
✔ Keep images aligned
✔ Produce cleaner HDR results
Tripods make bracketing easier and more consistent.
Press the shutter once, and your camera will capture the full bracket sequence.
That’s it — you’ve completed the shooting part of this bracketing photography tutorial.
After shooting, you can:
✔ Merge photos into HDR
✔ Blend exposures manually
✔ Choose the best single exposure
Bracketing gives you creative flexibility.
HDR (High Dynamic Range) photography combines bracketed photos into one balanced image.
Without bracketing, HDR wouldn’t be possible.
That’s why bracketing is foundational in real estate and landscape photography.
Can cause alignment issues.
Adds noise to shadow exposures.
Causes focus inconsistencies.
Slows editing without big benefits.
Avoiding these mistakes makes this bracketing photography tutorial much easier to apply.
Single exposure:
📷 Faster
📷 Less flexibility
📷 Risk of blown highlights or dark shadows
Bracketing:
📸 More detail
📸 Greater editing control
📸 Better results in tricky lighting
Bracketing wins in difficult lighting.
Yes!
Even if you don’t merge photos, one of the bracketed exposures might be perfect on its own.
Bracketing is also an insurance policy against exposure mistakes.
Use it whenever:
✔ The scene has strong contrast
✔ You’re unsure about exposure
✔ You want maximum editing flexibility
Over time, you’ll learn when bracketing is necessary and when a single exposure works fine.
This bracketing photography tutorial isn’t just about HDR — it teaches you to understand light.
You’ll start noticing:
✔ Bright vs dark areas
✔ How cameras interpret exposure
✔ When scenes exceed camera limits
That awareness improves all your photography.
Bracketing photography is one of the easiest ways for beginners to improve their images.
It helps you:
✔ Capture more detail
✔ Handle tricky lighting
✔ Create professional HDR photos
✔ Avoid exposure mistakes
Once you try this bracketing photography tutorial, you’ll realize how powerful this simple technique is.
Because when lighting gets complicated, bracketing keeps things simple.

Compact, ready to go anywhere
Interchangeable lens that’s upgradeable
Dual 1-inch sensors for improved clarity and low light performance
Dynamic range and 6K 360° capture
360° photo resolution at 21MP

8K 360° video recording for ultra-detailed visuals.
4K single-lens mode for traditional wide-angle shots.
Invisible selfie stick effect for drone-like perspectives.
2.5-inch touchscreen with Gorilla Glass protection.
Waterproof up to 33ft for underwater shooting.

360° photo resolution in 23MP
Slim design at 24 mm thick
Built-in image stabilization for smooth video capture.
Internal 19GB storage for photo and video storage.
Wireless connectivity for remote control and sharing.

60MP 360° still images for high-resolution photography.
5.7K 360° video recording at 30fps.
2.25-inch touchscreen for intuitive control.
USB Type-C port for fast charging and data transfer.
MicroSD card slot for expandable storage.
.png)
.png)

Try it free. No credit card required. Instant set-up.