.png)

Understanding the Differences Between Manual vs Auto Bracketing in Photography
If you’ve started using exposure bracketing for HDR or high-contrast scenes, you’ve probably wondered: manual vs auto bracketing — which is better?
Both methods help you capture multiple exposures of the same scene, but the way they work — and the situations they’re best for — can be very different.
In this guide, we’ll break down manual vs auto bracketing, explain how each method works, and help you decide which approach fits your photography style, workflow, and shooting conditions.
Let’s dive in. 🚀
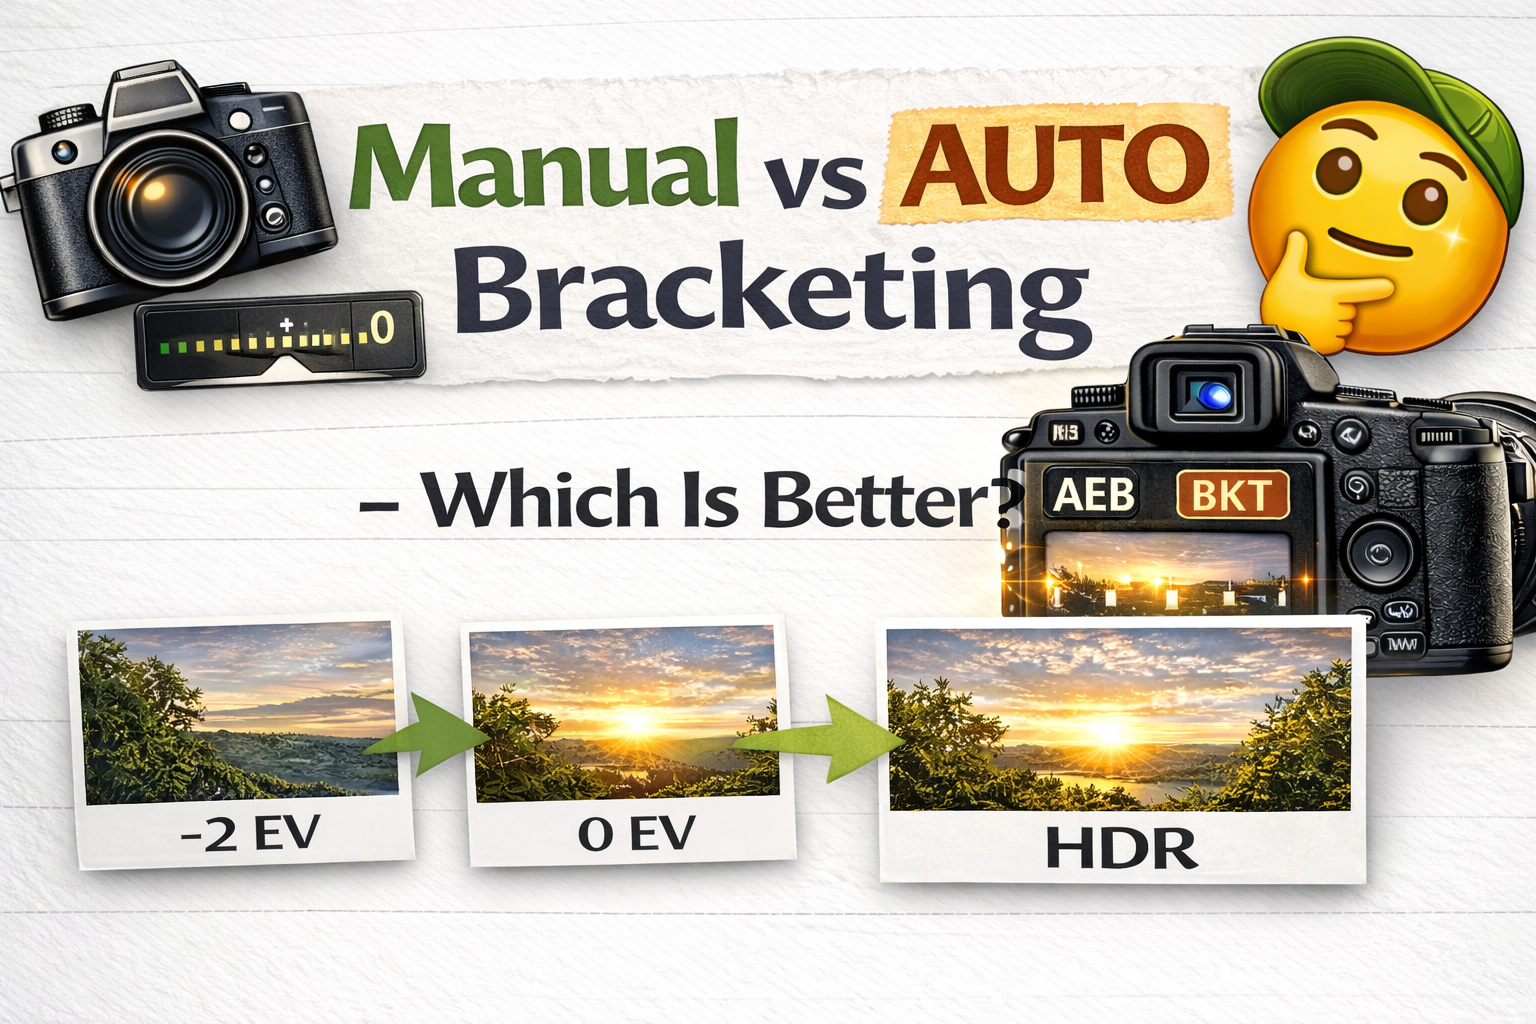
Exposure bracketing means taking several photos of the same scene at different brightness levels.
This helps photographers:
✔ Capture highlight detail
✔ Preserve shadow detail
✔ Create HDR images
✔ Avoid exposure mistakes
You can do this either automatically (auto bracketing) or by adjusting settings yourself (manual bracketing).
That’s where the manual vs auto bracketing debate begins.
Auto bracketing, often called AEB (Auto Exposure Bracketing), is a built-in camera feature.
When enabled, the camera automatically takes a sequence of exposures at different brightness levels with one press of the shutter.
Example:
📷 One darker shot
📷 One normal shot
📷 One brighter shot
The camera usually changes shutter speed while keeping ISO and aperture consistent.
Auto bracketing is fast, consistent, and convenient.
Manual bracketing means you change exposure settings yourself between shots.
You might:
📷 Take one photo
📷 Adjust shutter speed
📷 Take another
📷 Adjust again
This method gives full control but requires more time and precision.
Now let’s compare manual vs auto bracketing in real-world use.
When it comes to speed, auto bracketing is the clear winner.
Auto bracketing:
✔ Takes all exposures instantly
✔ Keeps spacing consistent
✔ Reduces chance of mistakes
Manual bracketing:
⏳ Slower process
⏳ Requires more button adjustments
⏳ Higher chance of forgetting a step
If you’re shooting real estate, events, or landscapes with changing light, auto bracketing is much more efficient.

Manual bracketing gives you total creative control.
You can:
✔ Choose exactly how much exposure changes
✔ Adjust settings differently between shots
✔ Fine-tune exposure for tricky scenes
Auto bracketing uses preset EV steps, which may not always be perfect.
In the manual vs auto bracketing comparison, manual wins when precision is the priority.
Auto bracketing ensures each exposure is evenly spaced.
Manual adjustments can lead to uneven gaps, especially if you rush or miscalculate.
Consistency is crucial for HDR merging, which is why many photographers prefer auto bracketing for routine workflows.
For beginners, auto bracketing is much easier to learn.
Manual bracketing requires a strong understanding of the exposure triangle and careful adjustments.
If you’re just starting out, auto bracketing makes the manual vs auto bracketing decision simple.
Manual bracketing allows you to change:
✔ Shutter speed
✔ Aperture
✔ ISO
Auto bracketing usually changes only shutter speed.
If you need a very specific exposure range or want to bracket beyond your camera’s AEB limits, manual is more flexible.
Auto bracketing captures shots in quick succession, reducing movement between frames.
Manual bracketing takes longer, increasing the chance of:
❌ Slight camera shifts
❌ Subject movement
❌ Lighting changes
For handheld shooting, auto bracketing is usually more stable.
HDR photography benefits from consistent exposure spacing.
Auto bracketing:
✔ Fast
✔ Even spacing
✔ Ideal for interiors and landscapes
Manual bracketing is sometimes used when a scene needs more extreme exposure differences than auto mode allows.
Both methods work — but auto is more common in HDR workflows.
Auto bracketing is best when:
✔ Shooting real estate interiors
✔ Capturing landscapes
✔ Working quickly
✔ Lighting is consistent
✔ You want a smooth HDR workflow
In most day-to-day situations, auto bracketing is the practical choice.
Manual bracketing is helpful when:
✔ Lighting is extremely high contrast
✔ You need more than your camera’s AEB range
✔ Shooting long exposures at night
✔ You want full creative control
Manual shines when automation doesn’t go far enough.
If you’re new to bracketing:
Start with auto bracketing.
It builds understanding while reducing mistakes. Once you’re comfortable, manual bracketing becomes a useful advanced tool.
Many professionals use both.
Auto bracketing for speed and efficiency
Manual bracketing for special situations
Knowing when to switch between the two is part of mastering exposure control.
Auto bracketing mistakes:
• Using too small EV steps
• Forgetting to turn AEB off
• Shooting handheld in low light
Manual bracketing mistakes:
• Uneven exposure spacing
• Changing aperture accidentally
• Forgetting to capture all exposures
Understanding manual vs auto bracketing helps you avoid these issues.
So, which is better?
✔ Auto bracketing is faster, easier, and more consistent
✔ Manual bracketing offers more control and flexibility
For most photographers, auto bracketing is the everyday solution, while manual bracketing is the advanced backup.
The real answer in the manual vs auto bracketing debate isn’t choosing one — it’s knowing when to use each.
Exposure bracketing is one of the most useful tools in photography, and both methods have their place.
If you value speed and efficiency, auto bracketing is your best friend.
If you need precise exposure control in extreme situations, manual bracketing gives you the freedom you need.
Master both, and you’ll be ready for any lighting challenge your camera faces.

Compact, ready to go anywhere
Interchangeable lens that’s upgradeable
Dual 1-inch sensors for improved clarity and low light performance
Dynamic range and 6K 360° capture
360° photo resolution at 21MP

8K 360° video recording for ultra-detailed visuals.
4K single-lens mode for traditional wide-angle shots.
Invisible selfie stick effect for drone-like perspectives.
2.5-inch touchscreen with Gorilla Glass protection.
Waterproof up to 33ft for underwater shooting.

360° photo resolution in 23MP
Slim design at 24 mm thick
Built-in image stabilization for smooth video capture.
Internal 19GB storage for photo and video storage.
Wireless connectivity for remote control and sharing.

60MP 360° still images for high-resolution photography.
5.7K 360° video recording at 30fps.
2.25-inch touchscreen for intuitive control.
USB Type-C port for fast charging and data transfer.
MicroSD card slot for expandable storage.
.png)
.png)

Try it free. No credit card required. Instant set-up.