


.png)

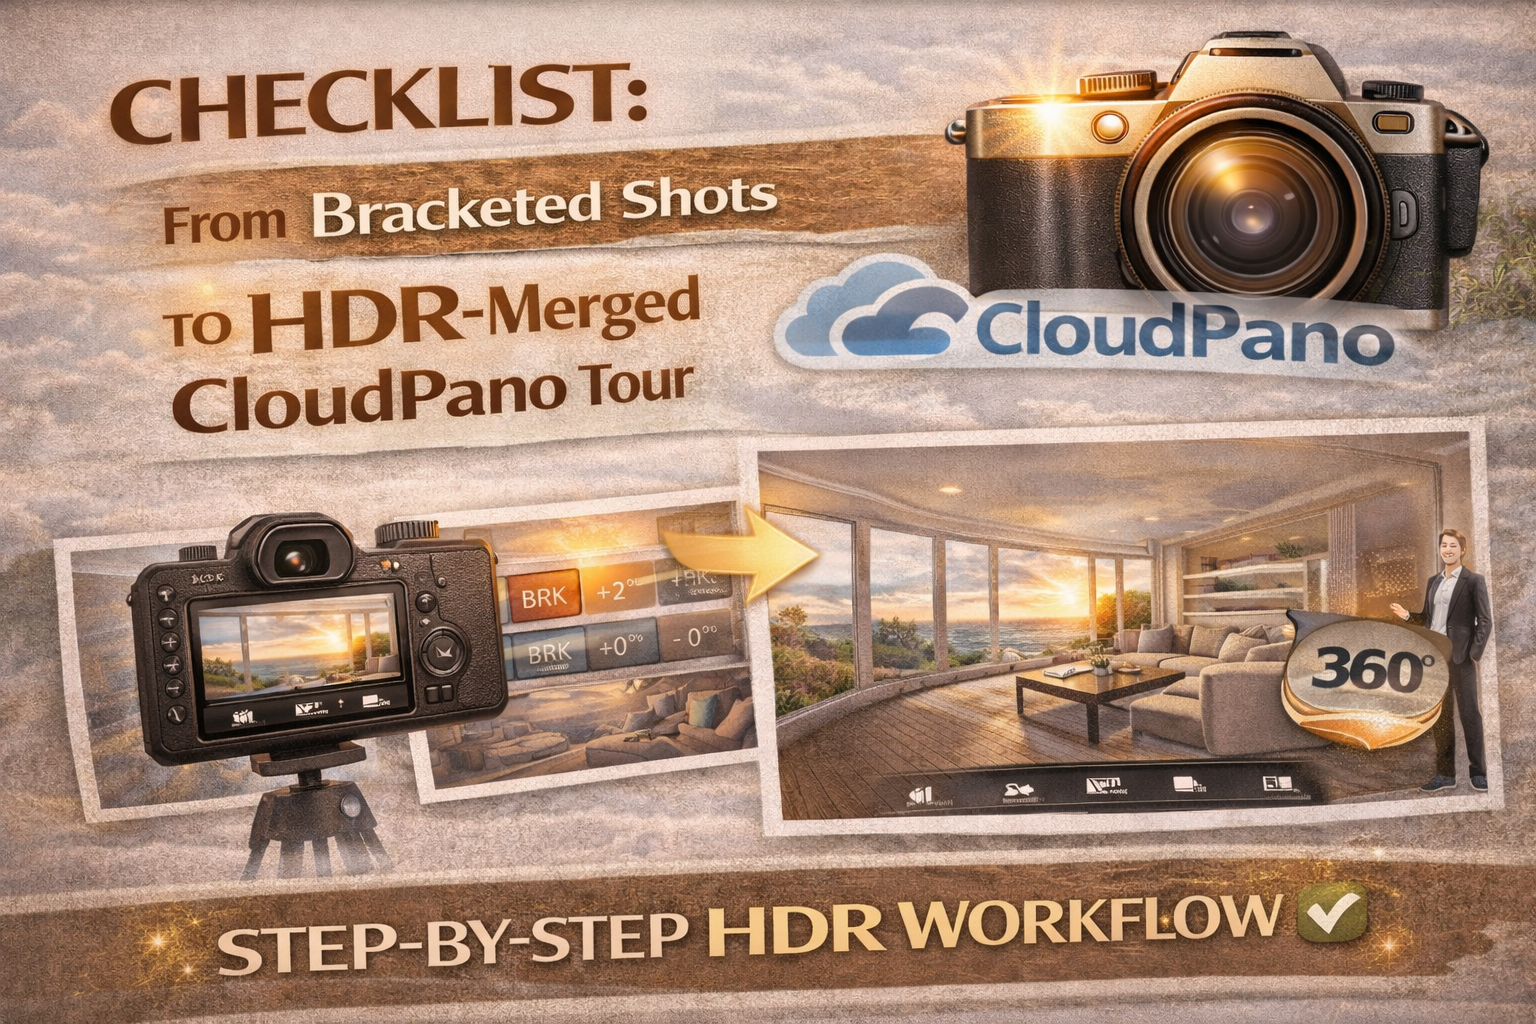
Your Complete HDR Workflow Checklist for Smooth CloudPano Tour Preparation
Creating a professional virtual tour doesn’t start at the computer — it starts the moment you set up your camera. A smooth, efficient HDR process ensures your final tour looks bright, natural, and immersive. Whether you’re new to HDR or refining your system, having a reliable HDR workflow checklist keeps every shoot consistent.
When your goal is a polished virtual walkthrough, proper CloudPano tour preparation makes all the difference. From capturing bracketed images to uploading finished panoramas, each step builds toward a seamless viewer experience.
Here’s your step-by-step guide from bracketed shots all the way to an HDR-merged CloudPano tour. Let’s walk through it. 🚀
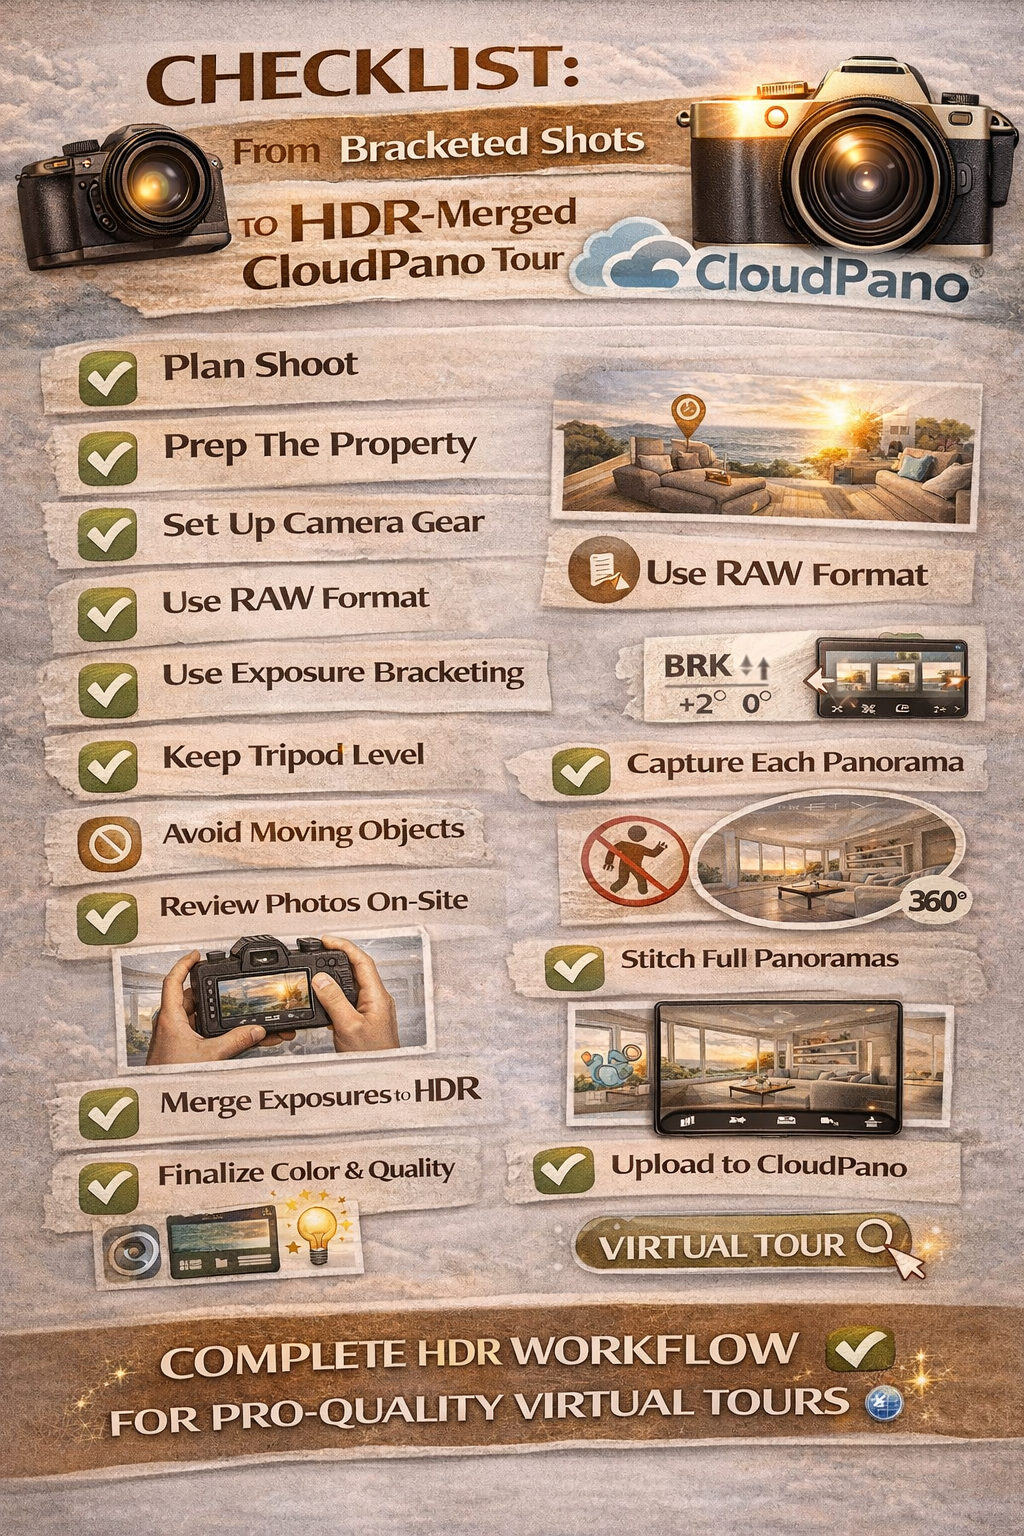
Every great HDR process starts with preparation.
Before the shoot:
✔ Confirm property access
✔ Check lighting conditions (time of day matters)
✔ Identify key rooms and features
✔ Plan camera positions for each panorama
Thinking ahead reduces mistakes and speeds up your entire HDR workflow checklist.
HDR blending works best when the environment is clean and stable.
Before shooting:
🛋 Remove clutter
💡 Turn on interior lights for warmth (unless color mixing is extreme)
🪟 Adjust blinds and curtains
🧽 Wipe reflective surfaces
Good CloudPano tour preparation ensures your HDR images look clean and professional without heavy retouching.
Your gear directly affects the quality of your HDR panoramas.
For best results:
📷 DSLR or mirrorless camera
📐 Sturdy tripod
🔄 Panoramic head (for level rotations)
🖥 Memory cards with plenty of space
Stability is critical in the HDR process, especially when blending multiple exposures.
RAW files preserve maximum highlight and shadow detail — essential for HDR.
RAW allows:
✨ Better window recovery
✨ Cleaner shadow lifting
✨ More natural color grading
This is a must-have item on any serious HDR workflow checklist.
Bracketing is the heart of the HDR process.
Typical setup:
📸 3–5 exposures per angle
⬇ One underexposed (for highlights)
⚖ One balanced
⬆ One overexposed (for shadows)
This gives your HDR software enough data to create a natural, balanced result.
Uneven camera angles make stitching panoramas harder later.
Use:
✔ Built-in tripod level
✔ Hot-shoe bubble level
✔ Digital level in your camera
Level shots = smoother stitching during CloudPano tour preparation.
For each room:
📍 Place camera in a central or corner position
📷 Rotate smoothly in equal increments
📸 Capture bracketed exposures at every angle
Consistency keeps your HDR workflow checklist efficient and repeatable.
HDR blending struggles with motion.
Watch out for:
🚶 People walking
🌬 Curtains blowing
🖥 TV screens changing
💡 Flickering lights
Static scenes produce cleaner HDR merges.
Before leaving a room:
✔ Check for blown-out windows
✔ Ensure shadow detail exists
✔ Confirm all bracketed exposures captured
Catching issues early saves time during your HDR process.
Good organization speeds up CloudPano tour preparation.
After the shoot:
🗂 Create folders by room
🧭 Group exposures per panorama
📝 Rename files logically
A clean file structure keeps your HDR workflow checklist efficient.
Now the editing stage begins.
Use HDR software to:
✨ Blend bracketed exposures
🌤 Balance highlights and shadows
🧼 Keep lighting natural
🎨 Correct white balance
Subtle blending is key. Overprocessed HDR hurts realism.
Once HDR images are ready:
🧩 Stitch them into full 360° panoramas
📐 Ensure lines stay straight
🧼 Remove tripod or nadir if needed
Clean stitching is an essential step in CloudPano tour preparation.
After stitching:
✔ Adjust brightness
✔ Correct color temperature
✔ Balance contrast
These refinements ensure consistency across the entire tour — a key item on your HDR workflow checklist.
For virtual tours:
📏 Use high resolution for clarity
⚖ Balance file size and quality
🖼 Use proper compression
Correct export settings ensure fast loading without sacrificing image quality.
Now your CloudPano tour preparation moves into the platform stage.
Upload each HDR panorama:
🏠 Organize scenes by room
🧭 Arrange navigation order
📍 Set starting viewpoints
Good organization enhances the viewer experience.
Interactive elements make tours engaging.
Add:
➡ Navigation hotspots between rooms
📝 Info spots for features
🎯 Points of interest
This step transforms HDR panoramas into a complete virtual tour.
Preview the tour as a visitor would.
✔ Walk through every scene
✔ Check lighting consistency
✔ Ensure smooth navigation
This quality check is a final step in your HDR workflow checklist.
Most buyers view tours on phones.
Ensure:
📲 Scenes load quickly
🔍 Text and hotspots are readable
✨ Images stay clear on small screens
Mobile optimization is essential in modern CloudPano tour preparation.
Once satisfied:
🌐 Publish the tour
🔗 Share with clients
📣 Embed on listings and websites
Your HDR process now delivers real marketing value.
Never skip backups.
✔ Store RAW files
✔ Keep HDR merges
✔ Save final panoramas
A complete archive protects your work and streamlines future updates.
Following a consistent HDR workflow checklist helps you:
✔ Maintain consistent image quality
✔ Speed up editing
✔ Reduce reshoots
✔ Deliver professional virtual tours
Consistency is what separates hobbyists from professionals.
Balanced HDR lighting ensures:
🪟 Clear window views
🛋 Visible interior detail
🌤 Natural room brightness
These qualities make tours feel more realistic and immersive.
From capturing bracketed exposures to completing full CloudPano tour preparation, every step in the HDR process plays a role in delivering a high-quality virtual experience.
When you follow a structured HDR workflow checklist, you eliminate guesswork, reduce editing headaches, and produce tours that impress clients and attract buyers.
Great virtual tours don’t happen by accident — they happen by following a reliable process from start to finish. 📸🌐✨

Compact, ready to go anywhere
Interchangeable lens that’s upgradeable
Dual 1-inch sensors for improved clarity and low light performance
Dynamic range and 6K 360° capture
360° photo resolution at 21MP

8K 360° video recording for ultra-detailed visuals.
4K single-lens mode for traditional wide-angle shots.
Invisible selfie stick effect for drone-like perspectives.
2.5-inch touchscreen with Gorilla Glass protection.
Waterproof up to 33ft for underwater shooting.

360° photo resolution in 23MP
Slim design at 24 mm thick
Built-in image stabilization for smooth video capture.
Internal 19GB storage for photo and video storage.
Wireless connectivity for remote control and sharing.

60MP 360° still images for high-resolution photography.
5.7K 360° video recording at 30fps.
2.25-inch touchscreen for intuitive control.
USB Type-C port for fast charging and data transfer.
MicroSD card slot for expandable storage.
.png)
.png)

Try it free. No credit card required. Instant set-up.


