


.png)



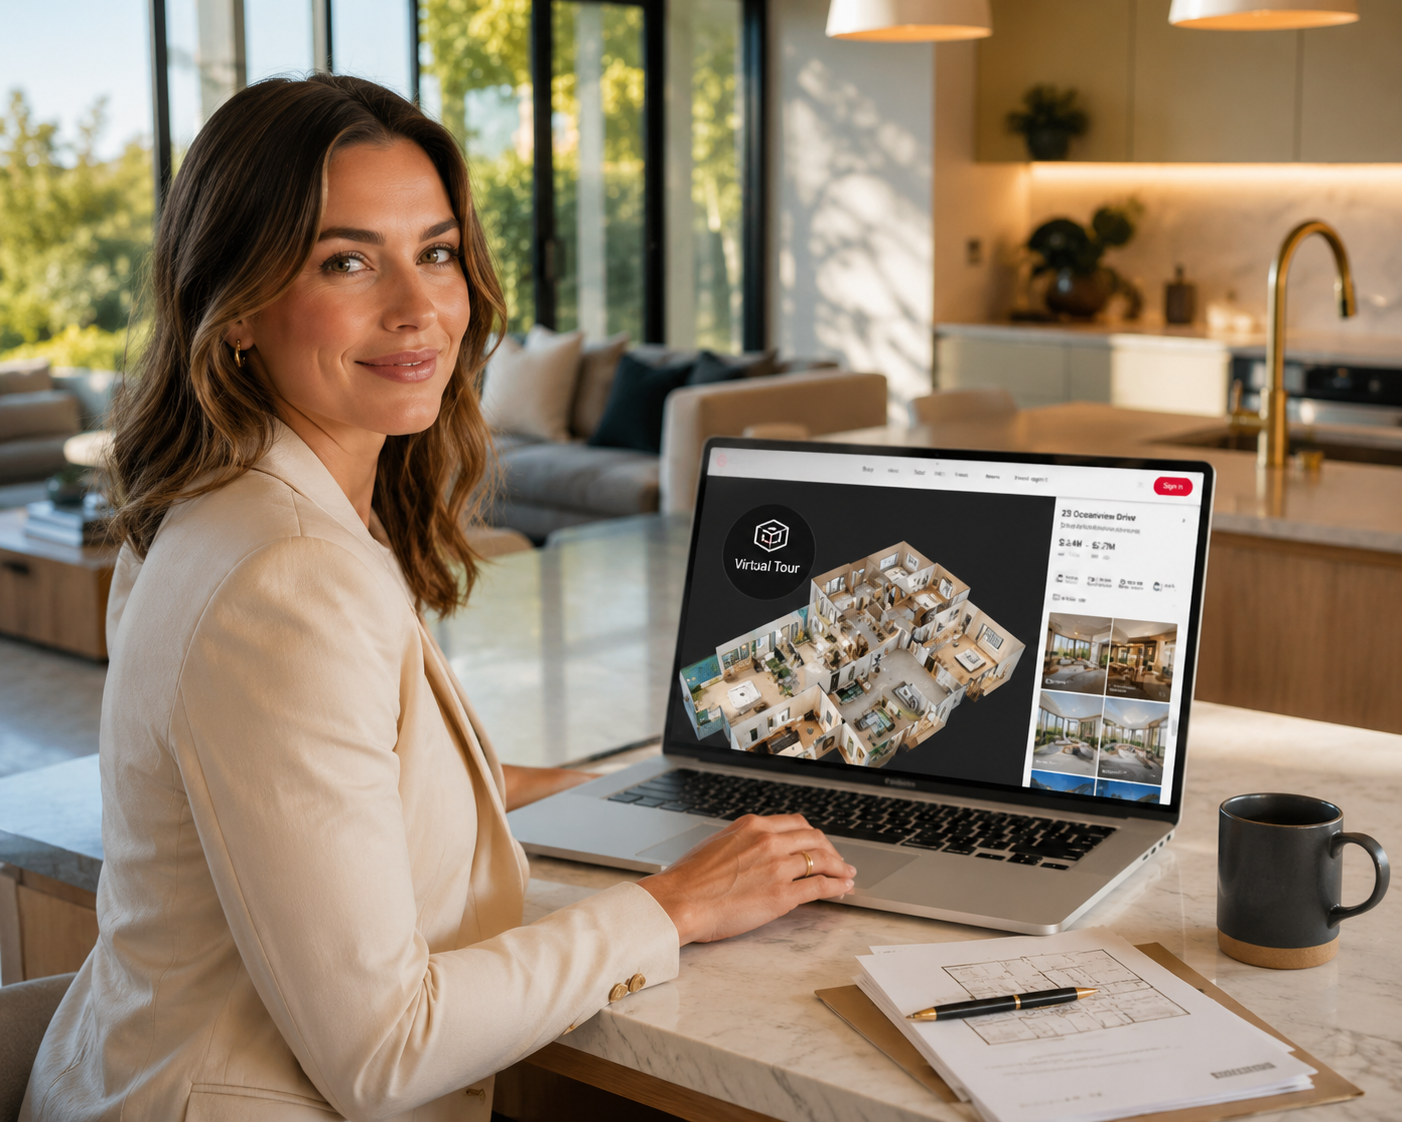
A listing without a virtual tour is starting the race a lap behind. Buyers now expect to "walk through" a property online before they ever request an inspection, and a link that doesn't work — or doesn't exist — sends them straight to the next listing. If you're wondering how to add a virtual tour to your realestate.com.au listing, the good news is that the process is straightforward once you know where the link goes and what to prepare beforehand.
This guide walks Australian real estate agents and virtual tour photographers through the exact steps, the common mistakes that quietly cost inquiries, and how to make sure the tour actually gets seen once it's live.
Photos tell a buyer what a room looks like. A virtual tour tells them what it feels like to move through the home — the flow from kitchen to living area, the natural light in the main bedroom, how the backyard connects to the house. That extra context matters most for buyers who are interstate, overseas, or simply too time-poor to attend every open home on their shortlist.
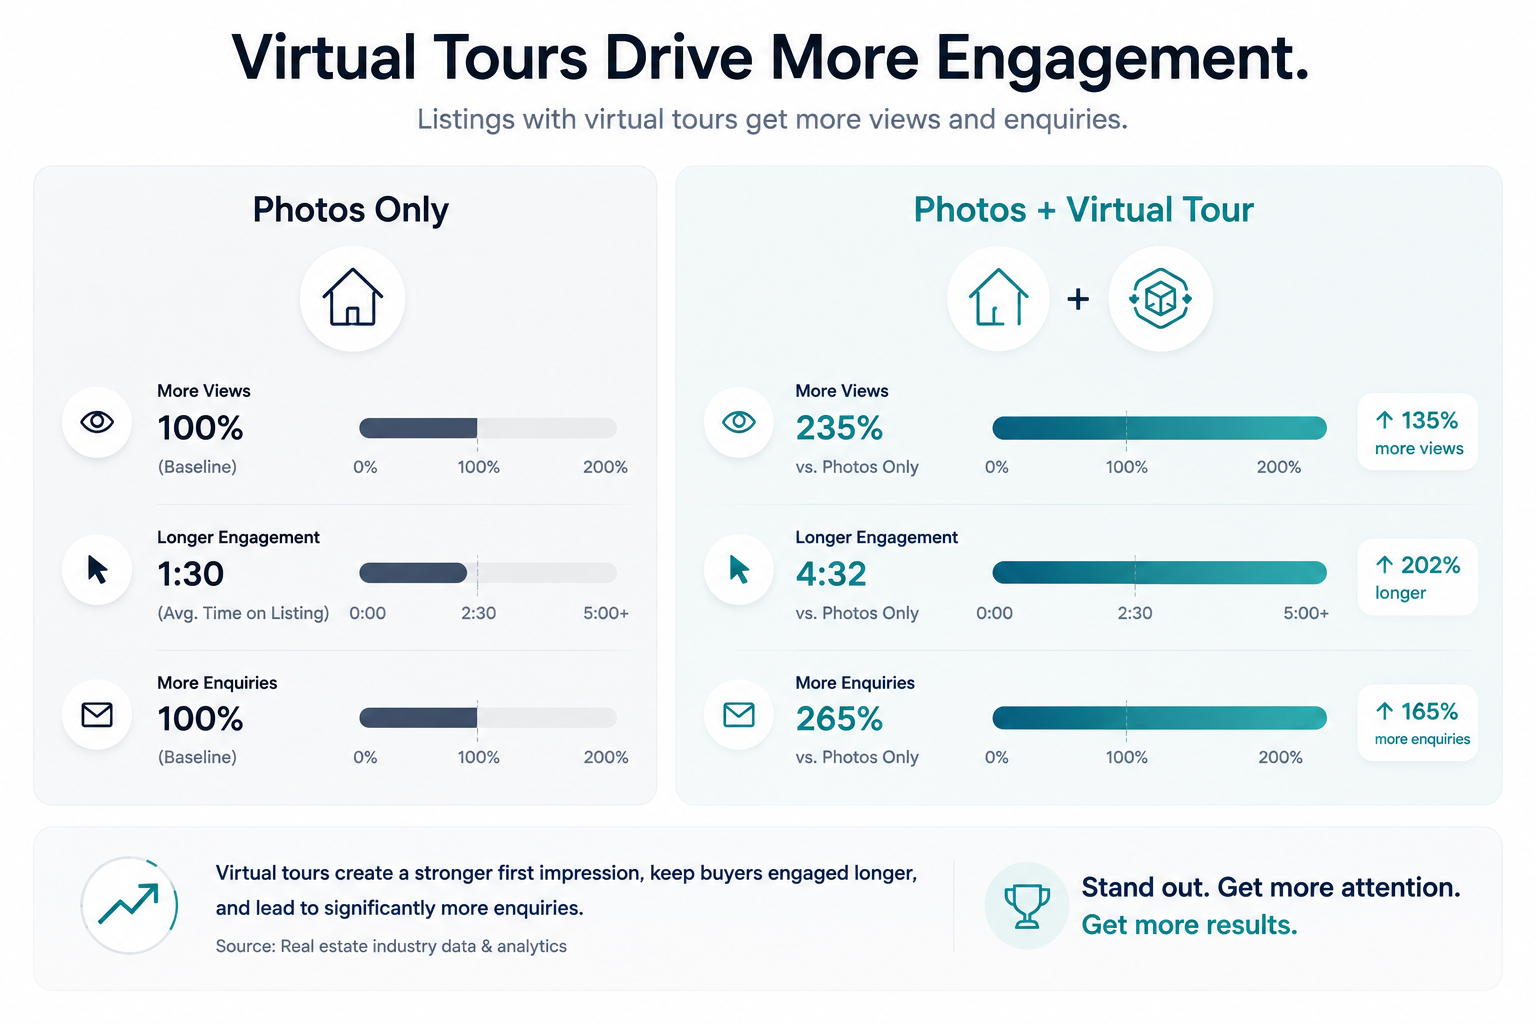
For agents, the benefit compounds. Listings with an embedded tour tend to hold attention longer, generate more qualified enquiries, and reduce the number of "time-waster" inspections from buyers who were never a genuine fit for the property. Interstate and overseas buyers in particular rely on a tour to shortlist properties before committing to a flight or a video call with the agent, which means a missing tour can quietly remove a whole category of otherwise motivated buyers from your pool.
For photographers and virtual tour creators, being the person who reliably delivers a tour that's ready to upload — not just ready to view — is what turns a one-off booking into a repeat client relationship with an agency. Agencies remember who hands over a tour that drops straight into the listing without back-and-forth, and who leaves them chasing a working link the night before a campaign launch.
Before you touch your listing, get three things sorted.
Your virtual tour needs to live somewhere with a stable, shareable link. Platforms like CloudPano host the tour and generate a URL (or embed code) you can drop straight into a listing. Avoid sending a raw file — realestate.com.au listings are built around links and embeds, not file uploads for 3D content. If you haven't created the tour yet, our guide to publishing a virtual tour on realestate.com.au covers the filming and export process in detail before you get to this upload stage.
Most standard and premium listing packages on realestate.com.au support video and virtual tour links, but entry-level packages in some markets may not. It's worth a quick check with your agency's account manager or the platform's current listing inclusions before you build the tour into your marketing plan, so there's no last-minute surprise.
You'll need login access to whichever system your agency uses to publish listings — this is usually a CRM (like Vault, AgentBox, or Rex) that feeds listings through to realestate.com.au, or in some cases the realestate.com.au partner portal directly. If you're a freelance photographer rather than the listing agent, you'll typically hand the finished link to the agent rather than uploading it yourself.
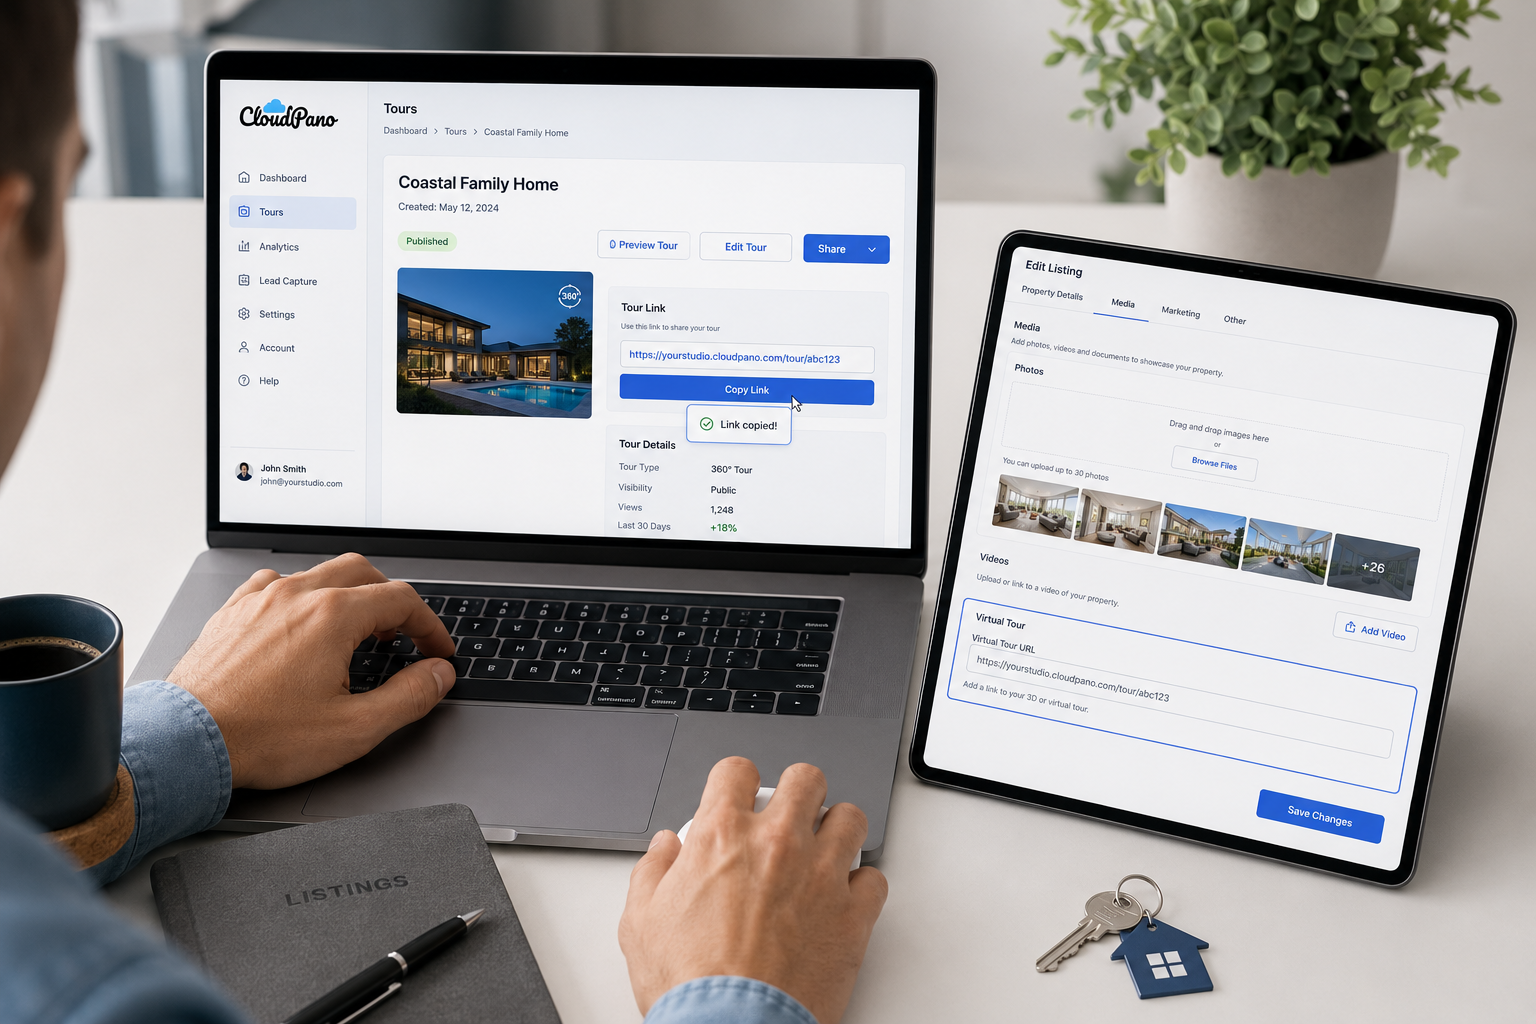
Once your tour is hosted and you've confirmed access, adding it is a short process.
A common point of confusion is treating the virtual tour as "just another photo." It isn't. The realestate.com.au virtual tour link has its own dedicated placement in the media gallery, usually appearing as a distinct icon or tab alongside photos and floor plans, so buyers can tell at a glance that an interactive tour is available.
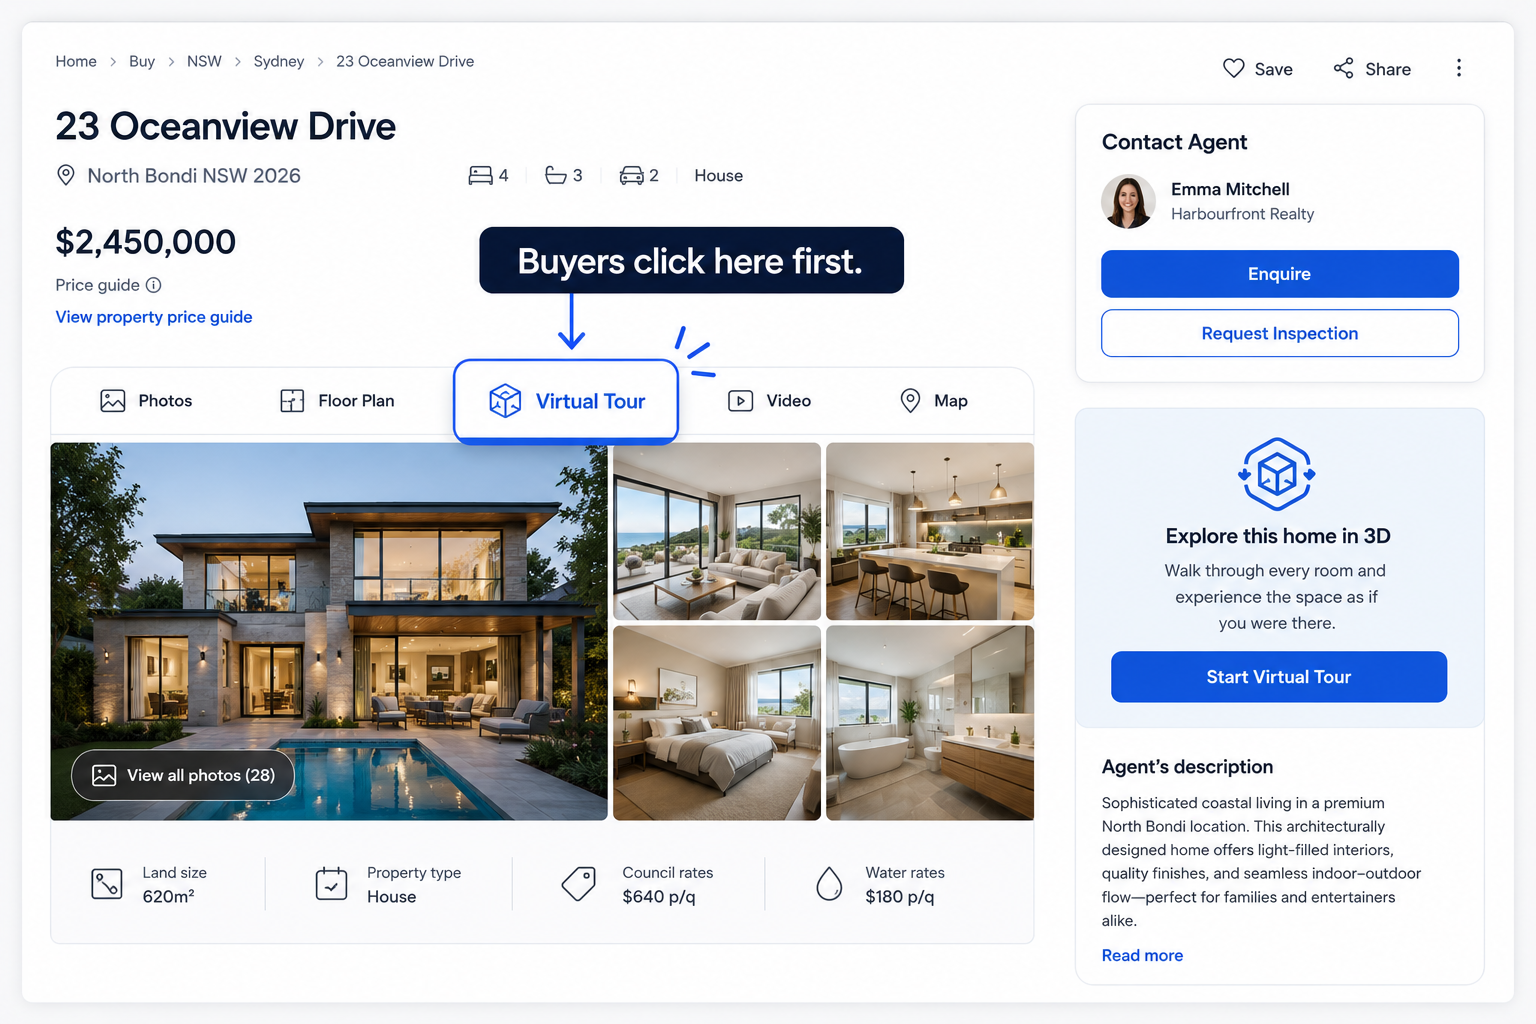
Because of this, the tour shouldn't be buried in a photo carousel or left as a link pasted into the listing description. Descriptions are read, but the media gallery is browsed — and that's where buyers are actively looking for a tour to click.
Even experienced agents slip up here. Watch for these issues when you upload a virtual tour to a real estate listing:
None of these mistakes are difficult to fix, but they're easy to miss when a tour is added in a hurry between other listing tasks. Building a short checklist — link tested, opening view set, mobile-checked, published alongside the rest of the listing — turns this from a recurring risk into a five-minute habit.
Getting the tour onto the listing is only half the job — getting it seen and acted on is the other half.
Make sure your photos and tour tell a consistent story: if the still photography is bright and warm, the tour should match that tone, not look like it was shot on a different day. Add a clear call-to-action near the tour, such as "Take the virtual walkthrough," so buyers know it's there and worth clicking. If your listing platform supports it, pair the tour with a floor plan or dollhouse view — buyers who watch a tour and then check the floor plan are showing strong intent, and giving them both increases the chance they book an inspection.
If you're new to this process end-to-end — from filming through to getting the tour live — our full guide to publishing virtual tours on realestate.com.au covers the production and publishing side in more depth, including how to prepare footage that's ready to upload the first time.
Can I add a virtual tour to any realestate.com.au listing?In most cases, yes, provided your listing package includes video/tour support. Confirm this with your agency or account manager if you're unsure.
What if my CRM doesn't have a virtual tour field?Check with your CRM provider — most major Australian real estate CRMs support a dedicated tour or video URL field that maps through to realestate.com.au. If it genuinely isn't supported, the video field can sometimes be used as a workaround, but a dedicated tour field is always preferable.
Does the realestate.com.au virtual tour link affect where my listing ranks?realestate.com.au doesn't publish an exact ranking formula, but listings with richer media — including virtual tours — consistently see stronger engagement, which supports better outcomes for the listing overall.
Who should upload the tour — the agent or the photographer?This varies by agency. In many cases, the virtual tour photographer delivers the finished link to the listing agent or their admin support, who then handles the upload as part of preparing the listing. Some larger agencies have a dedicated marketing coordinator who manages all listing media, including virtual tours, across the team. If you're a freelance photographer, it's worth confirming early in the booking who's responsible for the final upload step, so the tour doesn't sit finished but unpublished.
Learning how to add a virtual tour to your realestate.com.au listing is a five-minute technical task once the tour itself is ready. The real value comes from doing it properly: hosting the tour on a reliable platform, placing the link where buyers expect it, and testing it the way a buyer actually would. For a deeper look at getting a tour from filming through to publishing, the complete walkthrough for getting your tour live on realestate.com.au is a useful next stop.
If you're still deciding how to create the tour itself, CloudPano makes it simple to build a polished, mobile-ready virtual tour and generate the exact link you'll need for this process — no technical background required. Start your free CloudPano trial and have a listing-ready tour live in less time than it takes to schedule your next open home.


Compact, ready to go anywhere
Interchangeable lens that’s upgradeable
Dual 1-inch sensors for improved clarity and low light performance
Dynamic range and 6K 360° capture
360° photo resolution at 21MP

8K 360° video recording for ultra-detailed visuals.
4K single-lens mode for traditional wide-angle shots.
Invisible selfie stick effect for drone-like perspectives.
2.5-inch touchscreen with Gorilla Glass protection.
Waterproof up to 33ft for underwater shooting.

360° photo resolution in 23MP
Slim design at 24 mm thick
Built-in image stabilization for smooth video capture.
Internal 19GB storage for photo and video storage.
Wireless connectivity for remote control and sharing.

60MP 360° still images for high-resolution photography.
5.7K 360° video recording at 30fps.
2.25-inch touchscreen for intuitive control.
USB Type-C port for fast charging and data transfer.
MicroSD card slot for expandable storage.
.png)

.png)

Try it free. No credit card required. Instant set-up.





.svg)


.svg)