


.png)

Turn Flat HDR Photos into Bright, Natural, Professional Images
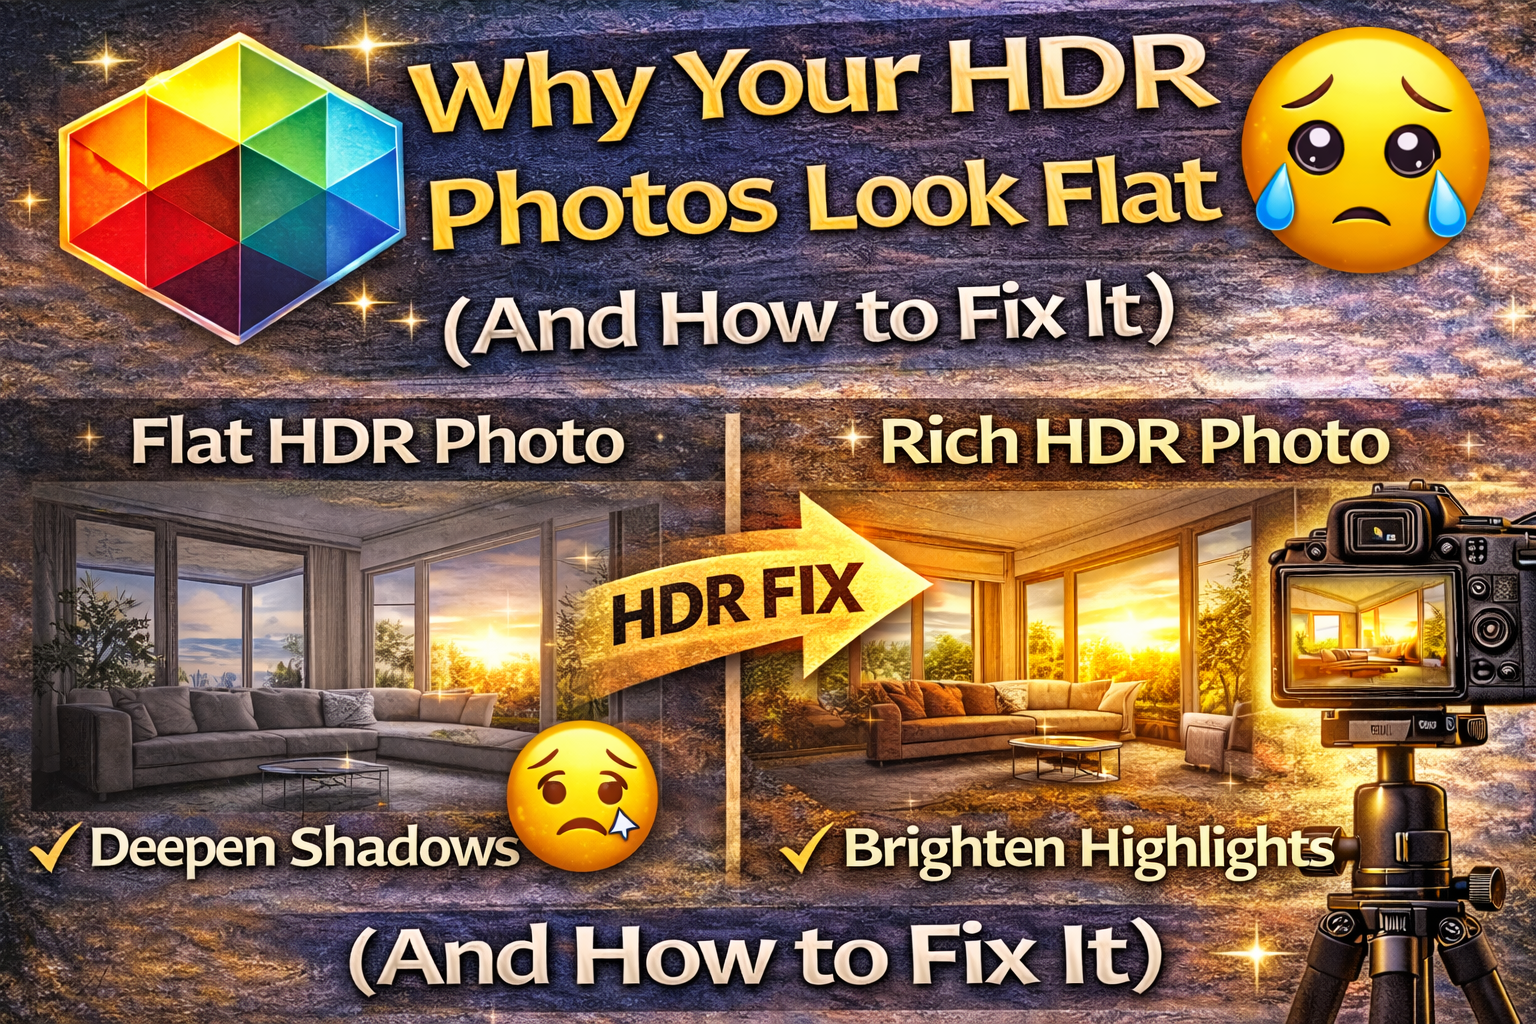
You took the bracketed shots. You merged them. The exposure looks balanced. But something still feels… off.
Your image looks dull. Lifeless. Washed out.
Welcome to one of the most common HDR problems photographers face: flat HDR photos.
The good news? Flat HDR images are fixable — and once you understand why they happen, your photos will instantly look more dynamic, realistic, and professional.
Let’s break it down. 🚀
When people say their HDR photo looks flat, they usually mean:
❌ No depth or contrast
❌ Colors look muted
❌ Shadows look gray instead of rich
❌ Highlights feel dull instead of bright
❌ The image looks lifeless and artificial
Flat HDR photos often happen when the merging process reduces contrast too much in an attempt to balance exposure.
HDR is supposed to reveal detail — not remove dimension.

HDR merging blends multiple exposures into one balanced image. During this process, software tries to:
✔ Bring back shadow detail
✔ Tone down bright highlights
✔ Even out lighting
But if these adjustments are too strong, the image loses natural contrast. Instead of light and shadow working together, everything lands in the same middle tone.
That’s the core reason flat HDR photos appear.
HDR software often brightens shadow areas aggressively.
While this reveals detail, it can also make shadows look gray instead of deep and rich. When shadows lose depth, the image loses dimension.
✔ Reduce shadow slider slightly
✔ Increase blacks or dark tones
✔ Add subtle contrast back into shadow areas
Healthy shadows create depth and realism.
HDR merging also pulls highlights down to prevent blown-out areas. But too much highlight reduction makes bright areas look dull.
Flat HDR photos often have no true “bright” areas left.
✔ Raise highlights slightly
✔ Increase whites carefully
✔ Restore natural brightness where light should feel strong
Highlights give the image sparkle and realism.
HDR aims for balance, but balance doesn’t mean everything should be mid-tone.
When contrast is too low, flat HDR photos result.
✔ Add moderate contrast
✔ Adjust tone curve for deeper shadows and brighter highlights
✔ Avoid pushing contrast too far — aim for natural depth
Contrast is what makes images feel three-dimensional.
Tone mapping controls how HDR software blends exposures. Aggressive tone mapping can flatten an image by compressing the entire tonal range.
✔ Reduce HDR strength
✔ Lower detail enhancement sliders
✔ Use more subtle blending settings
Less is more when trying to avoid flat HDR photos.
Flat HDR photos often look colorless because blending reduces color intensity along with contrast.
✔ Increase vibrance slightly
✔ Add a touch of saturation
✔ Adjust white balance if colors look dull
Color adds life back into the scene.
Even if global contrast is okay, lack of local contrast can make surfaces look soft and lifeless.
✔ Add a bit of clarity
✔ Use texture slider carefully
✔ Apply subtle sharpening
These adjustments bring out fine details without overprocessing.
More exposures don’t always mean better results. Too many brackets can flatten contrast during merging.
✔ Use 3–5 brackets for most scenes
✔ Only use more for extreme lighting
✔ Avoid unnecessary exposures
Simpler merges often produce more natural contrast.
If your lighting is already dull (overcast days or dim interiors), HDR merging can make it look even flatter.
✔ Add subtle warmth to white balance
✔ Boost highlights slightly
✔ Add gentle contrast
You can enhance natural light without overdoing it.
Many photographers are afraid to add contrast back in after HDR merging. But HDR isn’t meant to eliminate contrast — it’s meant to preserve detail while keeping natural depth.
Flat HDR photos often come from under-editing.
✔ Don’t be afraid of shadows
✔ Allow some highlights to stay bright
✔ Aim for realism, not perfect balance
These tools can flatten the image if pushed too far.
✔ Use sparingly
✔ Compare before and after
✔ Keep adjustments subtle
Subtlety prevents the artificial HDR look.
If your HDR image looks flat, run through this checklist:
✔ Add slight contrast
✔ Deepen shadows a little
✔ Brighten highlights slightly
✔ Boost vibrance
✔ Add clarity or texture
✔ Reduce overly strong HDR effects
These simple adjustments restore dimension and realism.
Natural HDR:
✨ Bright but not washed out
✨ Shadows have depth
✨ Highlights feel realistic
✨ Colors look lively
Flat HDR:
😐 Everything looks mid-tone
😐 No depth between light and shadow
😐 Colors feel muted
😐 Image looks lifeless
Your goal is balance with dimension.
It starts in-camera:
✔ Shoot low ISO for clean shadows
✔ Use proper bracketing (3–5 shots)
✔ Avoid overexposed highlights
✔ Keep lighting natural
Better capture makes better merges.
Flat HDR photos happen when contrast and depth are accidentally removed during the merging process.
The fix isn’t extreme editing — it’s restoring natural light relationships.
Remember:
💡 Shadows should have depth
💡 Highlights should feel bright
💡 Colors should look alive
💡 Contrast should feel natural
Once you understand this balance, your HDR photos will stop looking flat and start looking realistic, dynamic, and professional.
HDR isn’t about making everything the same brightness — it’s about keeping detail while preserving natural depth.
Fix that, and your images will instantly come to life. 📸✨

Compact, ready to go anywhere
Interchangeable lens that’s upgradeable
Dual 1-inch sensors for improved clarity and low light performance
Dynamic range and 6K 360° capture
360° photo resolution at 21MP

8K 360° video recording for ultra-detailed visuals.
4K single-lens mode for traditional wide-angle shots.
Invisible selfie stick effect for drone-like perspectives.
2.5-inch touchscreen with Gorilla Glass protection.
Waterproof up to 33ft for underwater shooting.

360° photo resolution in 23MP
Slim design at 24 mm thick
Built-in image stabilization for smooth video capture.
Internal 19GB storage for photo and video storage.
Wireless connectivity for remote control and sharing.

60MP 360° still images for high-resolution photography.
5.7K 360° video recording at 30fps.
2.25-inch touchscreen for intuitive control.
USB Type-C port for fast charging and data transfer.
MicroSD card slot for expandable storage.
.png)
.png)

Try it free. No credit card required. Instant set-up.


