Real Estate Video Creator Tips: Editing Techniques

Cloudpano
August 29, 2026
5 min read
Share this post

How to Edit Listing Videos With a Real Estate Video Creator

Turning a stack of listing photos into a video that actually holds a buyer’s attention takes more than clicking “generate” and hoping for the best. The editing choices you make inside a real estate video creator—which photos you use, which camera movements you assign to each room, how you pace the sequence, and how you brand the final export—are what separate a forgettable slideshow from a listing video that gets watched and shared.

Video has also become an important part of digital marketing, with industry research such as the Wyzowl State of Video Marketing report highlighting its widespread use and ability to engage audiences.

The good news is that you don’t need production experience to apply these techniques. This guide walks through the editing decisions that make the biggest difference using tools already built into a real estate video creator like PhotoAIVideo.
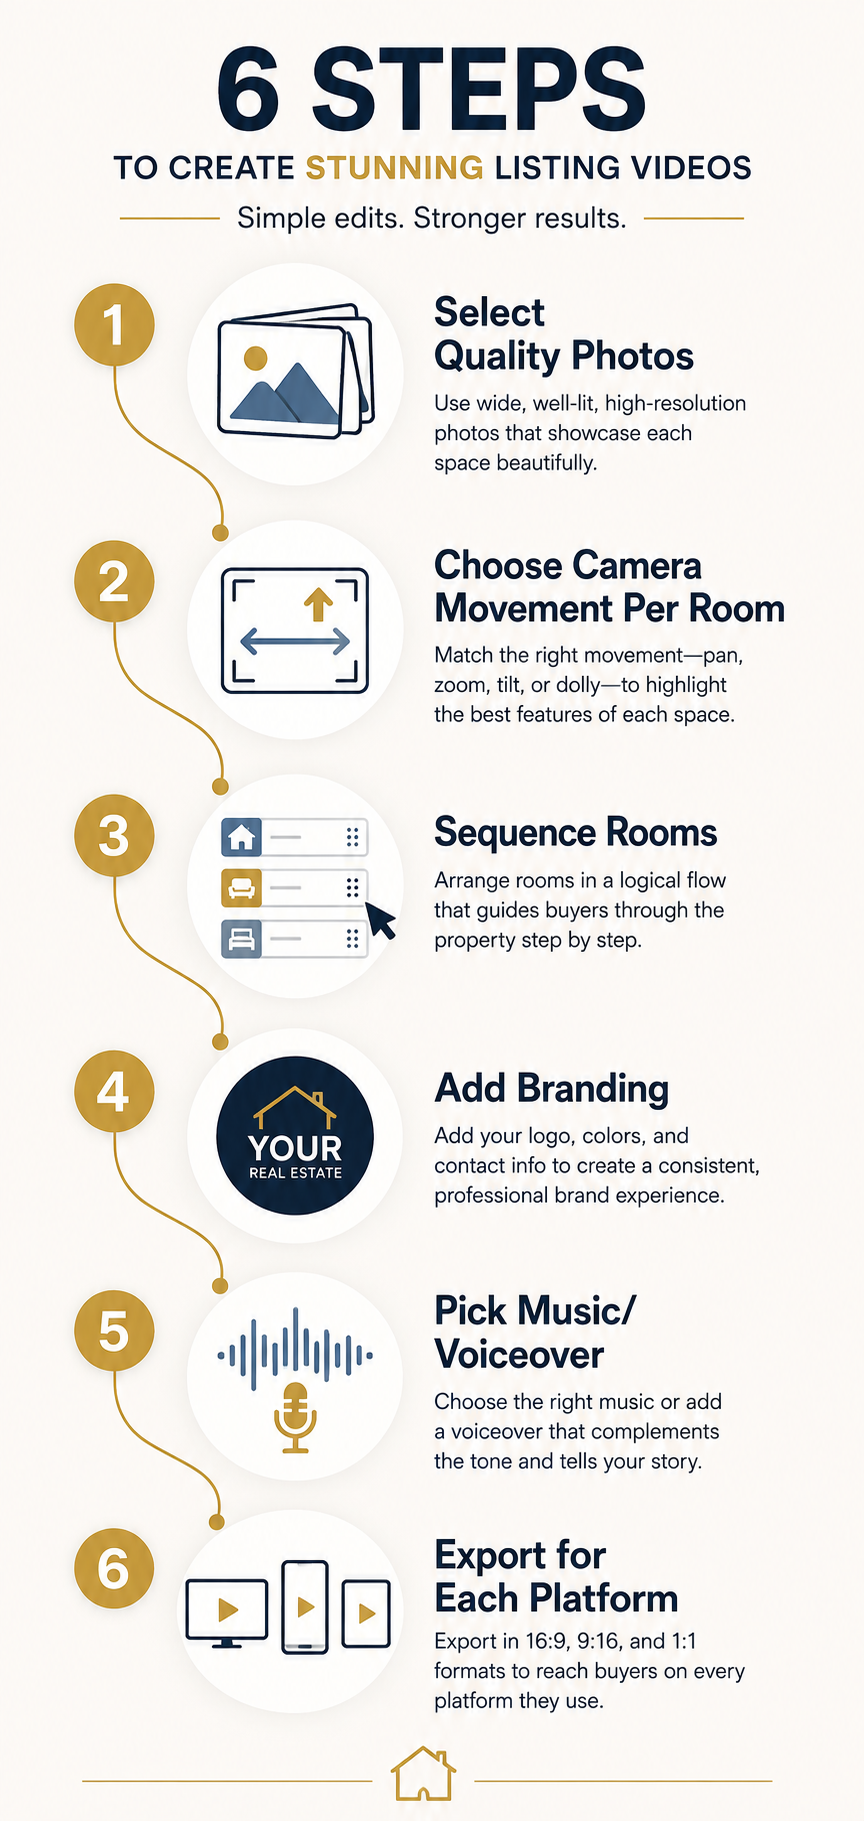
Infographic showing the six-step real estate video creator editing workflow from photo selection to platform export

Start With Photos That Set Up a Strong Real Estate Video Creator Output

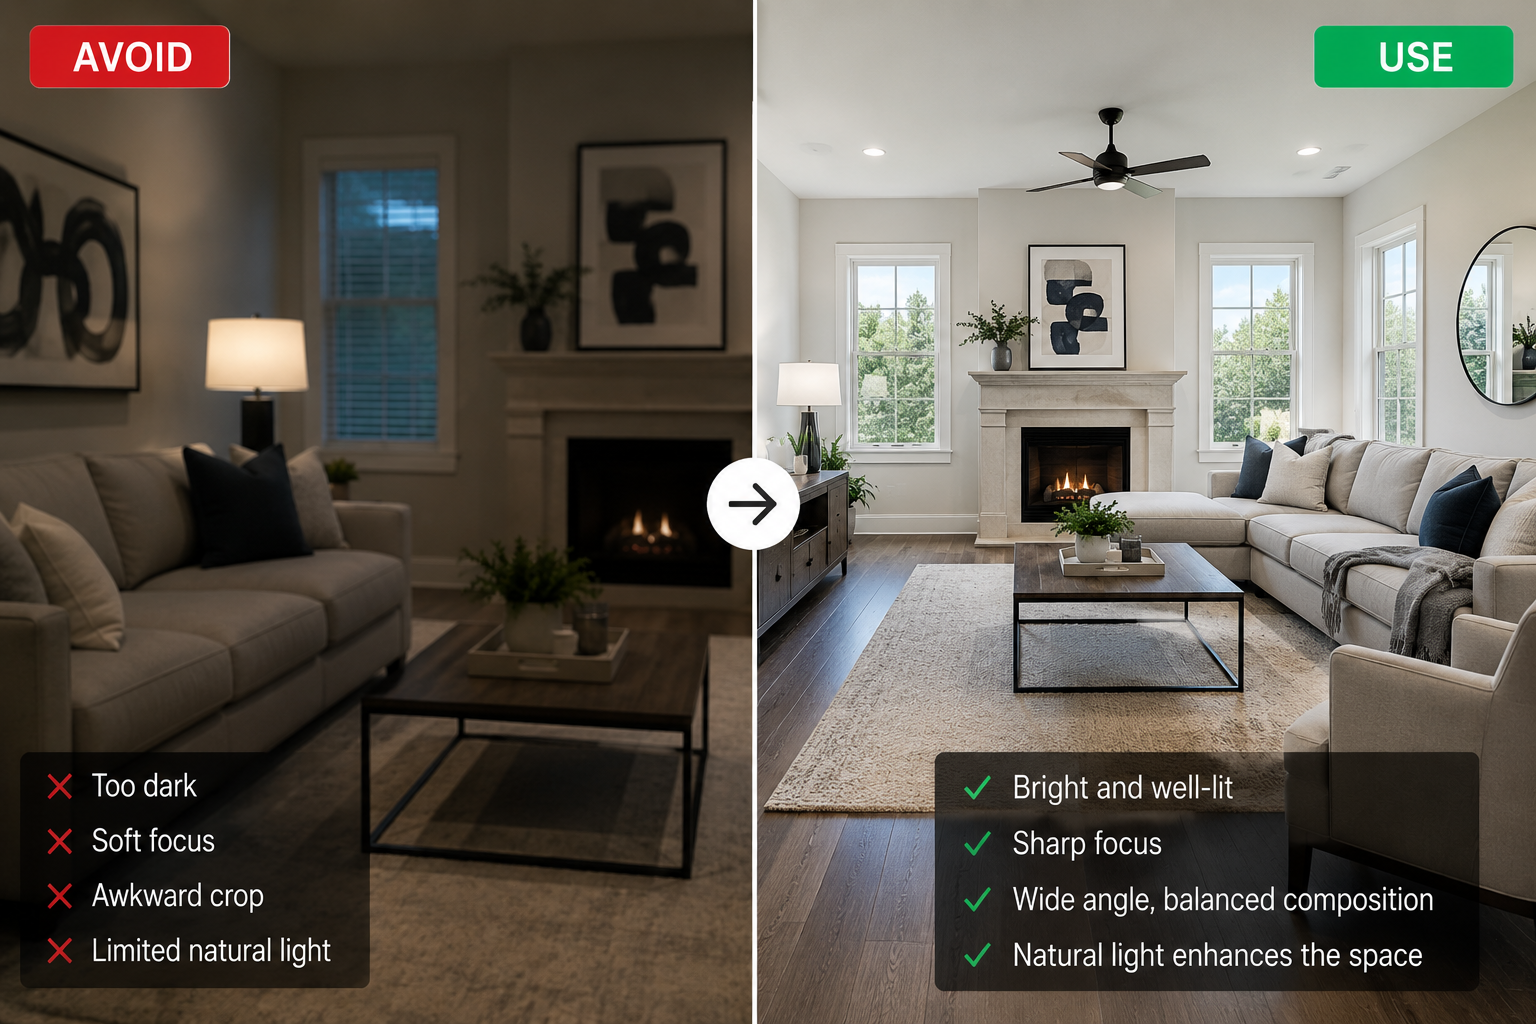
Side-by-side comparison of a blurry, poorly lit listing photo next to a sharp, well-lit version of the same room

Every real estate video creator is only as good as the images you give it. Automated camera movement and pacing can help improve presentation, but they can’t fully compensate for blurry, poorly lit, or awkwardly cropped photos. Before you upload anything, run through this checklist:

  • Shoot or select wide, well-lit shots. Rooms photographed with natural light and a wide-angle lens give the software more visual information to pan and zoom across, helping produce a smoother, more cinematic result.
  • Avoid heavily cropped or zoomed-in photos. A photo that’s already tightly cropped leaves little room for pan- or dolly-style movement, so the resulting clip can look static or overly zoomed.
  • Include a mix of wide room shots and detail shots. Wide-angle shots establish the space, while close-ups of countertops, fixtures, fireplaces, and other features add texture and variety to the sequence.
  • Skip duplicates and near-duplicates. Two nearly identical angles of the same kitchen add runtime without adding much information, which can hurt the pacing of the video.
  • Order your uploads logically before you even open the editor. Even though most platforms let you reorder rooms afterward, starting with photos already grouped by room can save editing time later.
  • Use your highest-resolution originals. Upscaled or heavily compressed images can look soft once camera movement is applied, especially in a widescreen export.

Fifteen to twenty-five strong photos can often provide enough coverage for a complete property tour without dragging down the pacing with unnecessary filler.
Match Camera Movements to Each Room Type

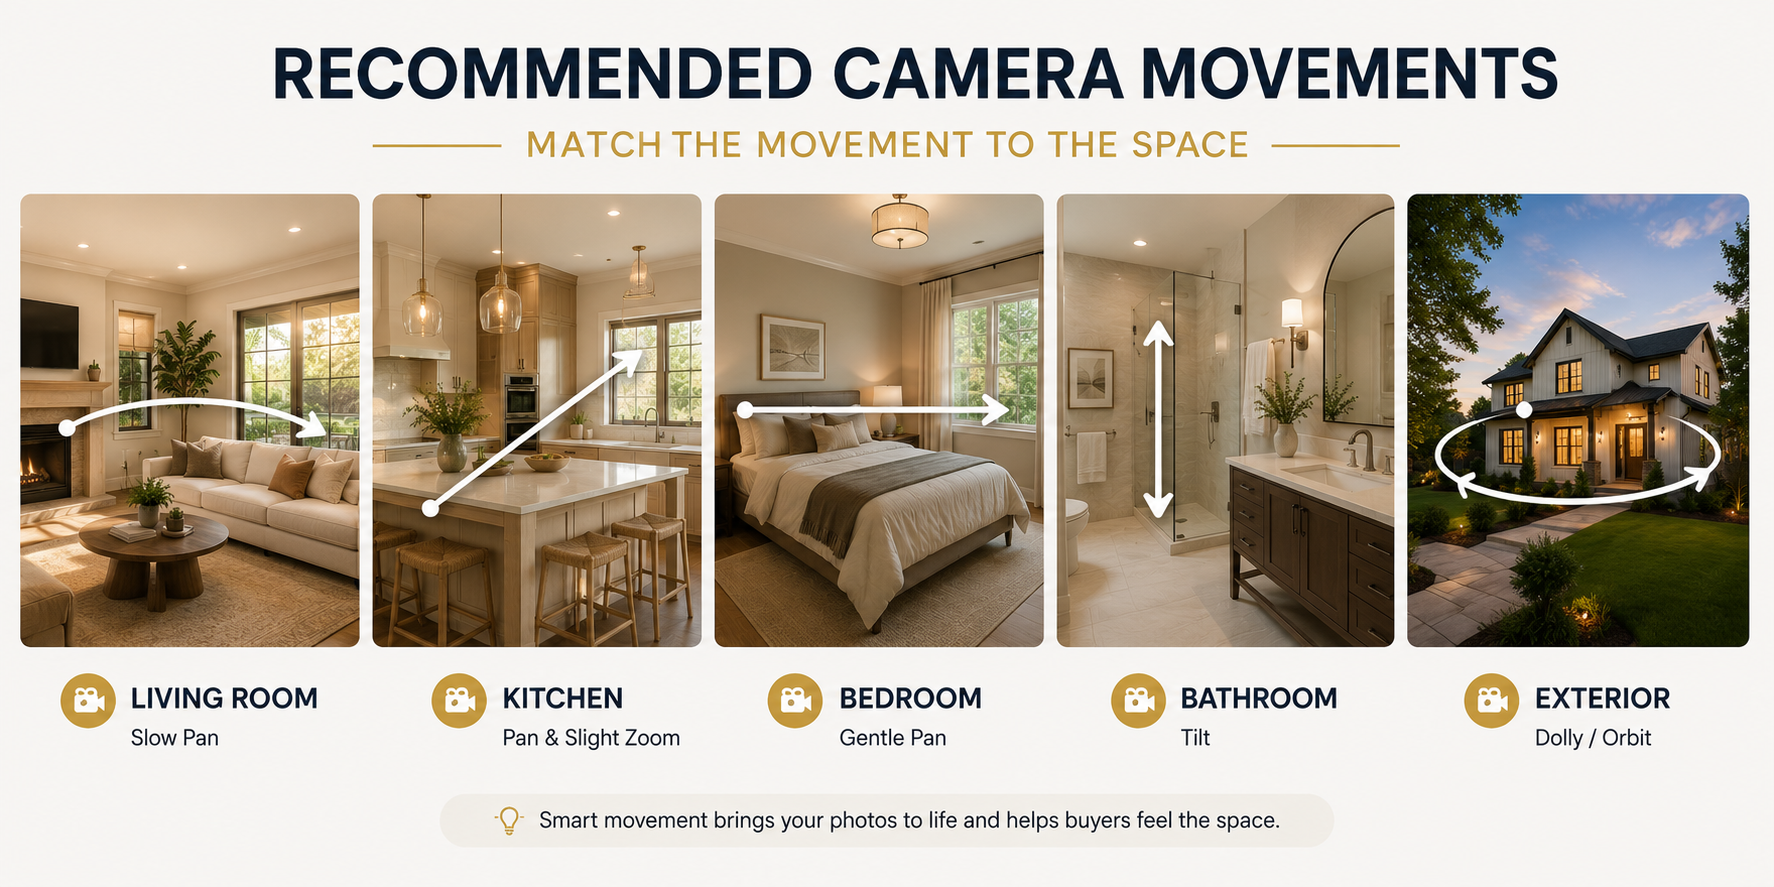
One of the most useful features of a modern real estate video creator is the ability to use different motion styles for different images. With professional camera movements such as pan, zoom, tilt, dolly, and orbit, you can choose a movement for each photo or room based on what that space is meant to communicate.

Living Rooms and Open-Concept Spaces

Slow pans and gentle dolly movements work well for larger spaces because they help reveal the room gradually and give viewers a better sense of its layout.

Kitchens

Pans and subtle zooms can help draw attention to cabinetry, countertops, islands, appliances, and other standout features without making the movement feel distracting.

Bedrooms

Gentle pans and zooms generally work best. Bedrooms benefit from calmer movement that keeps the space feeling comfortable and inviting.

Bathrooms and Smaller Spaces

Use subtle movements. Aggressive zooms or dramatic motion can make compact rooms feel even smaller.

Exteriors and Curb Appeal Shots

Dolly, pan, and orbit-style movements can work particularly well for exterior images because they add depth and help emphasize the overall shape and character of the property.

If you’re unsure how a particular movement will look with your photos, review before-and-after video examples to see how raw listing photos can change once camera movements and style templates are applied.

Sequence Your Listing Video for Pacing and Retention

Camera movement can make a photo more engaging, but sequencing is what helps keep viewers watching. Online audiences tend to favor content that gets to the point quickly, so a well-paced property video should move naturally through the home without lingering unnecessarily.

A few practical rules can help:

  • Open strong. Lead with the exterior or the most visually compelling room—not the laundry room. The opening seconds help determine whether a viewer keeps watching.
  • Group by room, not by photo order. Move through the property the way a buyer might tour it in person: entry, main living areas, kitchen, bedrooms, bathrooms, and outdoor spaces. Use drag-and-drop reordering to create a logical flow.
  • Vary your movement types. Repeating the same camera movement on every clip can make even a beautiful property feel monotonous. Alternate pans, zooms, tilts, and other subtle movements to create visual variety.
  • Keep individual clips proportional to the room’s importance. A primary suite or standout kitchen can stay on screen a little longer than a hallway or closet.
  • End on a strong note. Close with either another standout interior shot or the exterior, especially if you’re following it with an outro containing your contact information.

Because reordering is typically simple, build a rough sequence first, preview it, and then adjust the pacing before finalizing. Small changes in room order can sometimes make a bigger difference to the overall viewing experience than changing an individual camera movement.

Keep Your Branding Consistent From Intro to Outro

A listing video is also a piece of personal marketing, and inconsistent branding can weaken that presentation. Custom branding tools let you add your logo, brand colors, and contact information to intros and outros, so treat these elements as carefully as the property footage itself.
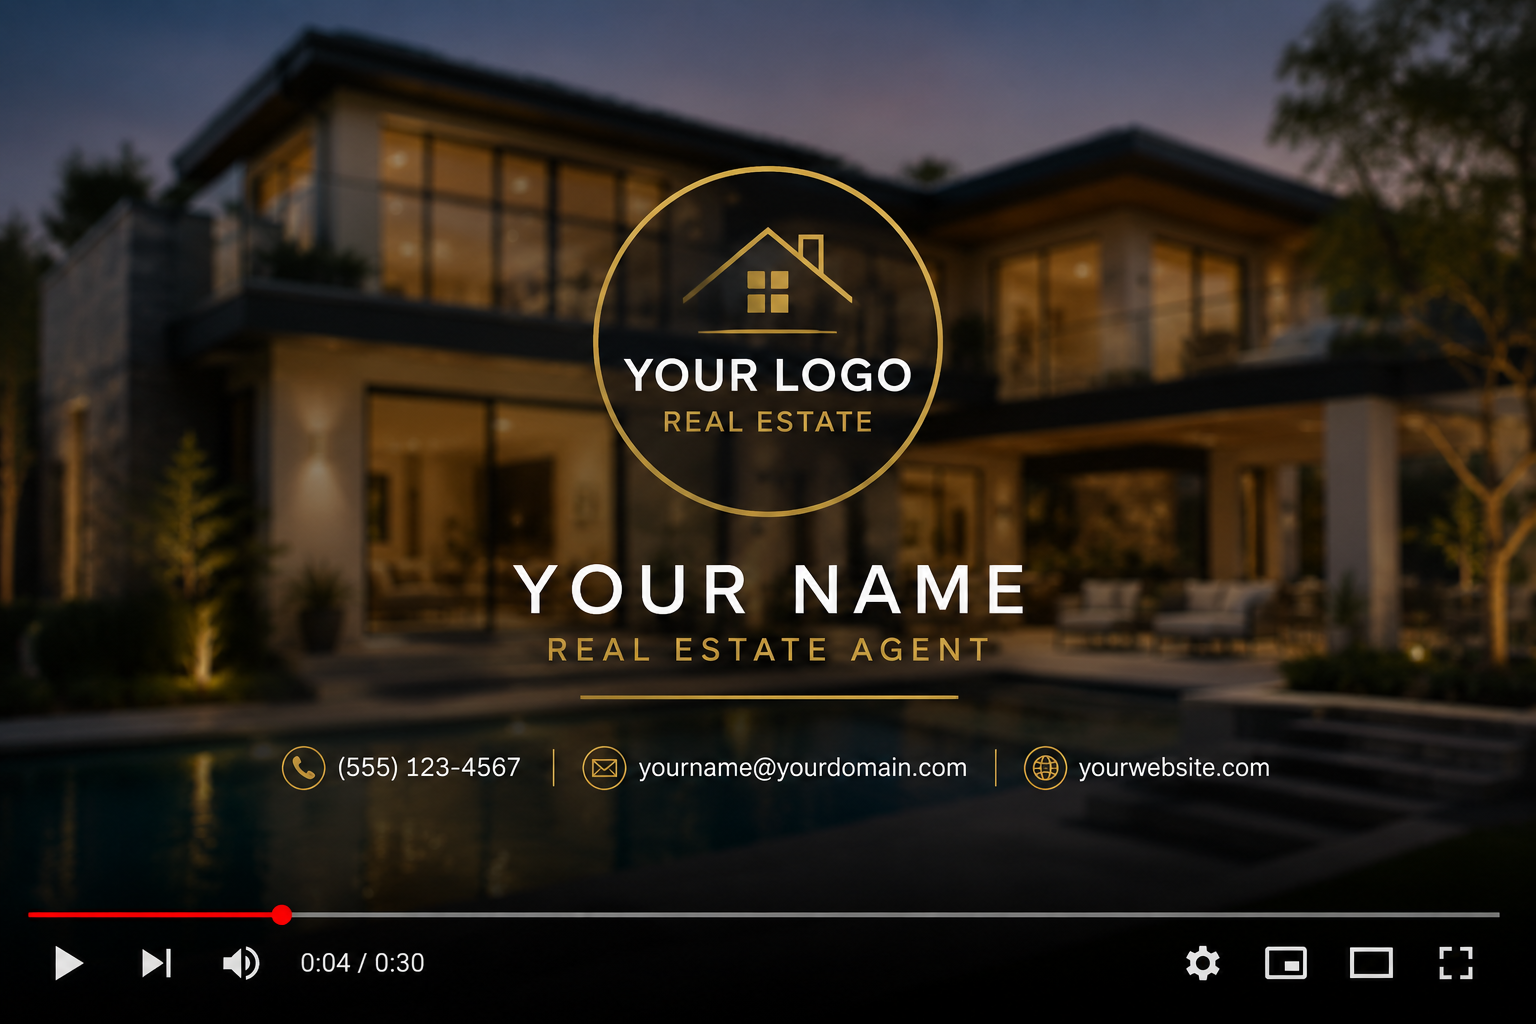
  • Use the same logo placement and color scheme across every listing you publish. Consistency helps make your videos recognizable across different platforms and properties.
  • Choose an overall visual style that fits the listing. A modern, minimal template may suit a downtown condo, while a warmer style can complement a family home. Luxury properties may call for a more refined presentation. Whatever you choose, keep your broader brand identity consistent.
  • Keep your outro contact information current and easy to read at a glance, especially because many viewers may encounter your video without audio.
  • If you use an AI avatar clone for a talking intro, keep the framing, tone, and script style consistent across videos so it feels like an intentional extension of your brand rather than a one-off effect.

Choose Music and Voiceover That Fit the Property

Sound helps set the emotional tone of your video, so it’s worth choosing audio deliberately rather than simply using whichever track is preloaded.

  • Match the tempo to the property type. Upbeat music can work well for smaller starter homes and condos, while slower, more atmospheric tracks may better complement luxury or family properties.
  • Keep volume levels consistent so music doesn’t overpower a voiceover or distract from on-screen branding and text.
  • Consider an AI voiceover for listings with more details to convey. Information such as square footage, standout features, or neighborhood highlights can sometimes be communicated more naturally through narration than room labels alone.
  • Match the voiceover pace to the video. A voiceover that rushes through details while the camera lingers on a slow pan can feel mismatched, so review the two together before finalizing.
  • Test the video with the sound off, too. Make sure the visuals, branding, captions, and pacing still communicate the most important information without relying entirely on audio.

Export Settings for Every Platform

Where your video will be watched should influence its export format. A real estate video creator that supports multiple aspect ratios makes it easier to repurpose one edit across different channels without starting over.
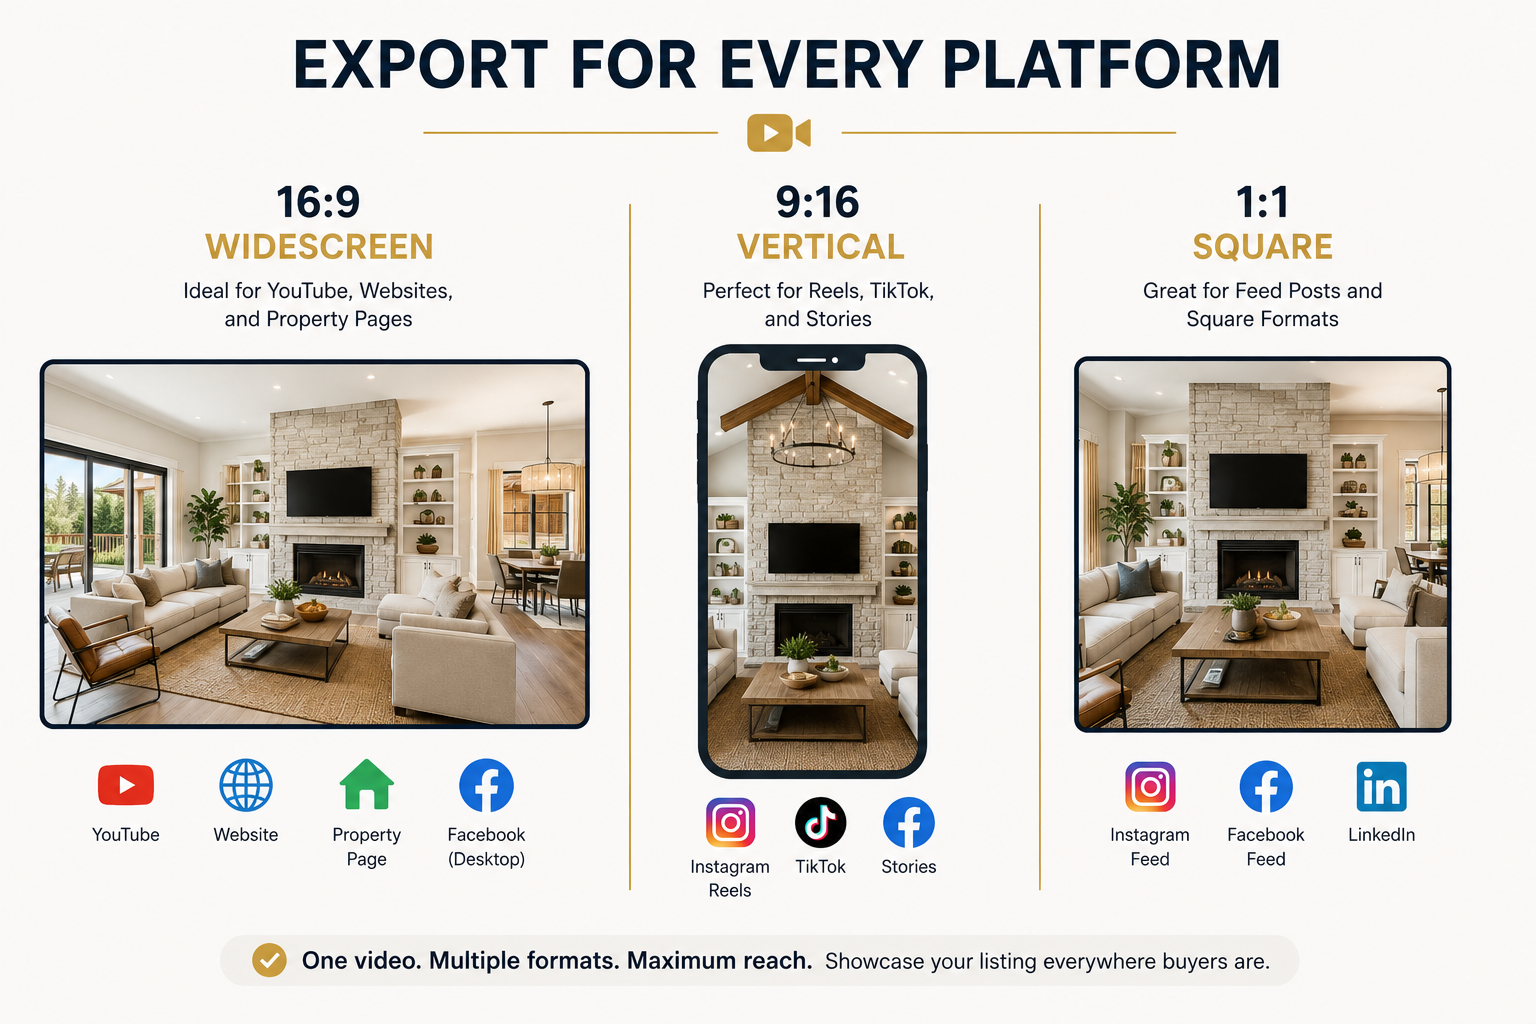
  • Widescreen (16:9) works well for YouTube, property pages, websites, and other landscape-oriented placements. It can also work well for video used in email campaigns.
  • Vertical (9:16) is ideal for Instagram Reels, TikTok, Facebook Stories, and other full-screen mobile formats. Reframe important room shots so the key subject remains centered.
  • Square (1:1) can work well for feed-based social posts and other placements where a compact format is useful.
  • Export more than one format for each listing rather than relying on a single “main” version. If your video creator supports multiple aspect ratios, you can reuse the same edited sequence for different channels.
  • Double-check branding placement in every aspect ratio. A logo or contact card positioned correctly in widescreen may become cropped or off-center in a vertical version, so preview each export before publishing.

Having a video ready in the appropriate format when a listing goes live can make it much easier to distribute the property consistently across your marketing channels.

Frequently Asked Questions

How many photos do I need to make a good real estate video?

Around 15–25 well-lit, high-resolution photos covering the major rooms and exterior can provide a solid starting point for a complete property tour without padding the runtime with unnecessary duplicates.

Which camera movement should I use if I’m not sure?

A slow pan or gentle zoom is a safe starting point for most rooms. Save more dramatic movements, such as orbit or dolly effects, for standout spaces like an open-concept living area or a strong exterior shot.

Should every listing video include a voiceover?

Not necessarily. Voiceover is most useful when the listing has details worth narrating, such as the layout, standout features, square footage, or neighborhood context. Simpler listings may work perfectly well with music, branding text, and thoughtful pacing.

Can I create videos in different formats for different platforms without redoing the whole edit?

If your real estate video creator supports multiple aspect ratios, yes. Once your room sequence, camera movements, and branding are set, you can export widescreen, vertical, and square versions from the same project rather than rebuilding the video from scratch.

Final Thoughts

Small editing decisions add up. Better source photos, room-appropriate camera movements, thoughtful sequencing, consistent branding, sound that complements the property, and the right export format for each platform can turn a basic real estate video creator output into a polished listing video that people are more likely to watch and remember.

If you’re deciding between a DIY app and a Done-For-You service—or comparing what’s included at each level—the PhotoAIVideo pricing page breaks down the available Free, Creator, Pro, and Enterprise options so you can choose a workflow that fits the number of listings you produce.

🚀 Your All‑In‑One Virtual Experience Stack
🎬
PhotoAIVideo
Turn photos into scroll‑stopping AI videos.
Get Started →
🏡
Pictastic
Instantly stage listings with AI.
Try Staging →
🌀
CloudPano
Create stunning 360° tours in minutes.
Launch Tour →
💰
VirtualTourProfit
Build a profitable virtual tour business.
Learn More →
🤝
CloudPano Reseller
Resell AI visual software without building it.
Become a Reseller →
🚗
Auto CloudPano
Sell more vehicles with 360° experiences.
Explore Auto →
🏗️
AI Floor Plan Builder
Generate detailed floor plans with AI.
Build Now →
📐
3D Measure
Capture accurate floor plans & 3D measurements.
Measure Now →
🧠
AI Training Data
Custom AI training data services.
Learn More →
Share this post
Cloudpano

Choose The Right 360° Camera

Insta360 ONE RS 1-Inch 360 Edition

  • Compact, ready to go anywhere

  • Interchangeable lens that’s upgradeable

  • Dual 1-inch sensors for improved clarity and low light performance

  • Dynamic range and 6K 360° capture

  • 360° photo resolution at 21MP

Learn More

Insta360 X4

  • 8K 360° video recording for ultra-detailed visuals.

  • 4K single-lens mode for traditional wide-angle shots.

  • Invisible selfie stick effect for drone-like perspectives.

  • 2.5-inch touchscreen with Gorilla Glass protection.

  • Waterproof up to 33ft for underwater shooting.

Learn More

Ricoh Theta Z1

  • 360° photo resolution in 23MP

  • Slim design at 24 mm thick

  • Built-in image stabilization for smooth video capture.

  • Internal 19GB storage for photo and video storage.

  • Wireless connectivity for remote control and sharing.

Learn More

Ricoh Theta X

  • 60MP 360° still images for high-resolution photography.

  • 5.7K 360° video recording at 30fps.

  • 2.25-inch touchscreen for intuitive control.

  • USB Type-C port for fast charging and data transfer.

  • MicroSD card slot for expandable storage.

Learn More
Property Marketing
Allows potential buyers to explore properties in detail from anywhere, enhancing the real estate marketing process.
Automotive Spins
Create an interactive virtual showroom and engage affluent digital buyers with live 360º video calls, all through the CloudPano mobile app for a complete automotive sales solution.
Interactive Floor Plans
Create 2D and 3D floor plans with measurements in 4 minutes or less, all from your phone. Download the Floor Plan Scanner app and get your first scan free.

360 Virtual Tours With CloudPano.com. Get Started Today.

Try it free. No credit card required. Instant set-up.

Try it free
Latest posts

See our other posts

Interviews, tips, guides, industry best practices, and news.

From Beginner to Pro: Mastering Your Real Estate Video Creator

Every agent starts with one simple listing video and grows from there. This guide walks through the beginner, intermediate, and pro stages of mastering a real estate video creator — from your first upload to a fully branded, repeatable workflow.
Read post

Real Estate Video Creator Mistakes to Avoid

Using a real estate video creator doesn't guarantee a video that sells the listing — plenty of agents undercut their own results with a handful of avoidable mistakes. This guide walks through the most common pitfalls, from blurry source photos to skipping mobile checks, and the practical fix for each one.
Read post

Real Estate Video Creator for Open House Announcements

Buyer interest in a new listing peaks in its first few days, but traditional video production often can't keep up. Here's how agents use a real estate video creator to produce just listed, open house, and just sold videos same-day, and how to get that video in front of buyers while it still matters.
Read post