


.png)

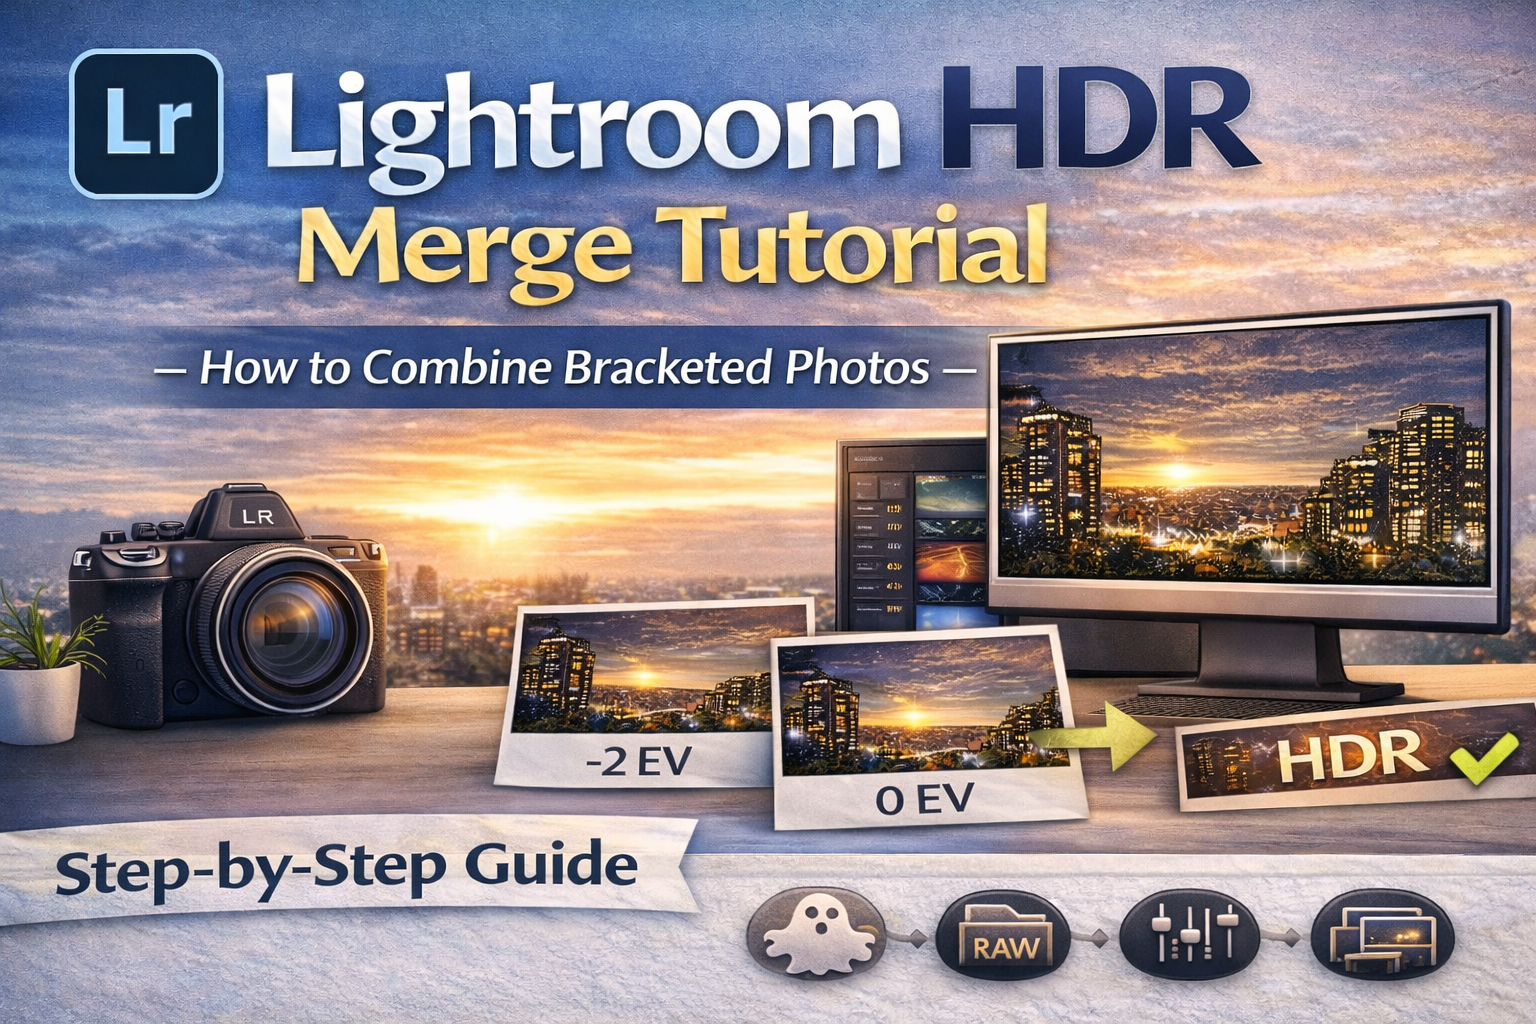
Step-by-Step Guide to Using Lightroom HDR Merge for Natural Results
If you shoot bracketed exposures and want a clean, natural way to combine them, Lightroom HDR Merge is one of the easiest and most effective tools available.
Instead of exporting files to separate software, Lightroom lets you merge bracketed photos directly inside your editing workflow. That means fewer steps, better RAW quality, and more control over the final image.
In this Lightroom HDR Merge tutorial, you’ll learn exactly how the process works, when to use it, and how to get realistic results that don’t look overprocessed.
Let’s dive in. 🚀
Lightroom HDR Merge is a feature inside Adobe Lightroom that combines multiple bracketed exposures into a single high dynamic range (HDR) image.
It blends:
🌤 Highlight detail from darker shots
🌑 Shadow detail from brighter shots
⚖ Balanced midtones from normal exposures
The final result is a 32-bit DNG file with expanded dynamic range — giving you more flexibility during editing.
There are many HDR tools available, but Lightroom offers unique advantages.
✔ Seamless workflow
✔ Maintains RAW image quality
✔ Natural-looking results
✔ Simple, beginner-friendly controls
✔ No need for external plugins
Because Lightroom HDR Merge produces a DNG file, you can edit it just like a RAW photo — with huge exposure latitude.
Lightroom HDR Merge works best when a scene has:
🏠 Bright windows and dark interiors
🌄 Sunrises or sunsets
🏙 City scenes with shadows and highlights
🌳 Landscapes with bright skies and dark foregrounds
Any high-contrast situation is a perfect candidate.
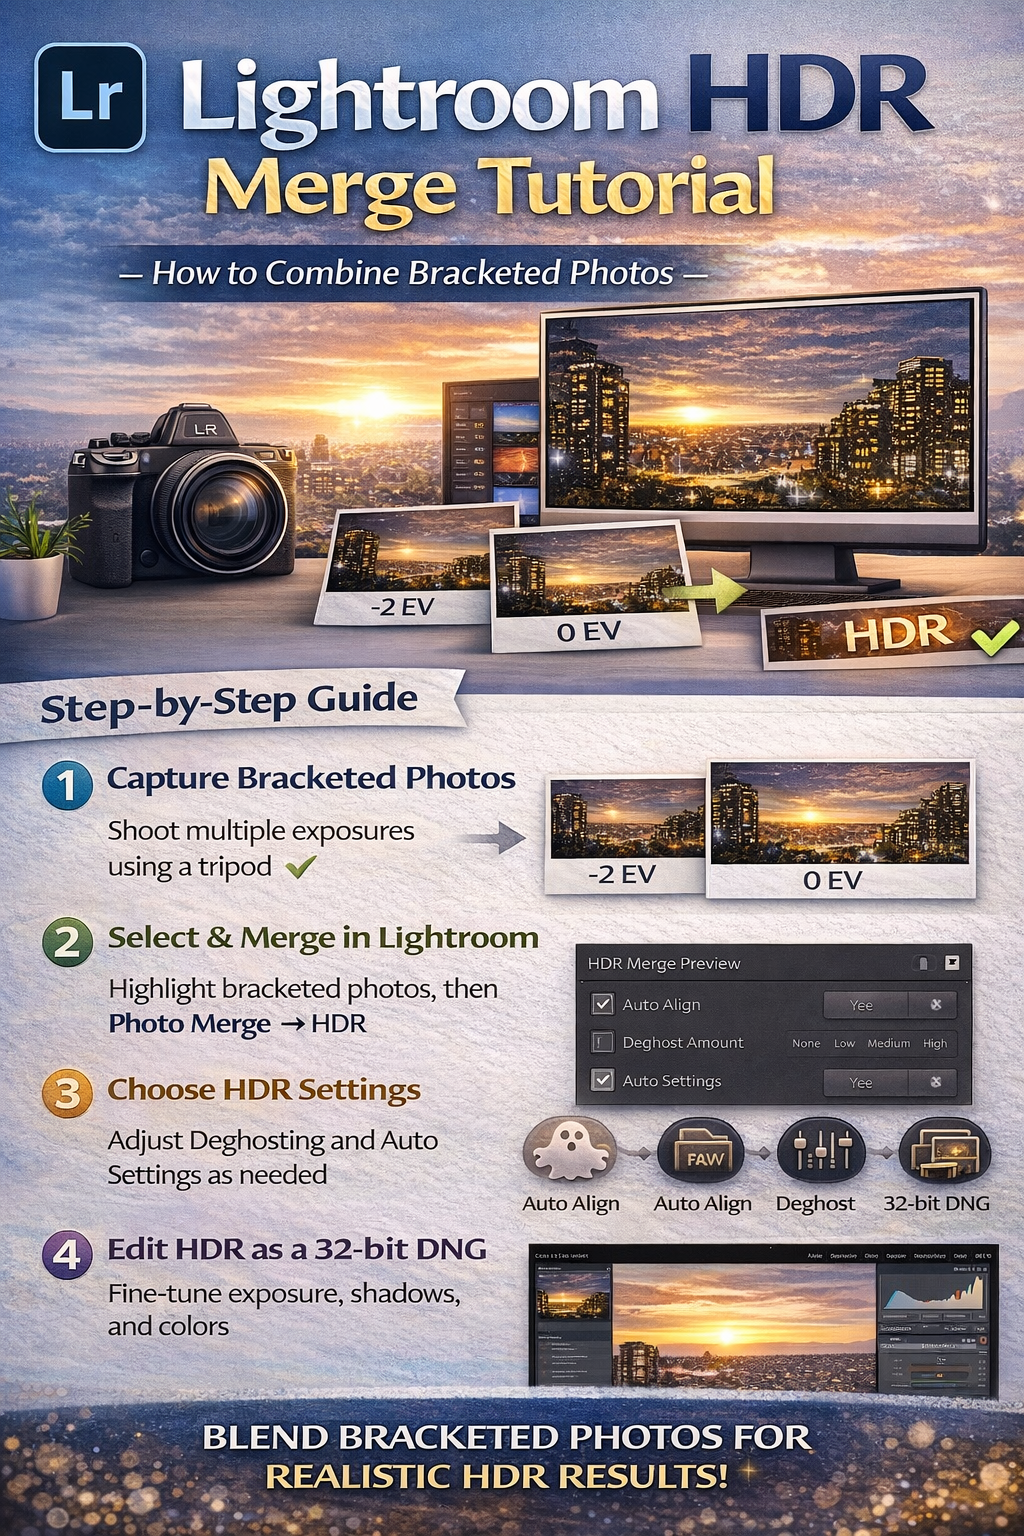
Before using Lightroom HDR Merge, you need bracketed exposures.
A common bracket is:
📸 One dark exposure
📸 One balanced exposure
📸 One bright exposure
Use a tripod for best results and keep ISO low to reduce noise.
Import all bracketed images into Lightroom as usual.
Make sure:
✔ Images are sharp
✔ They’re part of the same scene
✔ No major movement occurred between shots
Lightroom works best when frames align closely.
In the Library or Develop module:
Hold Ctrl (Windows) or Cmd (Mac) and click each exposure in the bracket.
Right-click the selection and choose:
Photo Merge → HDR
This launches the Lightroom HDR Merge preview window.
Lightroom gives you a few key options before merging.
Corrects slight camera movement between shots.
Leave this ON unless you used a rock-solid tripod.
Applies Lightroom’s automatic tone adjustments.
You can use it as a starting point, but you can also edit manually later.
Removes movement between exposures (like trees, people, or curtains).
Deghosting strength options:
Low • Medium • High
Use only when necessary, as heavy deghosting can soften details.
Once your settings are chosen, click Merge.
Lightroom creates a new 32-bit DNG HDR file next to your original photos in the Library.
This file contains all the combined exposure data.
Here’s where Lightroom HDR Merge really shines.
Because the output is a DNG file, you can:
✔ Adjust exposure dramatically
✔ Recover highlights
✔ Lift shadows without heavy noise
✔ Fine-tune contrast and color
This flexibility is much greater than editing a single exposure.
HDR should look realistic, not surreal.
Lifting shadows too much creates flat, gray images.
Don’t pull highlights down so far that light sources look dull.
Too much can create halos.
Subtle edits produce professional results.
Some HDR programs create stylized, dramatic images.
Lightroom HDR Merge focuses on realism and smooth tonal transitions.
Advantages of Lightroom:
✔ Less risk of halos
✔ Cleaner blending
✔ Easier color control
✔ Integrated workflow
For natural photography styles, Lightroom is often preferred.
Movement between frames can cause ghosting.
Use Deghosting when:
🌬 Leaves move in the wind
🚶 People pass through the frame
🚗 Cars drive by
Choose the lowest setting that fixes the issue to preserve detail.
Real estate photographers love Lightroom HDR Merge because it:
✔ Balances bright windows and dark rooms
✔ Keeps colors natural
✔ Works quickly for batch workflows
✔ Maintains realistic lighting
It’s a popular choice for interior photography.
Landscapes often contain bright skies and dark land.
HDR merging helps:
✔ Preserve sky detail
✔ Keep shadow detail in foreground
✔ Create balanced, natural images
Lightroom’s subtle blending works well for outdoor scenes.
May not capture enough dynamic range.
Can soften important details.
Leads to unnatural results.
Keep edits light and realistic.
You can merge multiple brackets efficiently.
Select several groups of bracketed photos and repeat the merge process.
This makes Lightroom HDR Merge practical for large shoots.
Lightroom HDR Merge is one of the easiest and most reliable ways to blend bracketed exposures.
It gives you:
✔ Expanded dynamic range
✔ Natural-looking results
✔ Full RAW editing flexibility
✔ A streamlined editing workflow
By combining careful capture with subtle editing, you can produce HDR photos that look balanced, professional, and true to life.
Master this tool, and high-contrast lighting will never intimidate you again.

Compact, ready to go anywhere
Interchangeable lens that’s upgradeable
Dual 1-inch sensors for improved clarity and low light performance
Dynamic range and 6K 360° capture
360° photo resolution at 21MP

8K 360° video recording for ultra-detailed visuals.
4K single-lens mode for traditional wide-angle shots.
Invisible selfie stick effect for drone-like perspectives.
2.5-inch touchscreen with Gorilla Glass protection.
Waterproof up to 33ft for underwater shooting.

360° photo resolution in 23MP
Slim design at 24 mm thick
Built-in image stabilization for smooth video capture.
Internal 19GB storage for photo and video storage.
Wireless connectivity for remote control and sharing.

60MP 360° still images for high-resolution photography.
5.7K 360° video recording at 30fps.
2.25-inch touchscreen for intuitive control.
USB Type-C port for fast charging and data transfer.
MicroSD card slot for expandable storage.
.png)
.png)

Try it free. No credit card required. Instant set-up.


