


.png)


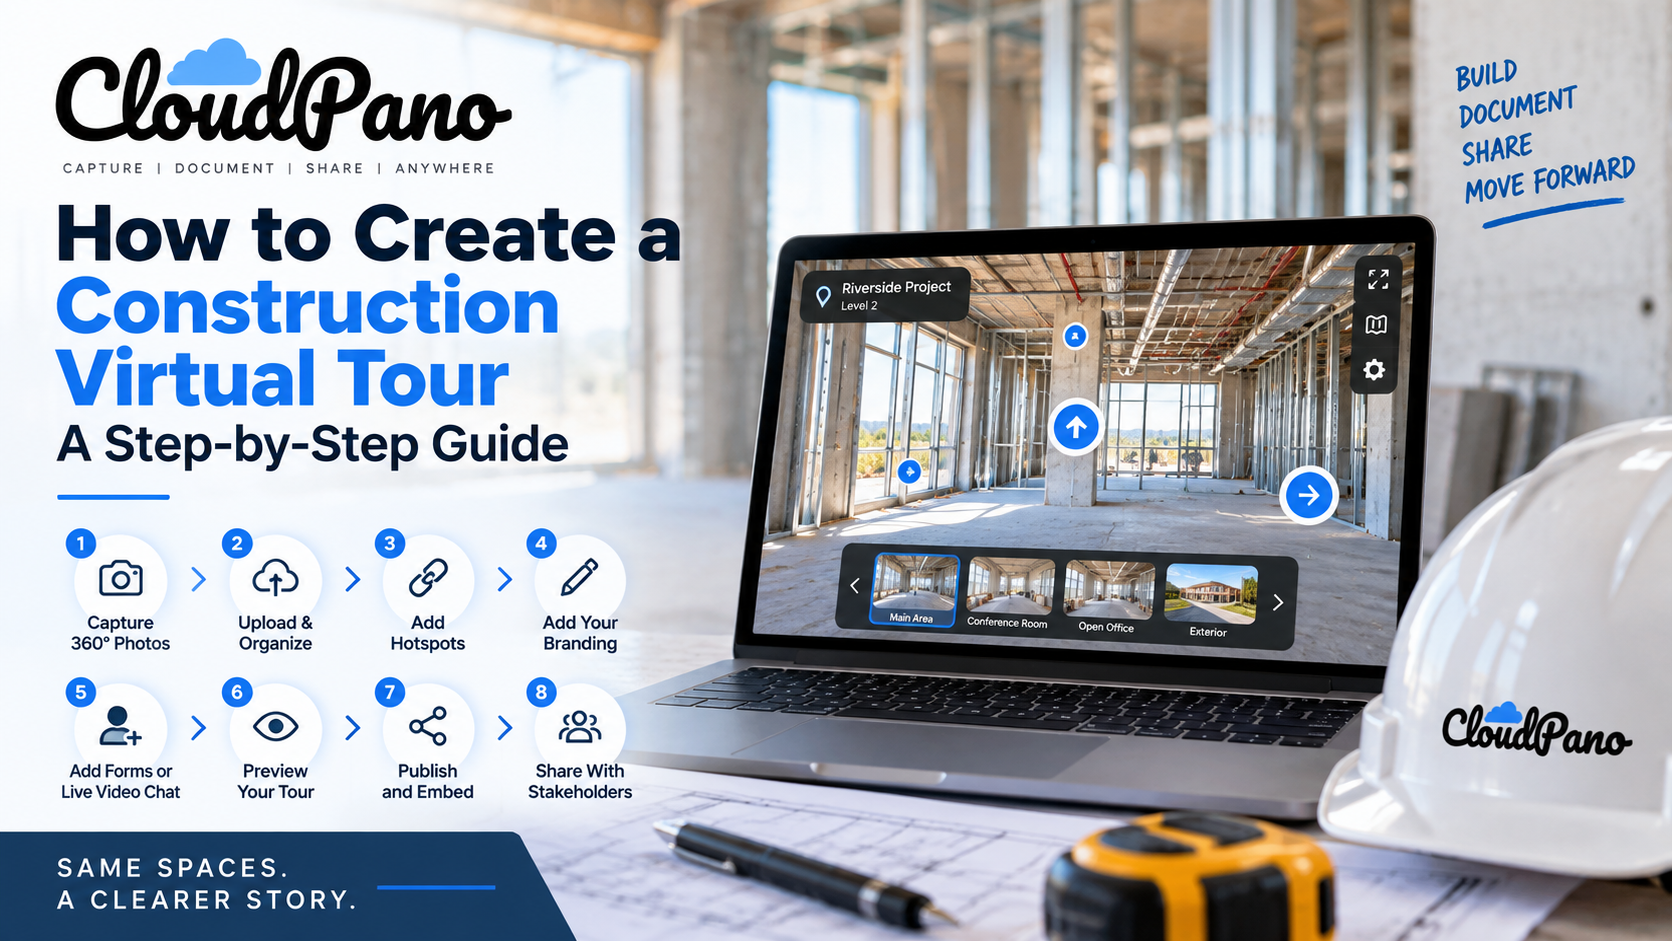
Capture 360° photos on site, upload and label the scenes, and link them with hotspots that follow the building's layout. Add branding and optional lead form or live video chat features, preview the tour on desktop and mobile, then publish, embed, and share it with stakeholders. Repeat the workflow at key milestones.
Project managers juggle countless priorities throughout the day, so any new tool needs to fit naturally into an existing workflow.
Building a walkable, clickable virtual tour of a jobsite may sound like something reserved for real estate or marketing teams, but it can also provide construction professionals with a practical way to document progress, communicate with remote stakeholders, and reduce the need for some routine site visits.
With the right virtual tour software for construction, teams can turn 360° imagery into an organized, navigable record of a project without needing a traditional production crew or advanced technical skills.
This guide walks through the process—from capturing your first 360° images to publishing and sharing a finished tour with stakeholders.
The goal is to create a workflow that's straightforward enough to repeat at important construction milestones without adding unnecessary complexity to the team's existing responsibilities.
Construction technology continues to evolve as field teams adopt digital tools for documentation, collaboration, and project management. Industry publications such as Engineering News-Record regularly cover these developments across the construction sector.
A virtual tour can fit into that broader digital workflow by complementing existing documentation rather than replacing it.
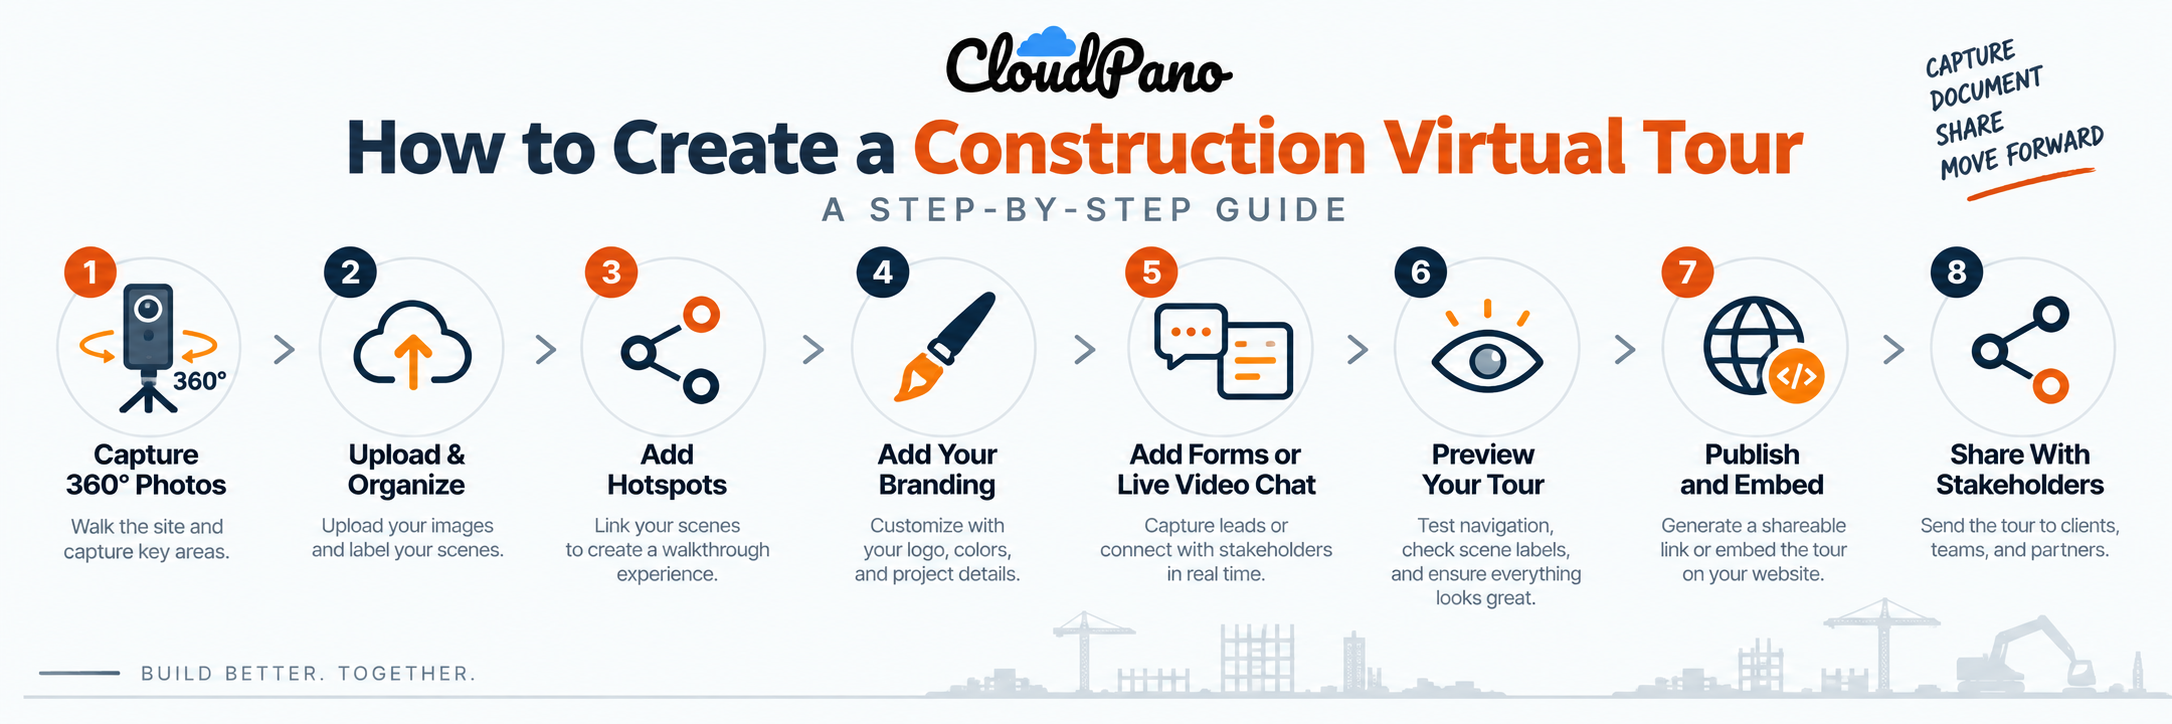
Everything starts with the imagery.
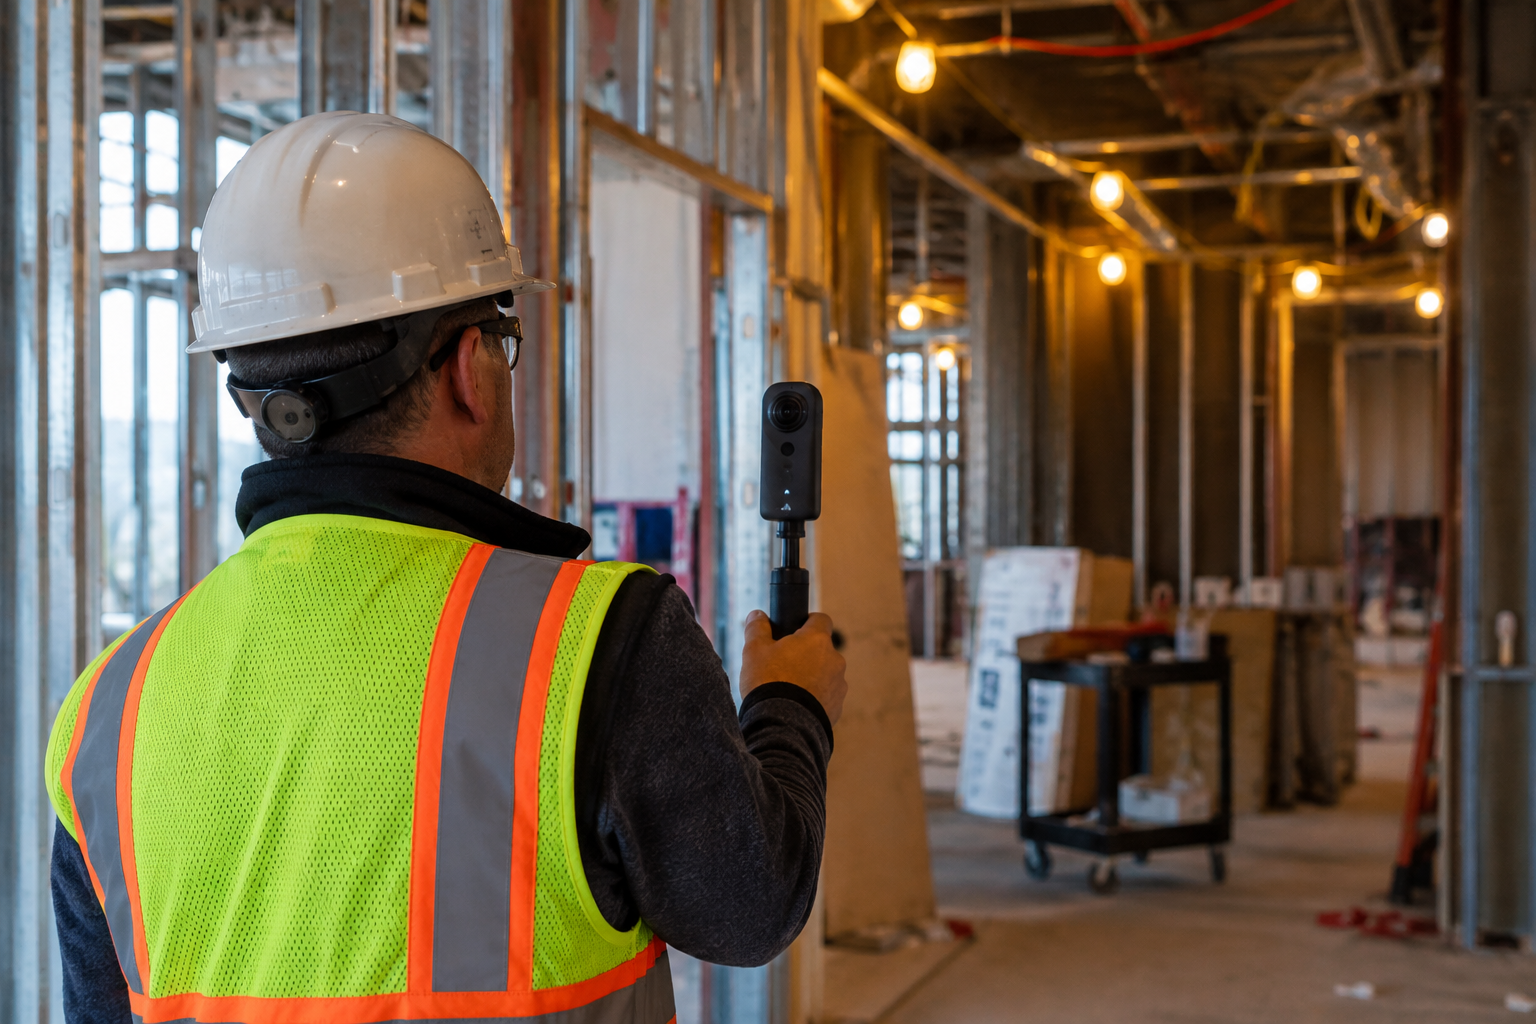
Modern 360° cameras can capture the surrounding environment from a single camera position, making them useful for documenting rooms, corridors, floors, exterior areas, and other important locations throughout a project.
Rather than relying on a universal spacing rule, determine your capture points based on the size and complexity of the space. Capture enough positions to provide useful visual continuity between areas, with additional scenes around important locations such as stairwells, mechanical rooms, entrances, and major transition points.
A few habits can make the later steps easier:
Following a consistent capture route can also help create a useful visual record of visible site conditions.
However, 360° imagery should complement—not replace—required safety inspections, compliance documentation, daily reports, or other formal project records.
Construction teams should continue following applicable workplace requirements and guidance, including relevant information available through OSHA's construction resources.
Once your images are captured, upload them to your virtual tour platform.
The exact process will depend on the software and camera you're using. Some platforms support uploads from computers, mobile devices, or camera storage, while processing times can vary depending on image size, connection speed, platform performance, and the number of scenes being uploaded.
Organization is especially important for construction projects.
Rename scenes using labels that stakeholders can immediately understand. “2nd Floor – East Wing” is much more useful than “IMG_4021.”
If you're documenting a project across multiple phases, consider organizing scenes by date, floor, location, or milestone, such as:
Foundation → Framing → Rough-In → Finishes → Substantial Completion
Consistent naming makes it easier for someone opening the tour weeks or months later to understand what they're viewing without relying on the person who originally captured the imagery.
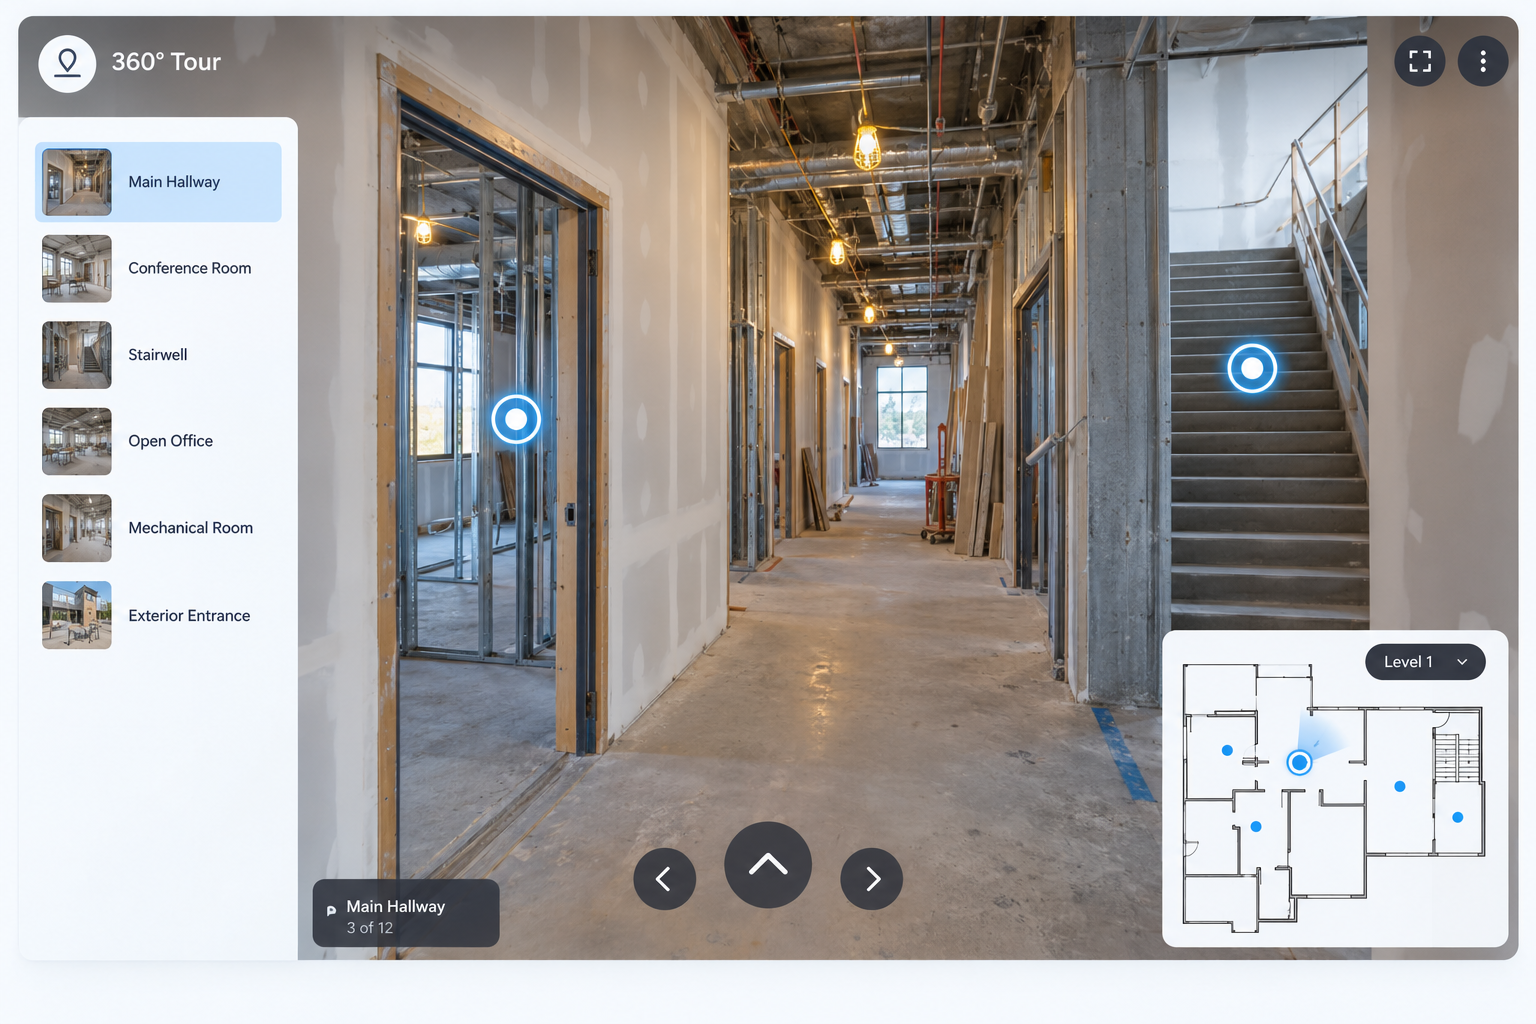
This is where a collection of standalone panoramic images begins to function like a virtual walkthrough.
Hotspots are clickable navigation points placed within a 360° scene. They can connect one scene to another, allowing viewers to move through documented spaces.
For example, a viewer might click a hotspot positioned near a doorway to enter the next room or select a navigation point near a stairwell to move to another floor.
With platforms that support visual tour building, the process may involve selecting a scene, placing a hotspot at a logical transition point, and linking it to the appropriate destination.
Try to make navigation follow the physical layout of the building as closely as possible.
Someone entering the tour should be able to understand how rooms, corridors, floors, and other areas relate to one another without constantly referring to outside instructions.
Depending on the platform's capabilities, teams may also be able to organize or connect imagery from different capture dates. This can provide stakeholders with additional context when reviewing how a documented area changed throughout the project.
For client-facing tours, branding can make the experience feel more like a professional project deliverable.
Depending on the platform, customization options may include your company logo, interface colors, a welcome message, project information, or other branding elements.
This can be especially useful when sharing tours with owners, prospective clients, investors, or other external stakeholders.
For internal documentation, extensive branding may not be necessary. In those cases, clear project names, scene labels, dates, and navigation may be more important than visual customization.
When comparing platforms, check which branding options are included with your plan and whether the software allows you to control how prominently the platform's own branding appears.
This step depends largely on the purpose of your tour.
If you're creating a public-facing tour to market a development, model unit, or completed project, lead-generation features can provide interested viewers with a convenient way to request additional information.
Depending on the platform, this could include a contact form, call-to-action button, or another inquiry option within the tour experience.
If your goal is remote collaboration, live communication features may also be useful.
For example, a project manager or site representative may be able to guide an out-of-town owner, architect, consultant, or other stakeholder through an area remotely while answering questions in real time.
Not every construction tour needs either feature.
For teams evaluating virtual tour software for construction, it's better to select features based on the actual purpose of the tour rather than adding functionality simply because it's available.
And importantly, a remote walkthrough shouldn't automatically be treated as a substitute for an inspection or site visit that must be performed in person.
Before sharing the tour, review it from the perspective of someone seeing the project for the first time.
Click through every hotspot and confirm that each one leads to the correct destination. Check scene names and labels for clarity, and make sure viewers can move logically between rooms, floors, and project areas.
It's also a good idea to test the tour on the devices your stakeholders are likely to use.
At minimum, check the experience on desktop and mobile. If the platform specifically supports VR and your audience is likely to use a headset, test that experience as well.
During your review, look for:
A short quality-control review can catch small problems before the tour reaches a client or other stakeholder.
Once everything checks out, publish the tour using your platform's available sharing options.
Depending on the software, you may receive a shareable link or embed code that allows the tour to appear directly on a project page, company website, client portal, or another compatible web environment.
This flexibility can be useful because many construction teams already have established places where project information lives.
Instead of treating the virtual tour as a completely separate resource, teams can link or embed it alongside other relevant project information where appropriate.
Construction organizations increasingly centralize digital project information through platforms such as Autodesk Construction Cloud, which brings together various construction-management workflows and project data.
A virtual tour doesn't need to replace those systems. Instead, it can serve as an additional visual resource within a broader project-documentation strategy.
The final step is getting the tour in front of the people who need it.
Depending on your workflow and the platform's sharing controls, you might include the tour link in:
Before sharing, consider who should have access.
Tours documenting active construction sites may contain information that isn't appropriate for public distribution, so review the platform's privacy, password protection, and access-control options where necessary.
If analytics are available, they may also provide insight into how viewers interact with the tour.
For example, you may be able to see which scenes receive more views or engagement. This can help identify areas that stakeholders are repeatedly reviewing, although the analytics alone won't necessarily explain why those scenes attracted more attention.
You'll generally need a compatible method of capturing panoramic imagery, such as a 360° camera.
Some platforms may support additional capture methods or compatible mobile workflows, so check the software's current camera and image requirements before purchasing equipment.
The tour-building software itself may be browser-based, depending on the platform.
There's no single schedule that works for every project.
Some teams may capture imagery weekly, while others may document only major milestones such as foundation work, framing, rough-in, pre-drywall conditions, finishes, and substantial completion.
Choose a cadence based on the project's pace, documentation requirements, stakeholder needs, and how quickly important site conditions are changing.
Not necessarily.
A virtual tour can reduce the need for some routine progress checks or give remote stakeholders additional visibility before deciding whether an in-person visit is necessary.
However, it shouldn't be treated as a substitute for required inspections, safety checks, physical verification, or other activities that need to occur on-site.
Depending on the purpose of the tour, viewers might include owners, architects, consultants, lenders, prospective buyers or tenants, facilities teams, and other authorized stakeholders.
The appropriate audience will depend on the project's confidentiality requirements and how the tour is being used.
Creating a construction virtual tour doesn't need to become a complicated production project.
A straightforward workflow—capture, organize, connect, customize, preview, publish, and share—can turn 360° imagery into a navigable visual resource that complements traditional construction documentation.
Once teams establish a consistent process, the same workflow can be repeated at important milestones throughout the project.
If you're comparing tools for documenting an active jobsite, focus on platforms that fit naturally into the way your team already works. The right virtual tour software for construction should make it easier to organize, navigate, and share visual project information without creating unnecessary technical overhead.
You'll generally need a compatible way to capture panoramic imagery, such as a 360° camera. Some platforms support additional capture methods or mobile workflows, so check the software's current camera and image requirements before buying equipment. The tour-building software itself may be browser-based, depending on the platform.
There's no single schedule that works for every project. Some teams capture imagery weekly, while others document only major milestones such as foundation, framing, rough-in, pre-drywall, finishes, and substantial completion. Choose a cadence based on the project's pace, documentation requirements, stakeholder needs, and how quickly site conditions are changing.
Not necessarily. A virtual tour can reduce the need for some routine progress checks and give remote stakeholders visibility before deciding whether a visit is needed. It shouldn't be treated as a substitute for required inspections, safety checks, physical verification, or other activities that must happen on-site.
Depending on the tour's purpose, viewers might include owners, architects, consultants, lenders, prospective buyers or tenants, facilities teams, and other authorized stakeholders. The appropriate audience depends on the project's confidentiality requirements and how the tour is being used.
Click through every hotspot to confirm it leads to the right scene, and check that scene names and navigation are clear. Look for dark images, omitted areas, and outdated branding or project information. Test the tour on desktop and mobile, and review privacy, password, and access-control settings before sending the link.


Compact, ready to go anywhere
Interchangeable lens that’s upgradeable
Dual 1-inch sensors for improved clarity and low light performance
Dynamic range and 6K 360° capture
360° photo resolution at 21MP

8K 360° video recording for ultra-detailed visuals.
4K single-lens mode for traditional wide-angle shots.
Invisible selfie stick effect for drone-like perspectives.
2.5-inch touchscreen with Gorilla Glass protection.
Waterproof up to 33ft for underwater shooting.

360° photo resolution in 23MP
Slim design at 24 mm thick
Built-in image stabilization for smooth video capture.
Internal 19GB storage for photo and video storage.
Wireless connectivity for remote control and sharing.

60MP 360° still images for high-resolution photography.
5.7K 360° video recording at 30fps.
2.25-inch touchscreen for intuitive control.
USB Type-C port for fast charging and data transfer.
MicroSD card slot for expandable storage.
.png)

.png)

Try it free. No credit card required. Instant set-up.





.svg)


.svg)