


.png)


Real estate video editing doesn't have to take up an entire afternoon. With the right workflow and tools, you can turn a folder of listing photos into a polished, branded property video without hiring a camera crew or learning traditional video editing software.
Here's how the process works, step by step.
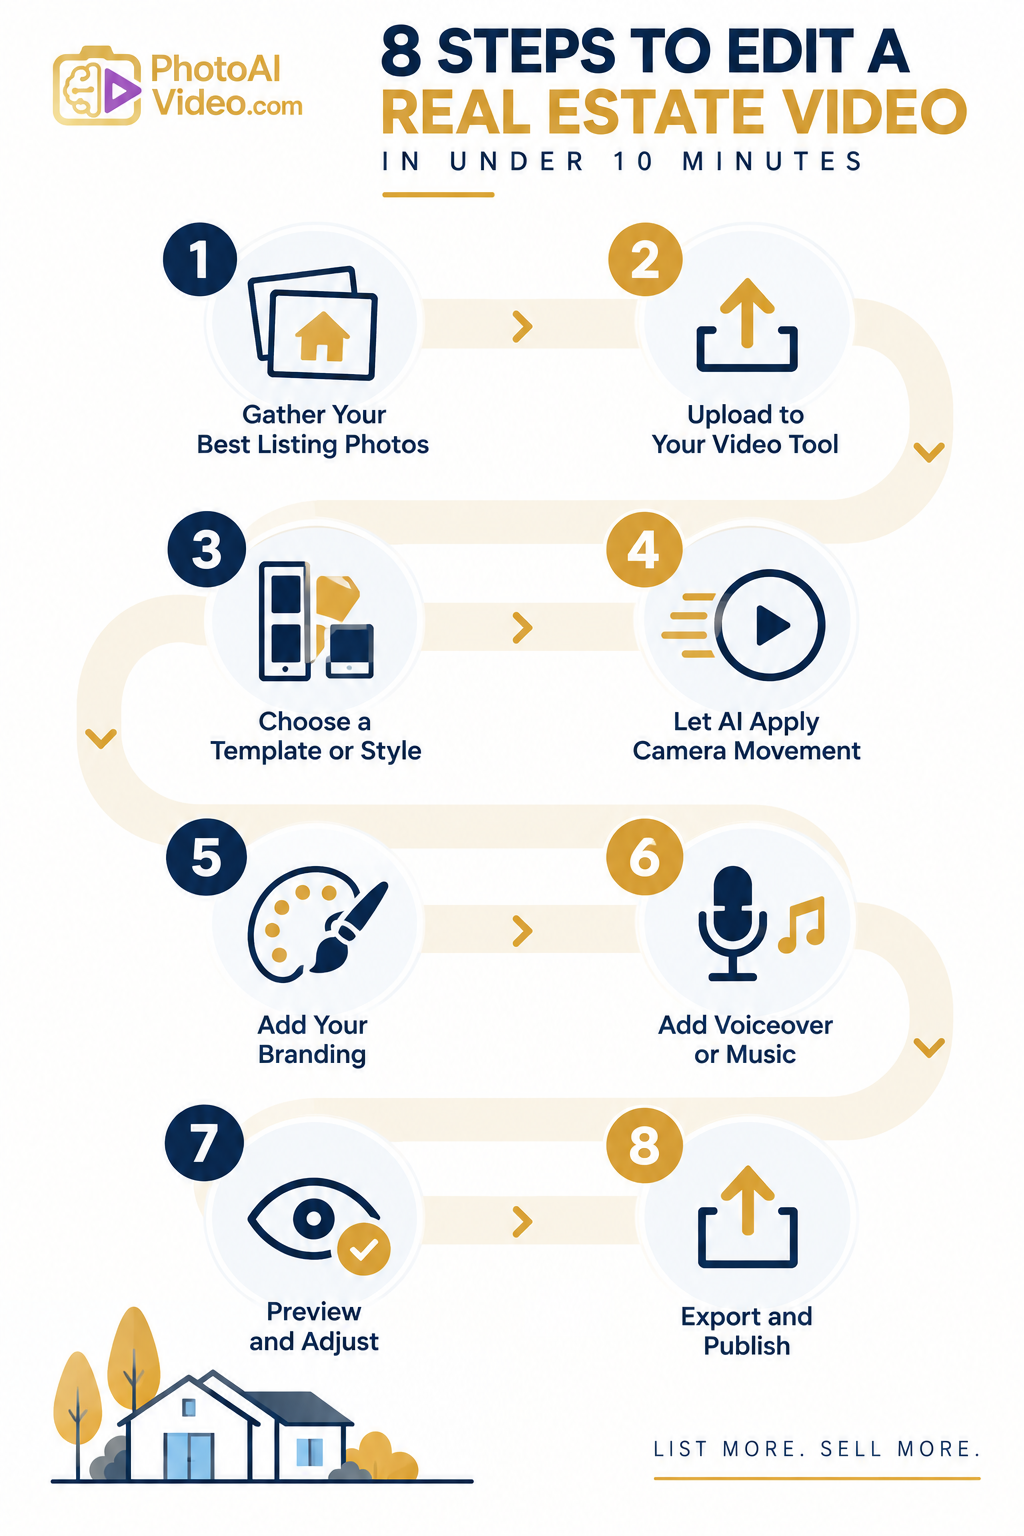
Real estate video editing starts long before you open any software — it starts with your photo library.
Before uploading anything, sort through your listing photos and choose the images that best tell the property's story. A natural sequence might begin with the exterior and curb appeal, followed by the entryway or living room, kitchen, bedrooms, bathrooms, standout features, and a final exterior or neighborhood image.
The exact number of photos you need will depend on the property and the length of video you want to create. What's more important is choosing strong images and arranging them in a logical sequence.
Resources from the National Association of Realtors provide ongoing research into how buyers search for homes and use digital resources throughout the home-buying process.
Remove images that are blurry, poorly lit, repetitive, or don't contribute much to the property's story. A carefully selected collection of photos will generally create a more focused video than including every available image simply because you have it.
If you're using a tool like PhotoAIVideo, start with your sharpest and most flattering listing photos and let the platform handle much of the video creation process from there.
With your photos selected, the next step is getting them into your video platform.
In a traditional editing workflow, this might involve importing files into desktop software, arranging media on a timeline, and manually creating movements and transitions.
AI-powered real estate video tools simplify much of this process. Instead of building the video manually on a traditional editing timeline, you can upload your listing photos and use the platform's automated tools to begin creating the video.
Before choosing a platform, check which file formats and upload methods it supports. Some tools may also provide integrations or additional ways to import property media.
If you want to see what the process looks like in practice, PhotoAIVideo's product walkthrough shows how its video creation workflow works from upload through the finished result.
Once your photos are uploaded, choose a visual style that fits the property, your audience, and your brand.
A modern condo or luxury property might benefit from a clean, cinematic presentation, while a social media teaser may work better with quicker pacing and more prominent on-screen elements.
Think about where the finished video will be published.
A listing video for your website, YouTube channel, or client presentation may call for a more relaxed pace, while content created for Instagram Reels, TikTok, or YouTube Shorts may benefit from a shorter, faster presentation.
If the platform provides previews or different style options, experiment with them before generating your final version.
Choosing the right presentation early can reduce the amount of adjustment needed later.
This is one of the areas where AI-powered real estate video editing can significantly simplify the traditional editing process.
Instead of displaying listing photos as completely static slides, AI video tools can apply camera-style movements to still images — such as pans, zooms, tilts, push-ins, and other effects designed to create a stronger sense of motion and depth.
The goal isn't to pretend the original images were captured as video footage. Rather, it's to transform static listing photography into more dynamic video content.
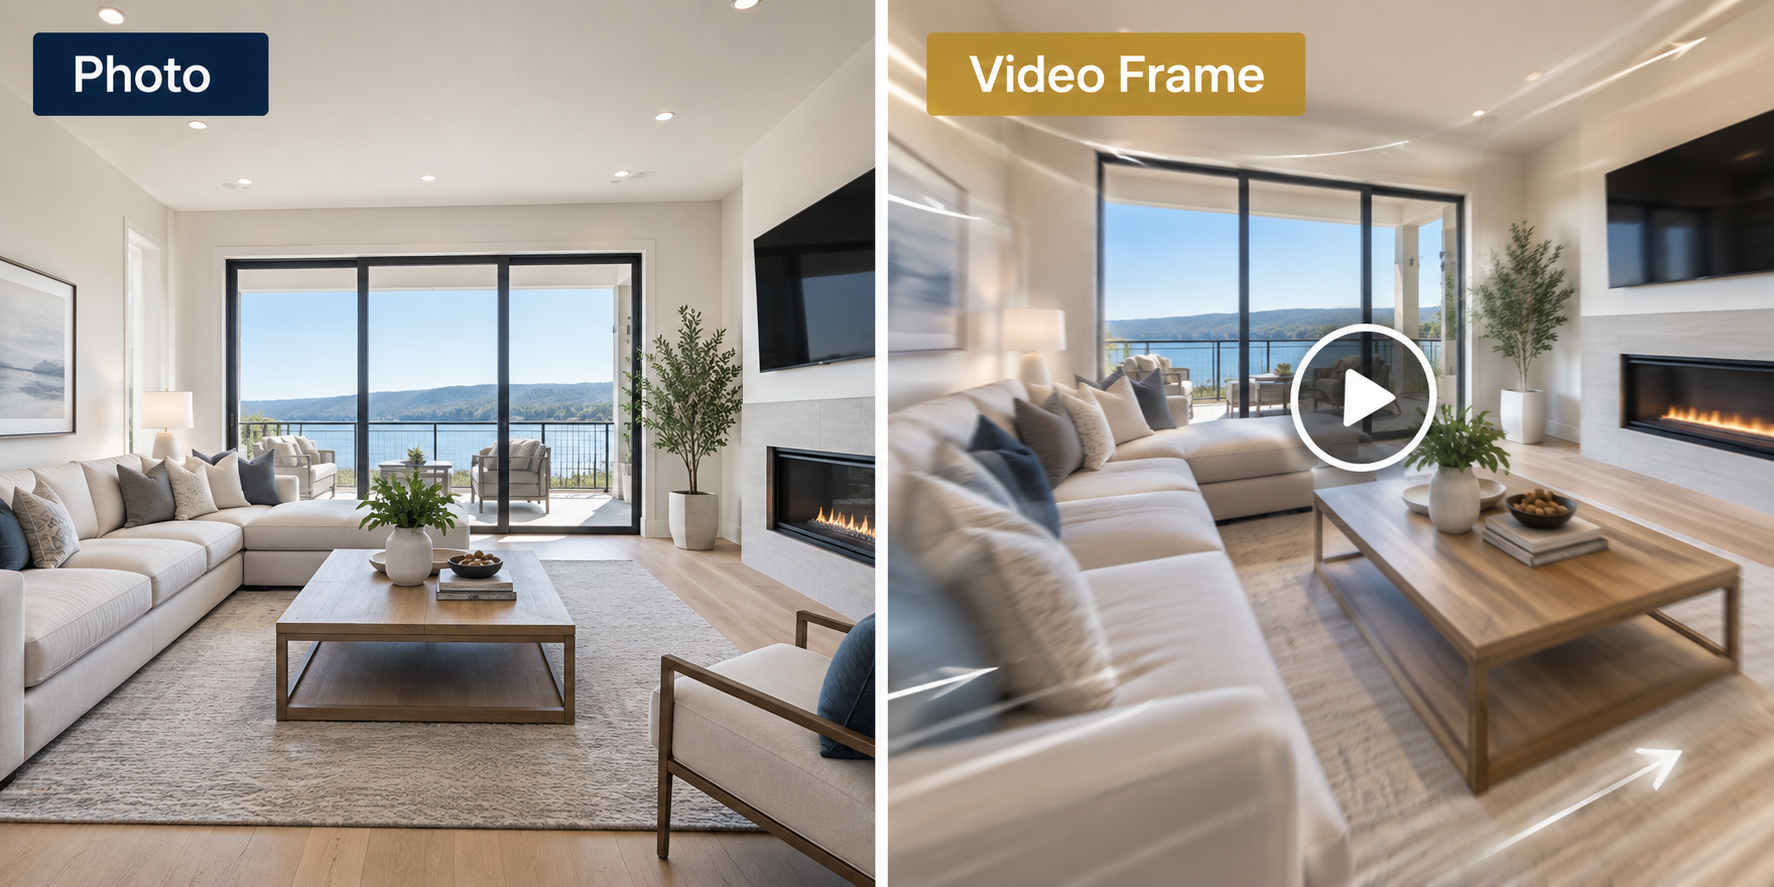
Depending on the platform, different movements may be available for different types of images. For example, a wide living room photograph might work well with a slow lateral movement, while a close-up of a kitchen feature may benefit from a gentle push-in.
PhotoAIVideo offers multiple camera movement options designed to turn listing photos into dynamic property clips.
This automated approach can reduce the amount of manual keyframing and motion editing that would otherwise be required in traditional video editing software.
A finished real estate video should reinforce the identity of the agent, photographer, team, or brokerage behind the listing.
This is where you can add elements such as your logo, brand colors, contact information, and customized intro or outro sequences.
Consistent branding can also help create a recognizable visual style across your listing content.
If you work with a team or brokerage, shared guidelines for logo placement, colors, typography, and contact information can help keep videos consistent across multiple properties and agents.
Branding controls can also be valuable for real estate photographers and media companies that provide video services to clients.
When white-label options are available, they can allow media professionals to deliver videos using their own business identity or their client's branding rather than prominent third-party branding.
Audio isn't required, but it can add another dimension to a listing video.
Background music can help establish the pace and atmosphere of the presentation. You might choose something upbeat for an energetic social media video or a more understated track for a luxury property.
If you use music supplied by a video platform, check the applicable licensing terms to make sure the track can be used for your intended commercial and social media purposes.
Voiceover is another option.
AI-generated narration can highlight property details such as square footage, bedroom and bathroom counts, renovations, amenities, or neighborhood features without requiring you to record every narration manually.
Some platforms may also offer AI presenter or avatar features for agents who want to incorporate a more personal element into their listing videos.
Whatever audio approach you choose, keep the levels balanced. Narration should remain easy to understand without competing with the background music.
Before publishing anything, watch the entire video from beginning to end.
This is your opportunity to catch anything that needs adjustment — a photo in the wrong order, a camera movement that doesn't suit a particular image, music that's too loud, incorrect property information, or an outro that disappears before viewers have time to read it.
Depending on the platform, you may be able to reorder photos, replace images, change movements or styles, adjust music, and regenerate the video without rebuilding the entire project manually.
Even when much of the editing process is automated, a final human review is important.
You're still responsible for making sure the finished video accurately represents the property and is something you're comfortable publishing under your name or brand.
The final step is exporting your video in the formats you actually need.
Potential buyers and clients may encounter your listing content across several platforms, and the ideal format can vary depending on where the video appears.
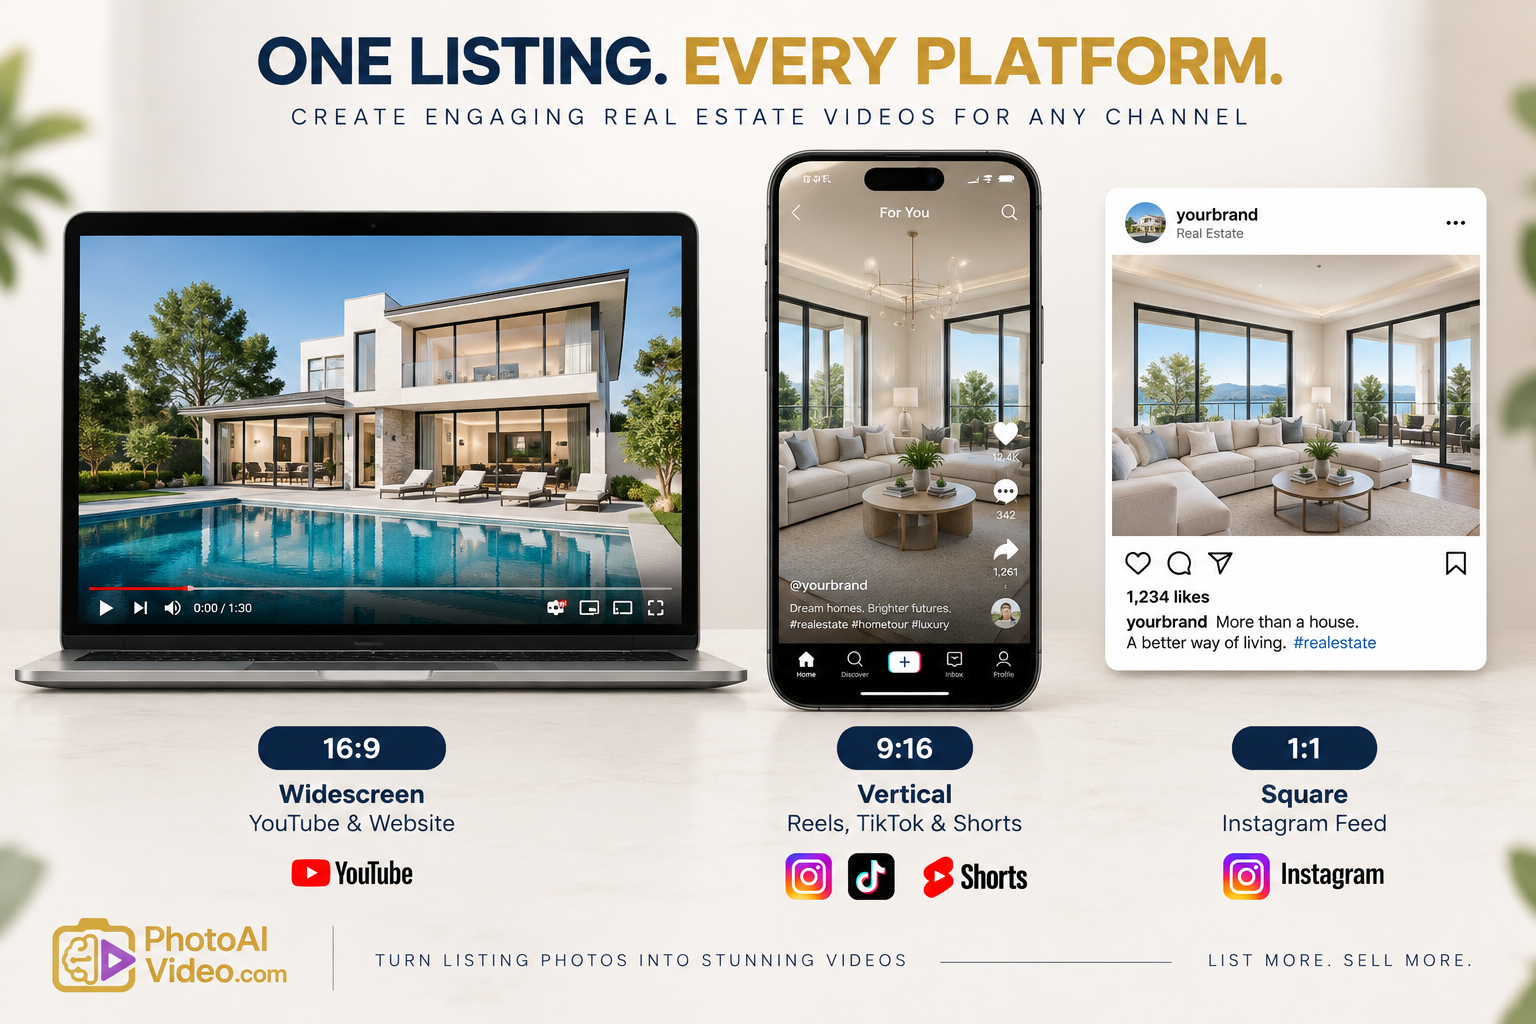
Common options include:
If your software can create multiple aspect ratios from the same project, you may be able to repurpose one listing across several marketing channels without manually rebuilding the video for each one.
Once the video is ready, incorporate it into your listing marketing workflow.
You can also use resources such as Redfin's Data Center to follow broader housing-market trends and HubSpot's video marketing resources for information about how businesses are using video across digital marketing channels.
Do I need any video editing experience to do this myself?
Not necessarily. Many AI-powered real estate video tools are specifically designed to simplify video creation for people without professional editing experience.
Instead of manually working with timelines, keyframes, and layers, you may be able to upload your photos, select your preferred options, add branding, and let the platform automate much of the editing process.
The exact learning curve will depend on the software you choose.
How long does it take to go from photos to a finished video?
It depends on the platform, number of photos, rendering time, selected effects, and how much customization you want to make.
AI-powered tools can reduce the amount of hands-on editing required compared with manually building a property video in traditional editing software.
If turnaround time is important to your workflow, test the platform with an actual listing to see how long the complete process takes — from uploading your photos through reviewing and exporting the finished video.
What if I don't have time to do any of this myself?
Some platforms may offer managed or Done-For-You services in addition to self-service video creation.
With this type of service, you provide your listing photos and other required information, and the provider handles more of the production process for you.
This can be useful for agents, photographers, or teams that want listing videos without adding another recurring production task to their workload.
Is this affordable for a solo agent, or only for brokerages?
Pricing varies considerably between platforms, so it's worth comparing plans against the number of videos you expect to produce each month.
Solo agents may need only a lower-volume plan, while teams, brokerages, and real estate media companies may benefit from plans designed for higher production volumes or multiple users.
Pay attention not only to the subscription price but also to video limits, credits, export options, branding features, resolution, and other restrictions that could affect your actual cost per listing.
Real estate video editing no longer has to mean hiring a videographer for every property or learning a traditional editing program yourself.
AI-powered tools offer another option: start with the listing photos you already have, upload them, select a style, apply automated camera movements, add your branding and audio, review the finished result, and export it for the platforms where you market your listings.
The biggest advantage isn't necessarily replacing professional video production. It's giving agents, photographers, and real estate teams another way to create video content when a full video shoot isn't practical or necessary.
If you're ready to see how this type of workflow could fit your listings, PhotoAIVideo's pricing page outlines the available plans and options so you can compare them with your expected production needs.


Compact, ready to go anywhere
Interchangeable lens that’s upgradeable
Dual 1-inch sensors for improved clarity and low light performance
Dynamic range and 6K 360° capture
360° photo resolution at 21MP

8K 360° video recording for ultra-detailed visuals.
4K single-lens mode for traditional wide-angle shots.
Invisible selfie stick effect for drone-like perspectives.
2.5-inch touchscreen with Gorilla Glass protection.
Waterproof up to 33ft for underwater shooting.

360° photo resolution in 23MP
Slim design at 24 mm thick
Built-in image stabilization for smooth video capture.
Internal 19GB storage for photo and video storage.
Wireless connectivity for remote control and sharing.

60MP 360° still images for high-resolution photography.
5.7K 360° video recording at 30fps.
2.25-inch touchscreen for intuitive control.
USB Type-C port for fast charging and data transfer.
MicroSD card slot for expandable storage.
.png)

.png)

Try it free. No credit card required. Instant set-up.






.svg)


.svg)