


.png)

Dial in the Perfect HDR Real Estate Camera Settings for Bright, Natural Interiors
When it comes to shooting homes, lighting is everything. Bright windows, dark corners, mixed indoor lighting — real estate scenes are full of extreme contrast. That’s exactly why photographers rely on HDR real estate camera settings to capture balanced, professional images.
If your photos look too dark, blown out, noisy, or flat, your camera settings are likely the issue — not your editing.
In this guide, we’ll break down the best HDR real estate camera settings, explain why each setting matters, and show how to capture clean bracketed exposures that are easy to merge later.
If you’re new to HDR merging, make sure to also review the complete HDR merge workflow in this guide: HDR Merge: Complete Guide for Real Estate Photographers — it pairs perfectly with the settings below. 🚀
HDR editing can only work with the data you capture. If your original exposures are blurry, noisy, or inconsistent, no software can fully fix that.
Good HDR real estate camera settings help you:
✔ Preserve window detail
✔ Capture clean shadow information
✔ Reduce noise
✔ Avoid color shifts
✔ Speed up your editing workflow
Think of camera settings as the foundation. Strong capture = easier HDR merging later.
Your job is to create images that look:
✨ Bright but natural
🪟 Detailed in windows
🏠 Evenly lit throughout the room
🎨 True to real-life colors
To do that, we use exposure bracketing with consistent camera settings. Only one thing should change between shots: brightness.
Let’s break down the exact HDR real estate camera settings you should use.

Automatic modes constantly adjust exposure, which ruins bracket consistency.
Manual mode gives you control and keeps your exposures aligned.
With manual mode, you lock in:
• Aperture
• ISO
• White balance
Then you change only shutter speed for each bracket.
This consistency is essential for clean HDR merging.
Aperture controls depth of field and sharpness.
For interiors, you want everything in focus — from furniture to walls to windows.
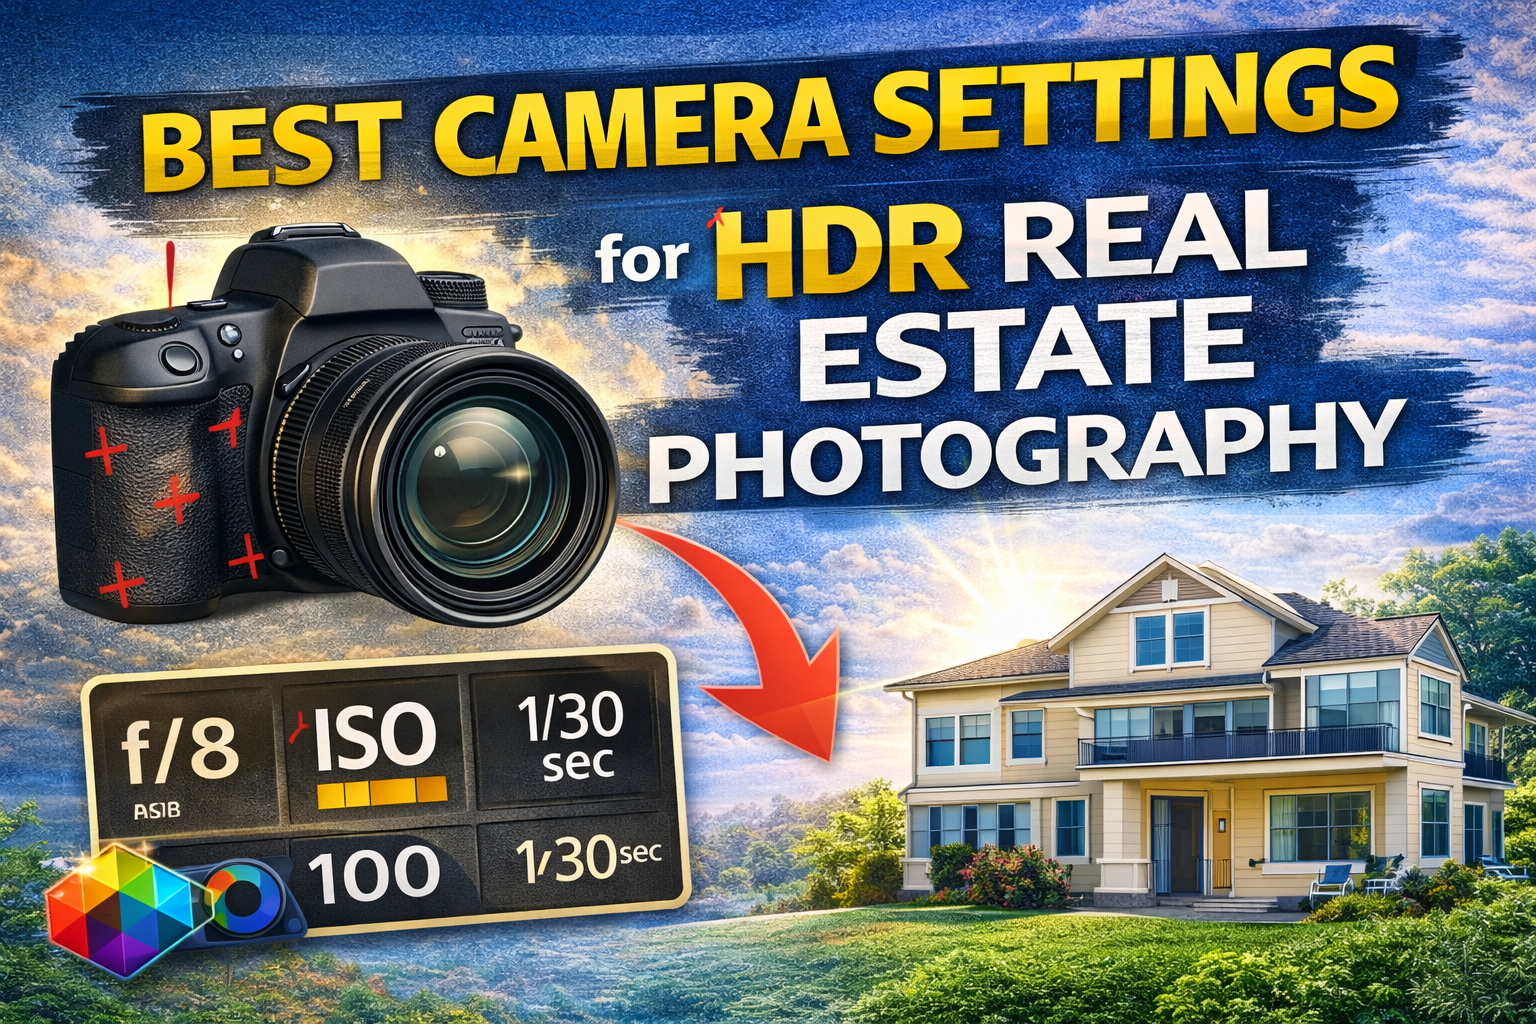
Best range for HDR real estate camera settings:
👉 f/7.1 to f/9
Why this works:
✔ Sharp images across the frame
✔ Enough depth of field for rooms
✔ Avoids softness from shooting too wide
✔ Avoids diffraction from shooting too narrow
This range is the professional standard for interior photography.
ISO controls image noise.
Higher ISO = more grain, especially in shadow areas — which HDR brightens later, making noise worse.
Ideal ISO for HDR real estate photography:
👉 ISO 100 (best)
👉 ISO 200–400 if needed
Avoid:
❌ ISO 800+ (too noisy for interiors)
Low ISO ensures clean shadow detail, which is critical when merging exposures.
In HDR bracketing, shutter speed controls exposure differences.
For each scene, you’ll take multiple shots at different shutter speeds:
📸 Fast shutter = darker exposure (for windows)
📸 Medium shutter = balanced exposure
📸 Slow shutter = brighter exposure (for shadows)
Typical bracketing range:
-2 stops, 0, +2 stops
Example:
• 1/125 sec (dark)
• 1/30 sec (normal)
• 1/8 sec (bright)
These varying shutter speeds are the core of effective HDR real estate camera settings.
HDR requires multiple exposures of the exact same scene.
Handheld shooting causes misalignment and blur.
A tripod ensures:
✔ Sharp images
✔ Perfect alignment
✔ Cleaner HDR merges
✔ Less editing time
Every professional using HDR real estate camera settings shoots on a tripod.
Auto white balance shifts between exposures, causing color inconsistency.
Instead:
👉 Set a fixed white balance
👉 Use Daylight or a custom Kelvin value
This keeps colors consistent across all bracketed photos.
You’ll fine-tune later, but starting consistent saves editing headaches.
Focus once, then don’t touch it.
Options:
✔ Use single-point autofocus, then switch to manual
✔ Or use manual focus entirely
This prevents focus shifts between bracketed shots, which can cause soft or mismatched merges.
RAW files store more detail in highlights and shadows.
This gives your HDR merge more usable information.
Never shoot HDR real estate in JPEG — you lose critical dynamic range.
RAW is essential for professional HDR real estate camera settings.
Standard setups:
• 3 brackets → mild contrast
• 5 brackets → typical interiors
• 7+ brackets → extreme window light
More contrast = more exposures.
The better your bracketing, the easier your merge will be in post-production.
When mounted on a tripod, stabilization can actually introduce blur.
Disable:
• Lens IS
• Body stabilization
This keeps images sharper for HDR merging.
Creates inconsistent exposures and color shifts.
Leads to noisy shadows after HDR merge.
Shallow depth of field = soft rooms.
Causes ghosting and misalignment.
Fixing these mistakes instantly improves your results.
Proper HDR real estate camera settings lead to:
✔ Cleaner window pulls
✔ Less noise in shadows
✔ Fewer halos
✔ Faster merging
✔ More natural-looking images
When your capture is strong, editing becomes easy — especially when following a complete HDR merge workflow like the one outlined here: HDR Merge: Complete Guide for Real Estate Photographers.
Use more brackets to handle window contrast.
Standard 3–5 brackets work well.
Pay extra attention to white balance consistency.
Use tripod and low ISO to avoid noise in darker spaces.
These core HDR real estate camera settings stay the same — you just adjust bracket count.
Great HDR images start in-camera, not in editing.
By using the right HDR real estate camera settings, you capture:
🌤 Full highlight detail
🌑 Clean shadow data
🎨 Accurate colors
📐 Sharp, aligned exposures
That gives you maximum flexibility during HDR merging and results in natural, professional property photos.
If you want better HDR real estate photos, stop looking for editing shortcuts and start with your camera.
Use these HDR real estate camera settings consistently:
✔ Manual mode
✔ f/7.1–f/9 aperture
✔ ISO 100–400
✔ Tripod
✔ Bracketed shutter speeds
✔ Fixed white balance
✔ RAW format
Dial these in, and your HDR images will look cleaner, brighter, and more professional — before you even touch editing software.
Nail your capture, and HDR becomes simple. 🚀📷🏡

Compact, ready to go anywhere
Interchangeable lens that’s upgradeable
Dual 1-inch sensors for improved clarity and low light performance
Dynamic range and 6K 360° capture
360° photo resolution at 21MP

8K 360° video recording for ultra-detailed visuals.
4K single-lens mode for traditional wide-angle shots.
Invisible selfie stick effect for drone-like perspectives.
2.5-inch touchscreen with Gorilla Glass protection.
Waterproof up to 33ft for underwater shooting.

360° photo resolution in 23MP
Slim design at 24 mm thick
Built-in image stabilization for smooth video capture.
Internal 19GB storage for photo and video storage.
Wireless connectivity for remote control and sharing.

60MP 360° still images for high-resolution photography.
5.7K 360° video recording at 30fps.
2.25-inch touchscreen for intuitive control.
USB Type-C port for fast charging and data transfer.
MicroSD card slot for expandable storage.
.png)
.png)

Try it free. No credit card required. Instant set-up.


