


.png)


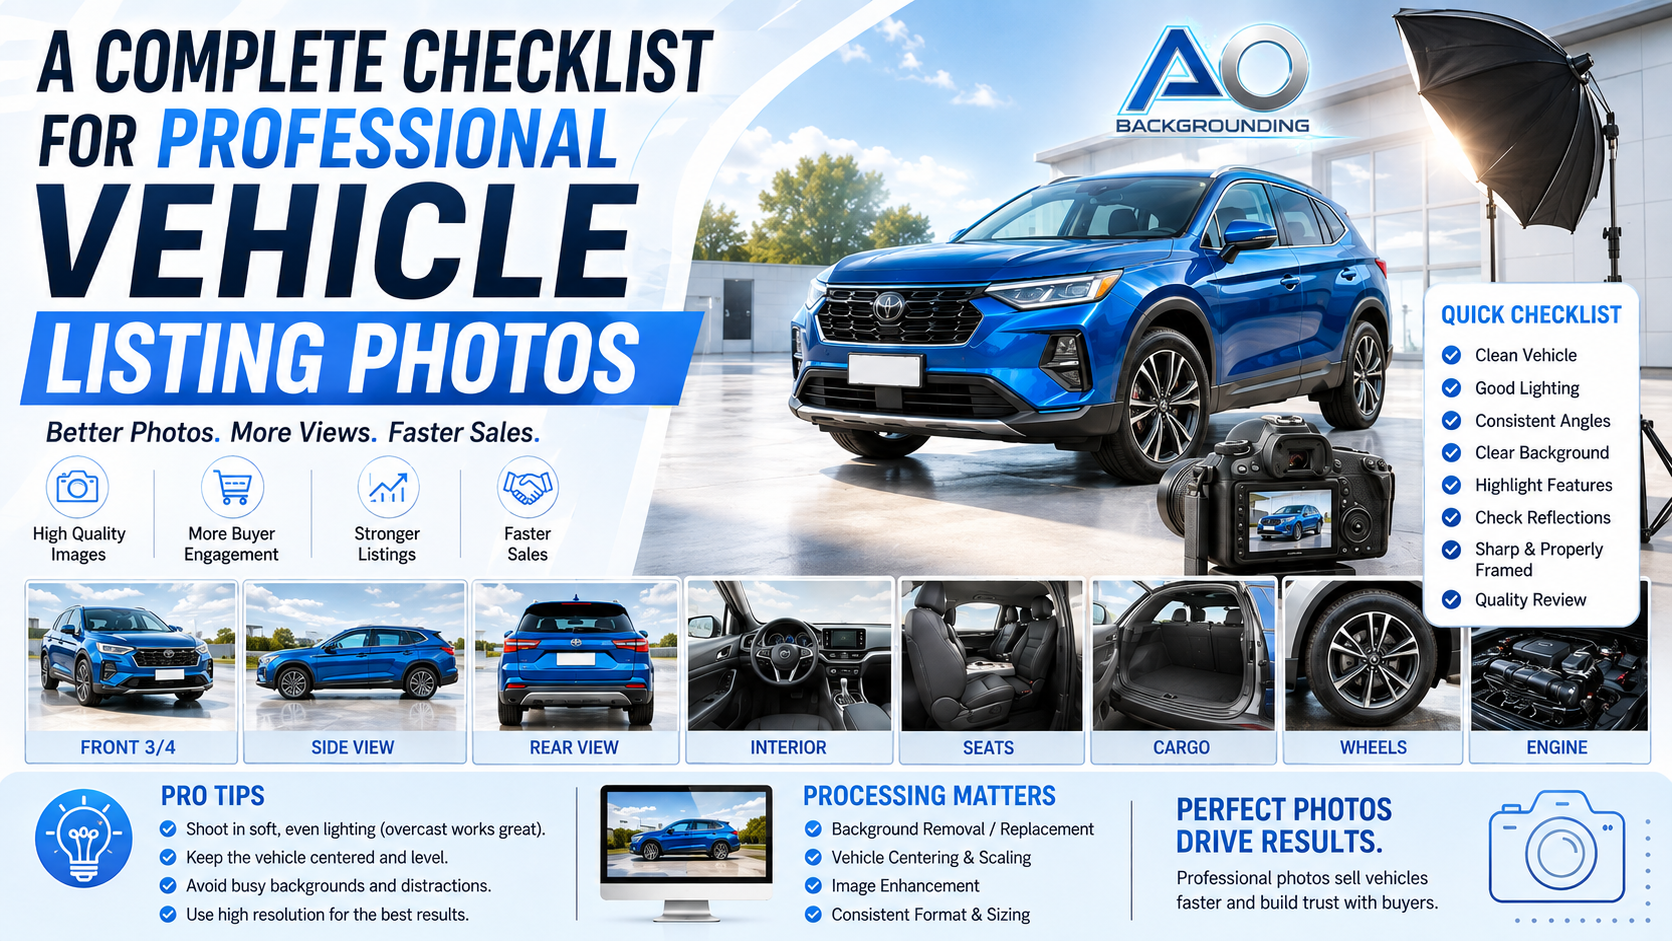
Vehicle photos are often the first thing a shopper notices before reading the description, checking mileage, comparing features, or contacting a dealership.
That makes vehicle photography an important part of the merchandising process.
Professional-looking images can make inventory easier to browse, create a more consistent dealership brand, and help shoppers understand what they are considering before they ever visit the lot.
The challenge is consistency.
Vehicles may be photographed by different employees, at different locations, under changing lighting conditions, and with different phones or cameras. Without a repeatable process, one listing may look polished while the next looks rushed.
A clear photography standard helps solve that problem.
Below are some of the most important vehicle listing photo requirements dealerships, marketplaces, and automotive platforms should consider when building a professional inventory photography workflow.
The photography process should begin before the camera is turned on.
A vehicle should ideally be washed, dried, vacuumed, and cleared of unnecessary items before photos are taken. Dealer paperwork, service tags, trash, personal belongings, and clutter can quickly make an otherwise strong listing look unfinished.
Before capturing the first image, check a few basic details:
A short walk-around before photography can prevent an entire set of images from needing to be retaken.
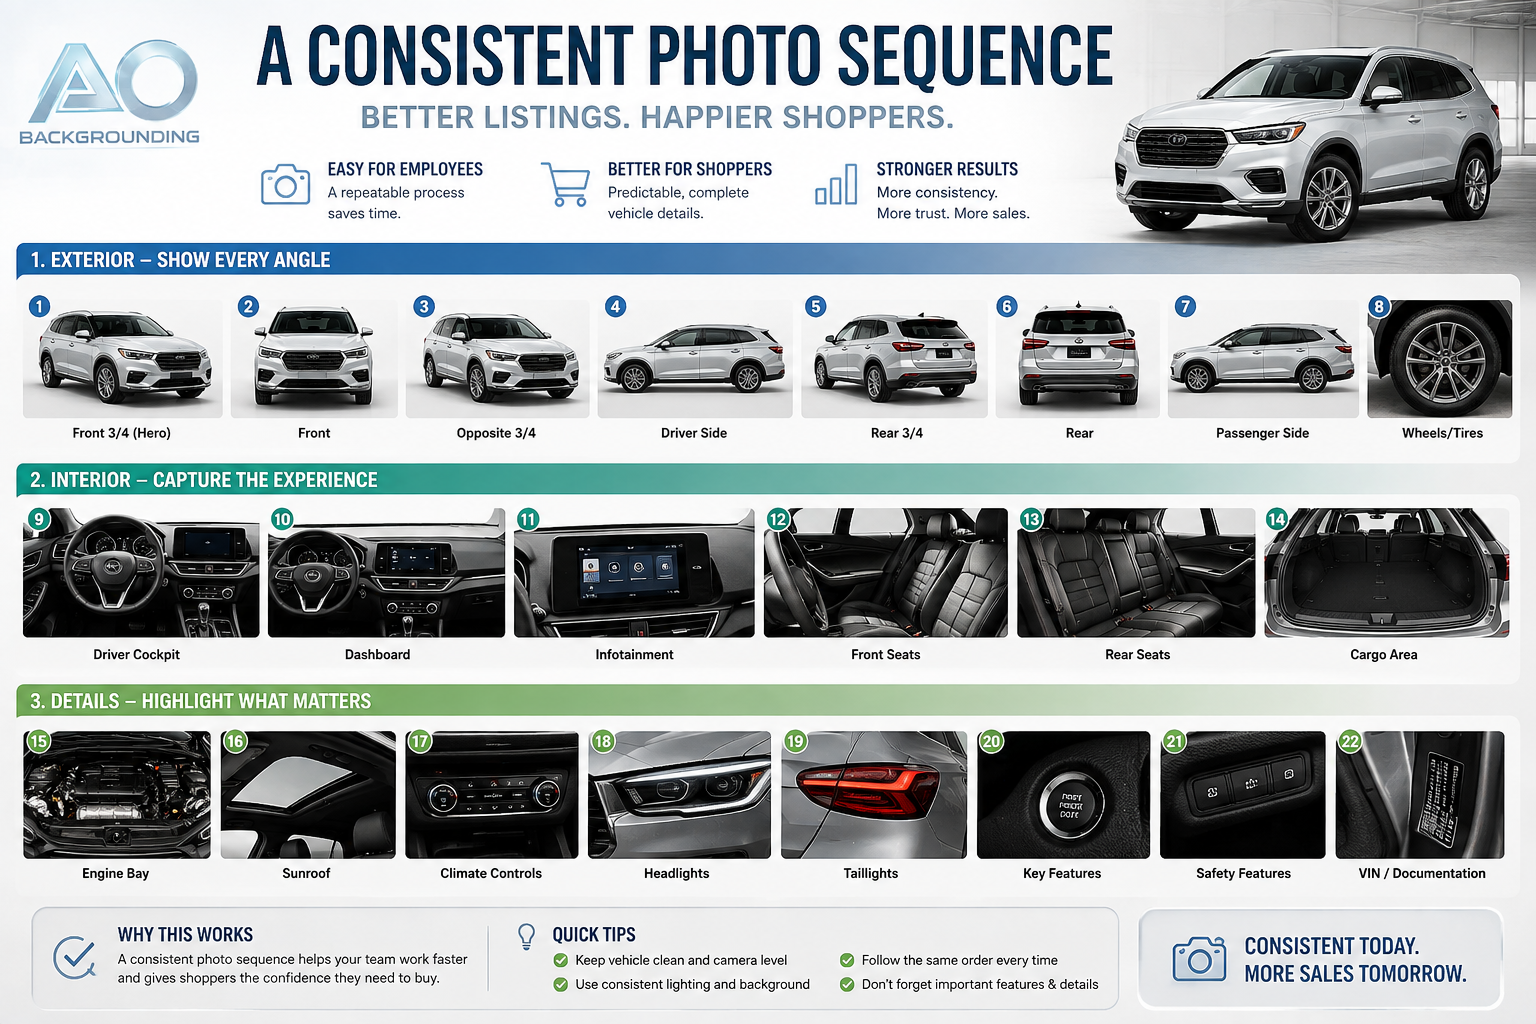
One of the most important vehicle listing photo requirements is consistency from one vehicle to the next.
A typical photo sequence may begin with a front three-quarter hero image, followed by additional exterior angles. From there, the photographer can move inside the vehicle to capture the dashboard, seats, cargo area, infotainment system, and important features.
The exact sequence can vary by dealership, but the same basic order should be repeated across inventory.
This makes the photography process easier for employees and gives shoppers a more predictable browsing experience.
The primary image deserves special attention because it may appear across inventory search pages, vehicle detail pages, marketplaces, paid advertising, and social media.
A front three-quarter angle is commonly used because it shows the front styling, side profile, wheels, and overall stance of the vehicle in one frame.
The vehicle should be fully visible and large enough to recognize immediately.
Leave enough space around the mirrors, roofline, bumpers, and tires so the vehicle does not feel cramped inside the image.
The objective is a clear, professional representation of the vehicle rather than an overly dramatic angle.
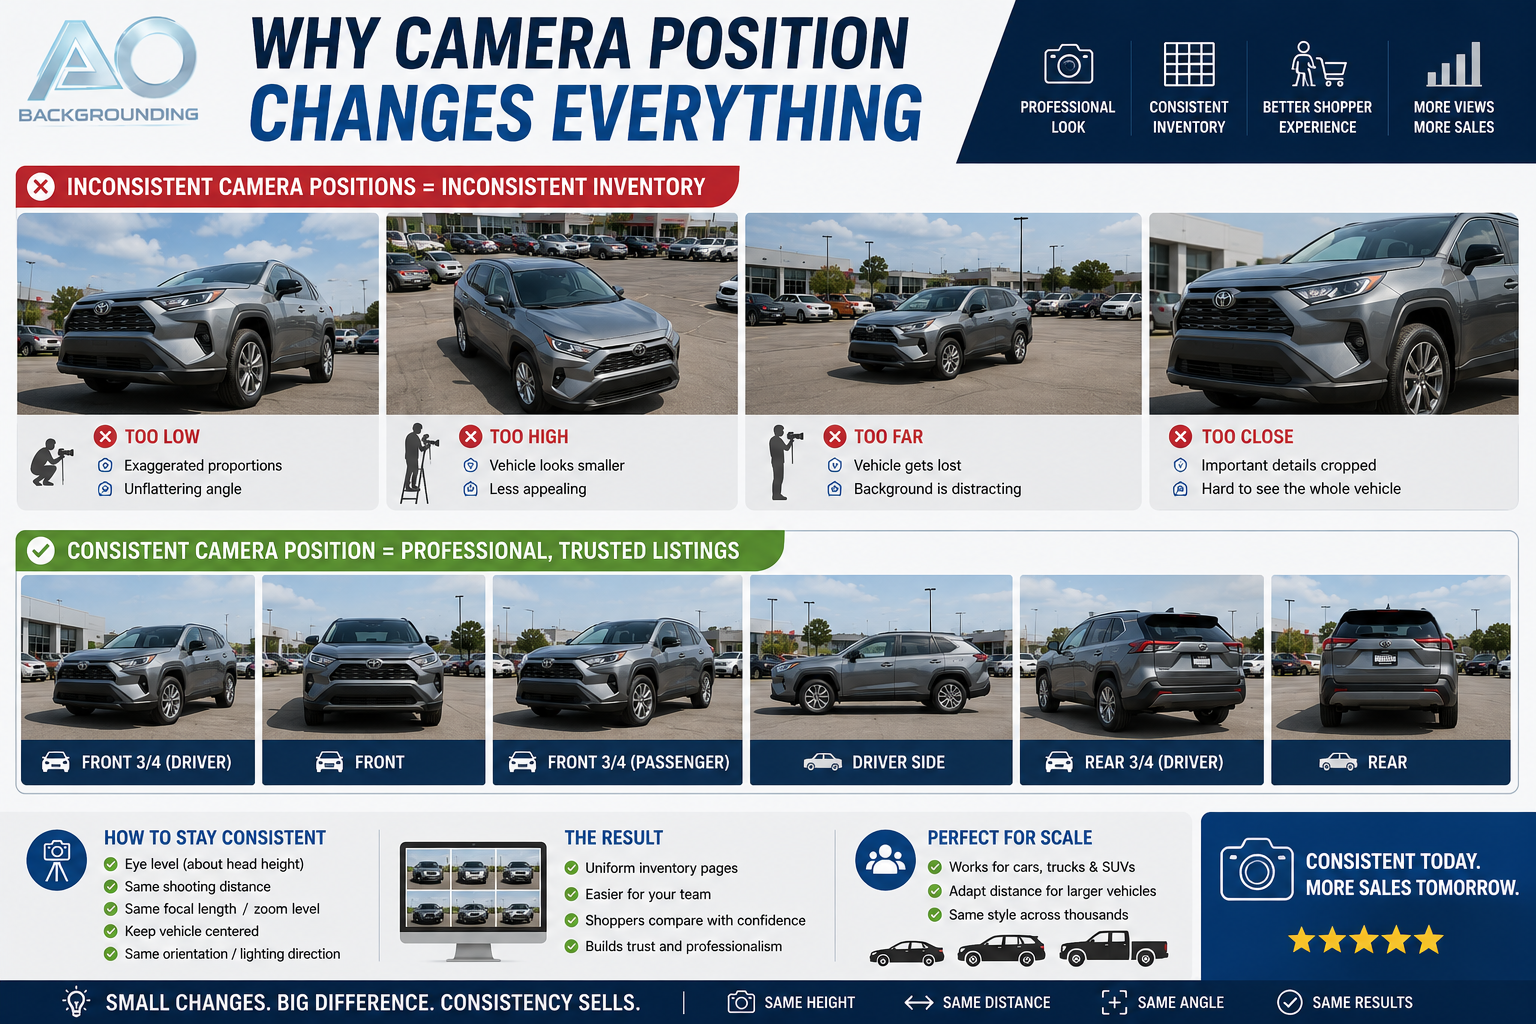
Small changes in camera position can create large visual differences across an inventory page.
If one employee photographs from eye level while another crouches or stands much farther away, the vehicles may look inconsistent when displayed next to each other.
Choose an approximate camera height and shooting distance that can be repeated.
Larger trucks and SUVs may require some adjustment, but the overall style should remain recognizable.
This becomes especially important for dealerships and marketplaces managing hundreds or thousands of listings.
The vehicle should remain the primary focus of the image.
Dealership lots naturally contain other vehicles, signs, employees, buildings, light poles, service equipment, and traffic. These elements can create distracting backgrounds.
Whenever possible, choose a relatively clean photography area with a predictable shooting direction.
It does not necessarily require a dedicated photo studio. Even a simple section of pavement with fewer distractions can improve the appearance of the entire inventory.
For dealerships that cannot fully control the environment, image processing can provide another option.
A modern processing workflow may help with:
Dealerships building an automated workflow can review available Processing Options to decide which transformations should be applied to different inventory programs.
The goal is not necessarily to make every image identical. The goal is to create a consistent visual standard.
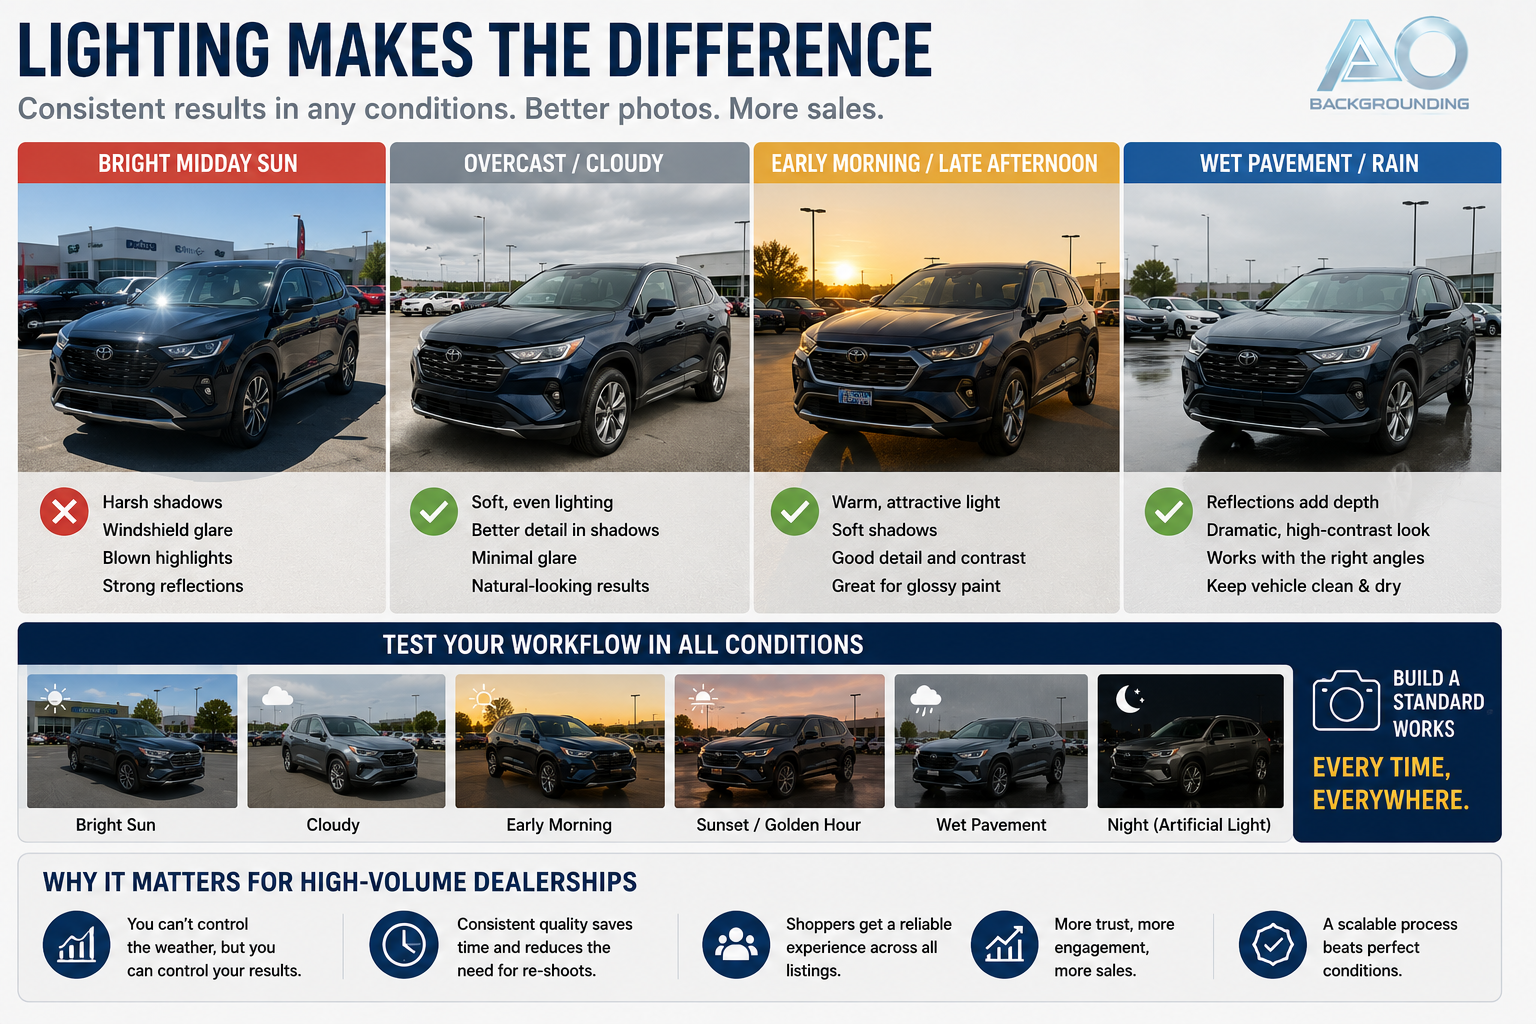
Lighting has a major impact on vehicle photography.
Bright midday sunlight can create harsh shadows, windshield glare, blown highlights, and strong reflections across glossy paint.
Overcast conditions often provide softer and more even lighting. Early morning and late afternoon can also work well depending on the orientation of the photography area.
High-volume dealerships cannot always wait for perfect weather, however.
A strong photography workflow should produce acceptable results under several conditions.
Test the process during bright sunlight, cloudy weather, wet pavement, and different times of day.
A photography standard that only works under perfect conditions will be difficult to scale.
Vehicles contain many reflective surfaces, including paint, glass, chrome, mirrors, glossy trim, and digital displays.
These surfaces can easily reflect the photographer, nearby cars, dealership buildings, or equipment.
This is especially noticeable on black and dark-colored vehicles.
Before taking the photo, look at the vehicle itself rather than only the camera screen. A small change in position can often remove a distracting reflection from a door panel, window, or dashboard.
Reflections do not always need to disappear completely, but they should not distract from the vehicle.
Professional vehicle photography should help answer shopper questions.
If the vehicle has an important feature, photograph it.
This may include a panoramic roof, digital dashboard, navigation system, heated seats, premium audio system, third-row seating, trailer equipment, or upgraded interior materials.
A few useful feature photos can communicate far more than a long list of specifications.
The photo gallery should help the shopper understand what makes that particular vehicle different.
Used-vehicle photography should also provide an accurate representation of condition.
If a vehicle has visible damage or wear that a buyer should reasonably know about, include a clear photograph.
This may include scratches, dents, wheel damage, paint chips, windshield issues, or interior wear.
Condition photography can be particularly important for remote buyers, auctions, wholesale inventory, recon departments, and vehicle inspection workflows.
The purpose is not to exaggerate an imperfection.
It is to document it clearly.
For many used-vehicle programs, transparent condition photography is an important part of professional vehicle listing photo requirements.
The vehicle should occupy enough of the image to remain easy to evaluate, especially on mobile devices.
Too much empty space can make the vehicle appear tiny when the image is displayed as a thumbnail.
At the same time, cropping too tightly can create problems when the image needs to be converted into other formats.
Leave enough room around the roof, mirrors, tires, and bumpers to give the image flexibility.
This becomes especially useful when one master photograph is later converted into landscape, square, vertical, or thumbnail formats.
Start with the best practical image quality available.
Avoid heavily compressing the original photograph before it reaches the dealership's inventory or processing platform.
A strong master image can later be resized and optimized for websites, mobile devices, marketplaces, paid advertising, and social media.
It is much easier to create smaller optimized images from a high-quality original than to recover missing detail from a low-resolution file.
High-quality source images also give automated processing systems more information to work with.
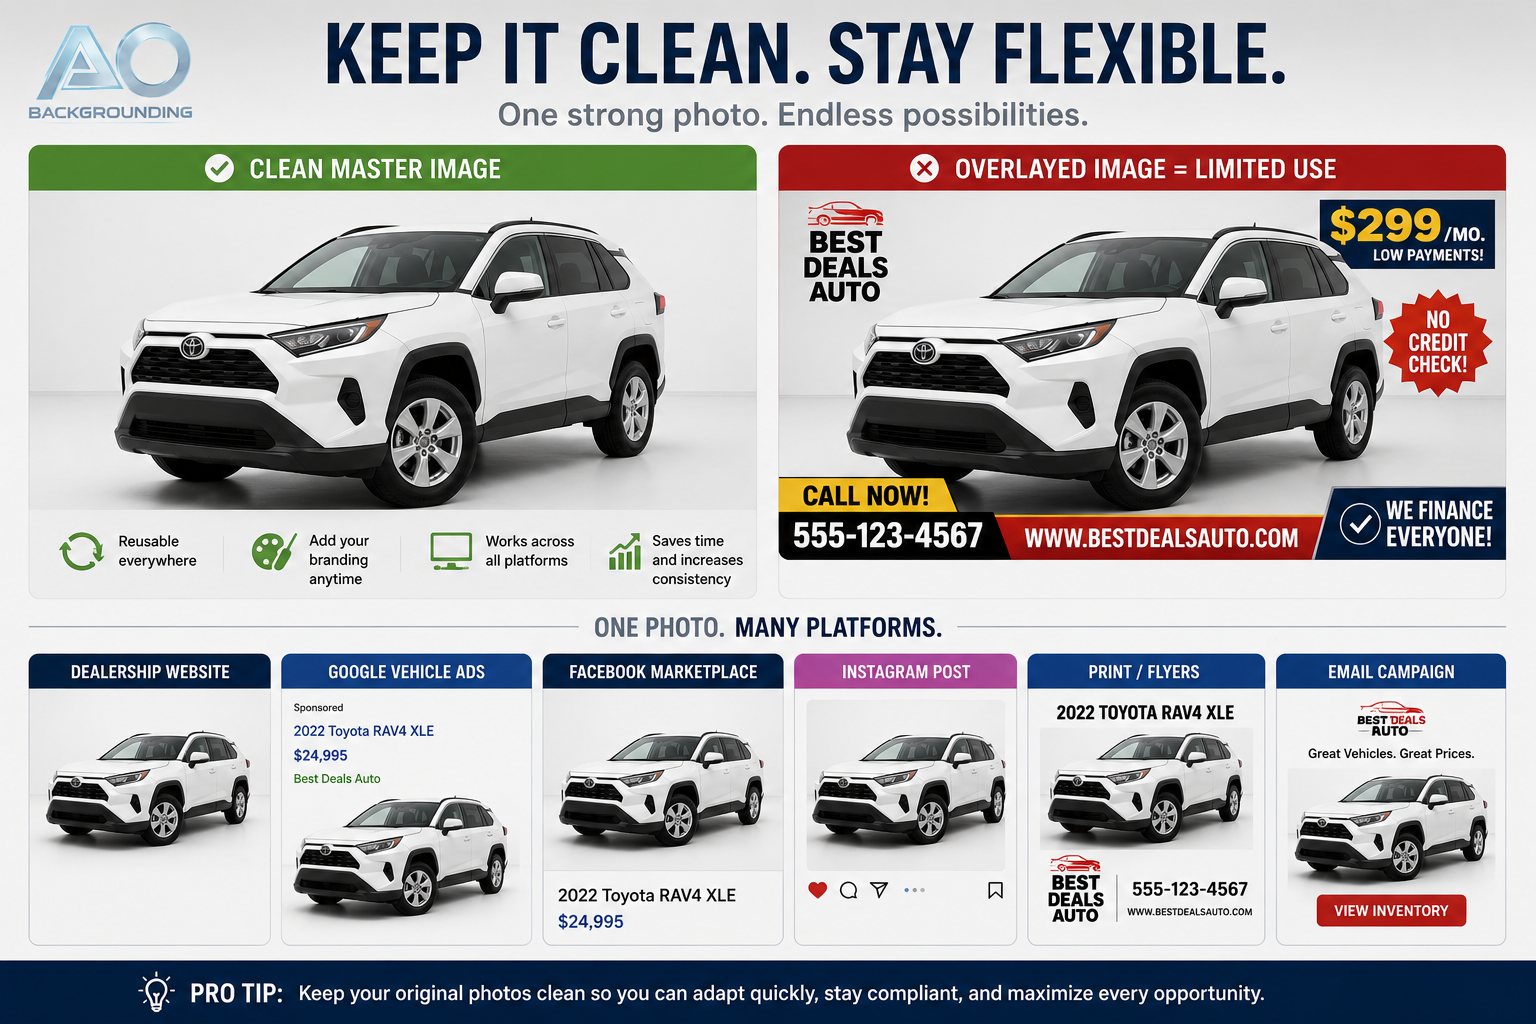
The original vehicle image should usually remain clean.
Large logos, financing messages, prices, phone numbers, website addresses, and promotional banners can reduce the flexibility of the photo.
Different marketplaces and advertising channels may have different requirements for promotional content.
Keeping a clean master allows the dealership to create separate versions when branding or promotional graphics are needed.
This makes one strong photo usable across more platforms.
A vehicle image may be displayed differently depending on where it appears.
A dealership website may use a landscape layout while a social platform or advertising placement may favor square or vertical images.
Instead of photographing the vehicle separately for every format, capture a strong master image and create additional versions afterward.
Image processing can help maintain consistent vehicle size and positioning as the canvas changes.
This creates a more efficient workflow while helping inventory look consistent across channels.
Even a well-designed photography process will occasionally produce images that need attention.
A dealership should define what qualifies as an acceptable image before inventory volume increases.
Photos may need review when the vehicle is out of focus, incorrectly framed, severely affected by glare, tilted, partially cropped, or obstructed.
Missing angles, incorrect vehicles, and obvious processing errors should also trigger review.
Some quality checks can be automated while others still require human judgment.
The important part is establishing the standard before problems appear at scale.
Do not build a photography standard using only perfect example vehicles.
Real dealership inventory varies dramatically.
Black vehicles can create reflection problems. White vehicles can disappear into bright backgrounds. Large trucks may require different framing than compact sedans.
Wet pavement, roof racks, changing weather, harsh sunlight, shadows, crowded lots, and multiple photographers can all affect the result.
A strong workflow should be tested against difficult real-world photography before it is deployed across a large inventory program.
That is how dealerships determine whether their process is truly scalable.
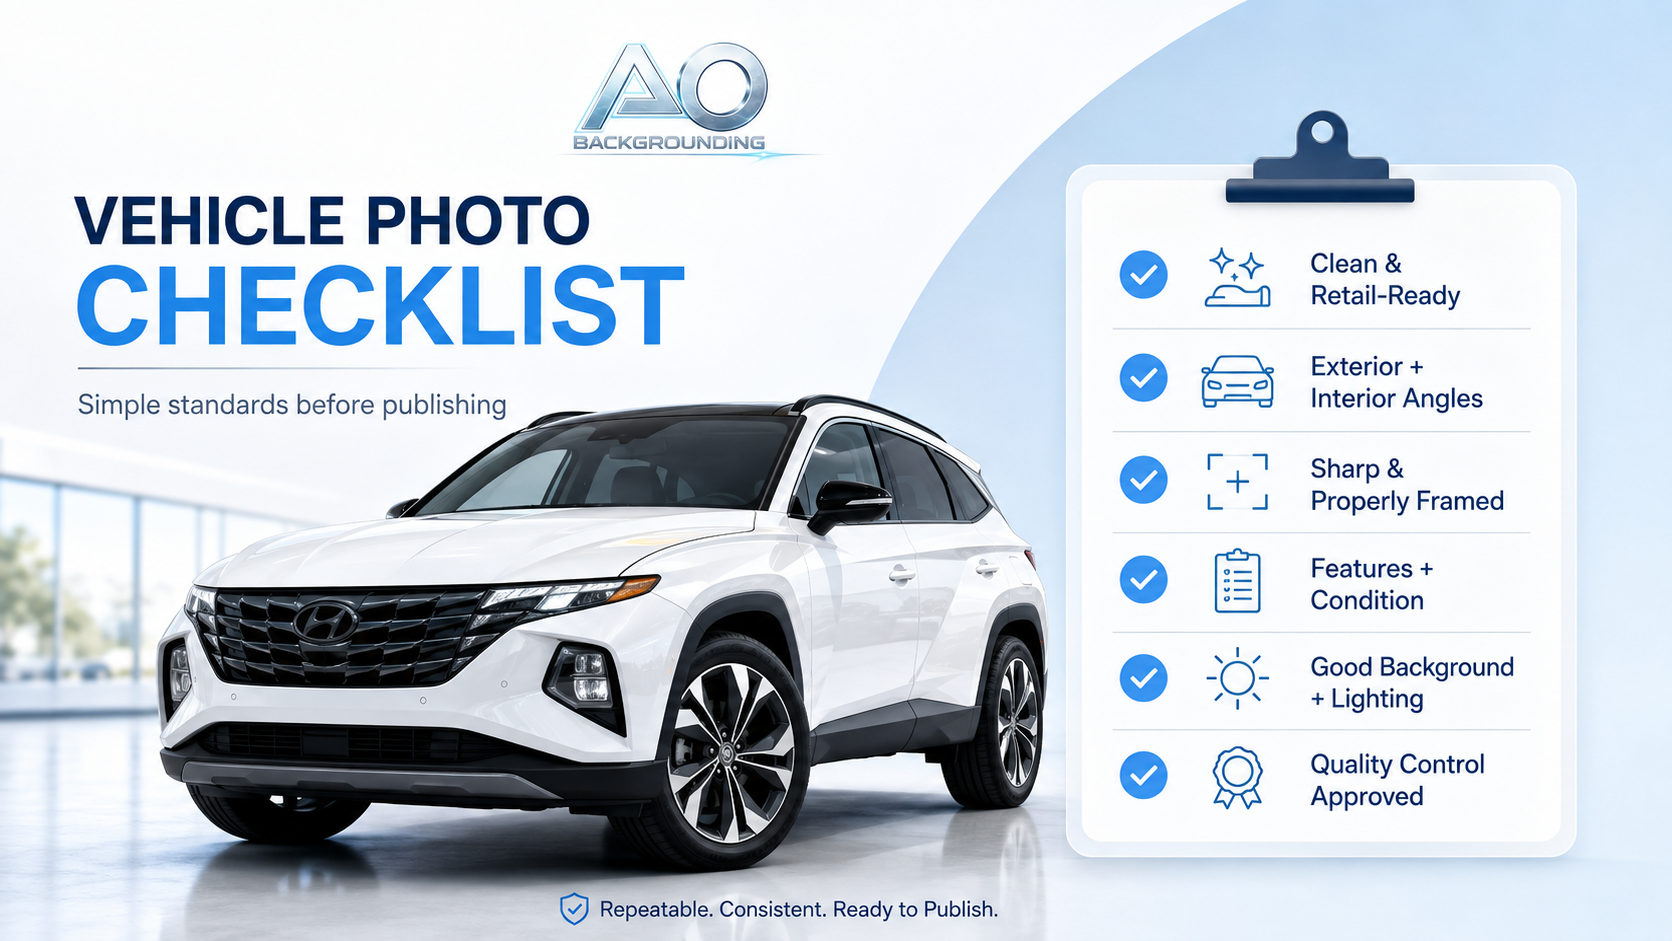
Before publishing a vehicle, confirm that the most important photography standards have been met.
The checklist does not need to be complicated.
Its purpose is to create a repeatable standard that every photographer and dealership location can follow.
Professional vehicle photography does not require every dealership to build an expensive studio.
What matters more is establishing a repeatable process.
Define which angles are required, how large the vehicle should appear, what backgrounds are acceptable, what image quality is expected, and what should trigger quality review.
Then determine which tasks should happen during photography and which can happen automatically after upload.
Modern image-processing systems can help standardize backgrounds, vehicle placement, canvas size, and output formats without requiring employees to manually edit every photograph.
This becomes increasingly valuable for dealer groups, marketplaces, auctions, and automotive software platforms processing thousands of inventory images.
The photographer can focus on capturing a strong original image while the processing workflow helps create a consistent retail-ready asset.
The best vehicle listing photo requirements are not simply technical camera specifications.
They create a repeatable merchandising standard.
Clean vehicles, consistent angles, strong hero images, appropriate lighting, useful feature photography, accurate condition documentation, high-quality master images, and reliable quality control all contribute to better vehicle listings.
Once those fundamentals are established, automation can handle many repetitive post-production tasks such as background standardization, vehicle centering, resizing, scaling, and channel-specific formatting.
The result is a more consistent inventory experience without requiring every image to be manually edited.
If your dealership, marketplace, or automotive platform processes large volumes of inventory photography, review your current workflow and identify where greater consistency can be introduced.
Explore your available Processing Options and build a vehicle photography system designed to produce professional, retail-ready images at scale.


Compact, ready to go anywhere
Interchangeable lens that’s upgradeable
Dual 1-inch sensors for improved clarity and low light performance
Dynamic range and 6K 360° capture
360° photo resolution at 21MP

8K 360° video recording for ultra-detailed visuals.
4K single-lens mode for traditional wide-angle shots.
Invisible selfie stick effect for drone-like perspectives.
2.5-inch touchscreen with Gorilla Glass protection.
Waterproof up to 33ft for underwater shooting.

360° photo resolution in 23MP
Slim design at 24 mm thick
Built-in image stabilization for smooth video capture.
Internal 19GB storage for photo and video storage.
Wireless connectivity for remote control and sharing.

60MP 360° still images for high-resolution photography.
5.7K 360° video recording at 30fps.
2.25-inch touchscreen for intuitive control.
USB Type-C port for fast charging and data transfer.
MicroSD card slot for expandable storage.
.png)

.png)

Try it free. No credit card required. Instant set-up.






.svg)


.svg)