How to Add Interior Street View Tours to Your Google Business Profile

Cloudpano
October 17, 2025
5 min read
Share this post

🏢 How to Add Interior Street View Tours to Your Google Business Profile

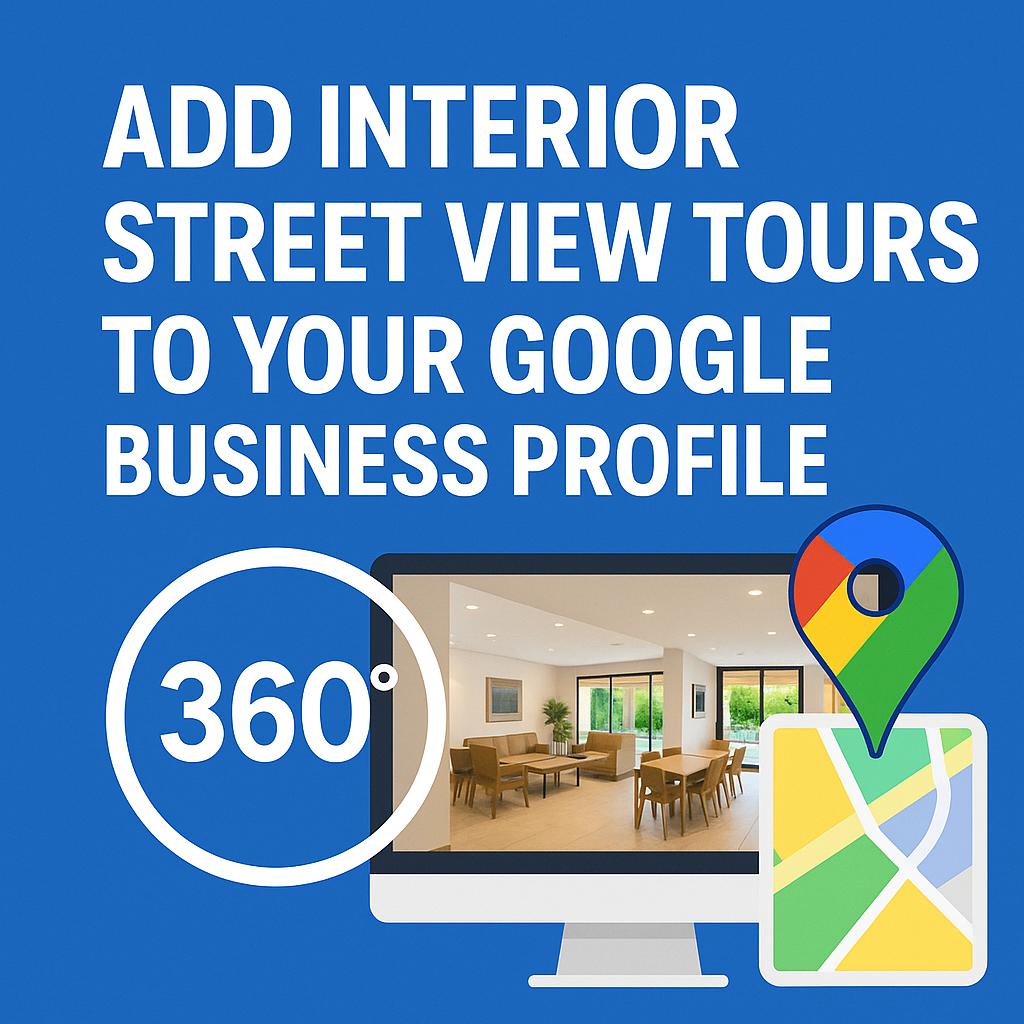
When people search for your business on Google, what they see first can make or break their decision to visit. Adding an interior Street View tour to your Google Business Profile helps you stand out instantly — showing customers exactly what to expect inside your store, restaurant, office, or venue. 🌎📸

With Google’s Street View technology and virtual tour software like CloudPano, you can easily publish professional 360° tours right to your profile. In this step-by-step guide, you’ll learn how to capture your business interior, upload your photos, connect your software, and publish an immersive Street View experience directly onto Google Maps. 🚀🌎 Launch your virtual tour agency and get paid to put businesses on Google Street View! A real estate video app makes it easy for agents to turn listing photos into high-quality videos that boost MLS visibility.

🌟 Why Add an Interior Street View Tour?

Your Google Business Profile is often the first impression potential customers have. When you enhance it with a virtual tour, you:

  • 📈 Boost visibility — listings with photos and tours rank higher in local searches.
  • 💬 Increase trust — customers love transparency and seeing your actual space.
  • 👣 Drive more visits — virtual tours can double interest in your business.
  • 🏆 Stand out from competitors — most listings still rely only on static photos.

According to Google data, listings with virtual tours are 94% more likely to be viewed and twice as likely to generate in-person visits.

🧰 What You’ll Need

Before you can publish your interior Street View tour, gather these essentials:

  1. A 360° camera (like Ricoh Theta Z1, Insta360 X3, or GoPro Max).
  2. A tripod or monopod for stability.
  3. Virtual tour software (CloudPano or equivalent).
  4. A verified Google Business Profile (your listing must be active).

Once these are ready, you can start capturing your interior scenes.

Read: Google Street View & Maps: The Ultimate Marketing Strategy for Real Estate Agents

📸 Step 1: Capture 360° Photos of Your Interior

The quality of your imagery determines how professional your virtual tour looks. Spend a bit of time getting your shots right.

🔦 Capture Tips for the Best Results

  • Shoot at eye level (5 feet / 1.5 meters) for a natural perspective.
  • Use HDR mode to balance light from windows and interiors.
  • Avoid showing yourself or reflections in mirrors or glass.
  • Capture each key space: entrance, main area, hallways, rooms, and any special features.
  • Keep a consistent distance between each photo point for smoother navigation.

💡 Pro Tip: Capture extra angles around corners or transition areas — Google connects these better for a seamless flow between points.

🖼️ Step 2: Upload Your Photos into Virtual Tour Software

Once your photos are ready, it’s time to upload them into a professional tour builder.

CloudPano is the easiest option because it integrates directly with Google Maps and Street View.

  1. Log in to CloudPano.com.
  2. Click “Create New Tour.”
  3. Upload your 360° photos (JPG or RAW).
  4. Wait a few seconds for each photo to render in full 360° view.

Now you’ll see your images transformed into an immersive, clickable experience. 🎥

🔗 Step 3: Connect and Link Each Scene

Each photo in your virtual tour should connect naturally to the next.

Within your CloudPano dashboard:

  • Click on your first photo (typically your front entrance).
  • Add hotspots or navigation arrows pointing to the next photo.
  • Repeat this for all connected spaces — lobbies, rooms, hallways, etc.

You can preview your tour at any time by clicking “Play” to walk through your space as if you were a visitor.

🧭 Tip: Use CloudPano’s AI Auto-Link Tool to automatically connect nearby scenes using metadata and compass orientation. It saves tons of time.

🌐 Step 4: Connect Your Google Account

Before publishing to your Google Business Profile, your tour software must connect to your Google account.

Here’s how to do it in CloudPano:

  1. In your project, click “Google Street View Settings.”
  2. Select “Connect Google Account.”
  3. Log in with the Gmail associated with your Google Business Profile.
  4. Approve access permissions for “Publish to Street View.”

Once connected, you’ll be able to publish directly from CloudPano to your Google Maps and Business Profile — without needing to touch Google’s backend. 🧠✨

🏢 Step 5: Add Your Business Information

Google needs to know which business the imagery belongs to.

Fill in these fields under your Street View settings:

  • Business name (exactly as it appears on Google)
  • Address
  • Category (e.g., restaurant, gym, retail store)
  • Phone number (optional)

This ensures your 360° tour appears inside your Google Business Profile panel under “See Inside” — instead of just floating on Google Maps.

🗺️ Step 6: Publish to Google Street View

You’re now ready to go live! 🌍

  1. Double-check that all your 360° photos are aligned and connected.
  2. Click “Publish to Google Street View.”
  3. CloudPano will process your photos and automatically push them to Google Maps.

Within a few minutes to a few hours, your tour will appear on your Google Business Profile and on Google Maps when users drag the Street View icon over your location.

🎉 Congrats — your interior Street View tour is live for the world to explore!

🧭 Step 7: Embed and Share Your Tour

After your tour is live, you can promote it across all your marketing channels.

  • 🌐 Embed it on your website: Add the iframe code directly to your homepage or “About” page.
  • 📱 Share it on social media: Post a clickable link on Facebook, Instagram, or LinkedIn.
  • 📧 Include it in emails: Add your tour link to your signature or newsletters.

Sharing your virtual tour increases clicks and reinforces your Google authority — both of which help with local search visibility.

💡 Step 8: Optimize Your Google Business Profile

Once your tour is published, don’t stop there!

Google rewards active, optimized profiles. Combine your Street View tour with these tactics:

  • 🖼️ Upload high-quality cover and logo photos.
  • ✍️ Add an SEO-friendly business description.
  • 🕒 Keep hours and contact info updated.
  • 💬 Encourage satisfied customers to leave Google reviews.
  • 📢 Post weekly updates about events or offers.

The more signals your profile sends to Google, the higher it ranks — and your Street View tour plays a major role in engagement metrics.

⚙️ Step 9: Update Your Tour Regularly

If you remodel, change your layout, or add new products, update your tour!

Google loves fresh imagery — and regular updates tell customers that your business is active and evolving.

In CloudPano, simply:

  1. Replace or add new 360° photos.
  2. Adjust the navigation path.
  3. Click “Republish to Street View.”

It’s that simple. You don’t need to rebuild your entire tour from scratch.

📈 Step 10: Measure Results

Once your tour is published, Google will automatically track engagement metrics like:

  • Impressions (how many users view your listing)
  • Clicks to your website
  • Directions requests
  • Street View interactions

You can see these stats in your Google Business Dashboard under the “Performance” tab.

💡 Pair this with CloudPano’s analytics tools for a full view of user behavior — which areas customers explore most, and how long they stay.

Read: Turn Google Maps and Street View into a Profitable Side Hustle

🧠 Bonus: Use AI Tools to Supercharge Your Virtual Tours

You can go beyond basic Street View tours by using AI tools that enhance visuals and storytelling.

  • 🎬 PhotoAIVideo.com — Turn 360° photos into cinematic videos with narration and motion.
  • 🏡 Pictastic.ai — Add virtual staging or create branded property websites.
  • 🤖 LeadStack CRM — Automate follow-up messages when leads engage with your tours.

With these tools, your Street View tour becomes a complete marketing ecosystem — not just a static feature.

🧭 Common Mistakes to Avoid

Even though uploading is simple, many users make avoidable mistakes. Here’s what not to do:

  • ❌ Forgetting to connect your Google account properly.
  • ❌ Publishing low-quality, blurry, or misaligned images.
  • ❌ Uploading photos with visible tripods or reflections.
  • ❌ Skipping metadata like business name and address.
  • ❌ Leaving navigation points disconnected.

✅ Always preview your tour before publishing — it’s your brand’s digital first impression.

🌍 How This Helps Your SEO

Adding an interior Street View tour does more than look impressive — it helps your business appear in the Local 3-Pack (the top map listings on Google).

Here’s why it works:

  • Google’s algorithm prioritizes listings with rich media (photos + tours).
  • Increased engagement signals (clicks, views, time spent) boost ranking.
  • It strengthens your Google entity association — connecting your imagery, location, and website together.

In short: the more interactive your profile, the more visibility you gain. 🔍📊

🧩 The CloudPano Advantage

Why use CloudPano instead of Google’s Street View app?

Because CloudPano gives you:

  • 🧠 Automatic linking between scenes.
  • 🎨 Branding and logo overlays.
  • 🌐 Web hosting for standalone virtual tours.
  • 🚀 Direct one-click publishing to Google Street View.

You get the power of Google visibility plus the flexibility of a professional virtual tour platform.

🏁 Final Thoughts

Adding an interior Street View tour to your Google Business Profile is one of the smartest marketing moves you can make in 2025.

It boosts credibility, drives more traffic, and helps you rank higher in search — all while showing off your space in a visually stunning way.

With the right tools, you can go from capture to publish in less than an hour.

Your all-in-one virtual experience solution starts here.

Share this post
Cloudpano

Choose The Right 360° Camera

Insta360 ONE RS 1-Inch 360 Edition

  • Compact, ready to go anywhere

  • Interchangeable lens that’s upgradeable

  • Dual 1-inch sensors for improved clarity and low light performance

  • Dynamic range and 6K 360° capture

  • 360° photo resolution at 21MP

Learn More

Insta360 X4

  • 8K 360° video recording for ultra-detailed visuals.

  • 4K single-lens mode for traditional wide-angle shots.

  • Invisible selfie stick effect for drone-like perspectives.

  • 2.5-inch touchscreen with Gorilla Glass protection.

  • Waterproof up to 33ft for underwater shooting.

Learn More

Ricoh Theta Z1

  • 360° photo resolution in 23MP

  • Slim design at 24 mm thick

  • Built-in image stabilization for smooth video capture.

  • Internal 19GB storage for photo and video storage.

  • Wireless connectivity for remote control and sharing.

Learn More

Ricoh Theta X

  • 60MP 360° still images for high-resolution photography.

  • 5.7K 360° video recording at 30fps.

  • 2.25-inch touchscreen for intuitive control.

  • USB Type-C port for fast charging and data transfer.

  • MicroSD card slot for expandable storage.

Learn More
Property Marketing
Allows potential buyers to explore properties in detail from anywhere, enhancing the real estate marketing process.
Automotive Spins
Create an interactive virtual showroom and engage affluent digital buyers with live 360º video calls, all through the CloudPano mobile app for a complete automotive sales solution.
Interactive Floor Plans
Create 2D and 3D floor plans with measurements in 4 minutes or less, all from your phone. Download the Floor Plan Scanner app and get your first scan free.

360 Virtual Tours With CloudPano.com. Get Started Today.

Try it free. No credit card required. Instant set-up.

Try it free
Latest posts

See our other posts

Interviews, tips, guides, industry best practices, and news.

Drone Profit Secrets Review: Zach Calhoon’s Guide to Making Money with Drones

Drone Profit Secrets is a powerful, step-by-step drone entrepreneur guide created by Zach Calhoon to help pilots turn their flying skills into real income. This review breaks down the core lessons, including market opportunities, niche selection, pricing strategies, service packaging, and proven drone business growth strategies. You’ll learn how the book teaches a complete drone business blueprint—from landing your first client to scaling with automation and recurring revenue. Whether you're a beginner, side hustler, or established pilot, this book provides clear, actionable insight to build a profitable drone business with confidence.
Read post

Top Lessons from Drone Profit Secrets: Turn Your Drone Skills into Cash

This article breaks down the most valuable lessons from the Drone Profit Secrets book by Zach Calhoon, offering a practical and proven drone entrepreneur guide for anyone looking to turn drone skills into a profitable business. Readers learn how to choose profitable niches, price services correctly, market effectively, and scale using Zach’s drone business blueprint. The guide also explores essential drone business growth strategies, including client acquisition, branding, automation, and service expansion. Whether you're a beginner or seasoned pilot, this summary shows exactly how to turn aerial expertise into predictable revenue.
Read post

Drone Profit Secrets by Zach Calhoon: How to Start a Lucrative Drone Business

This article explores Drone Profit Secrets by Zach Calhoon—a complete drone entrepreneur guide that teaches readers how to start, grow, and scale a profitable drone business. It highlights key lessons from the book, including niche selection, pricing frameworks, equipment recommendations, and proven drone business growth strategies. The post explains how the drone business blueprint outlined in the book has helped countless entrepreneurs succeed in real estate, inspections, construction, and event photography. Readers are encouraged to apply these strategies to create long-term, sustainable income through aerial services.
Read post