


.png)


Getting the most out of your CoreLogic Symbility 360 camera can really change how you handle projects. It might seem a bit much at first, but with a few simple steps, you'll be uploading and sharing those immersive images like a pro. This guide is here to walk you through everything, from getting your images ready to sharing them with others. Let's make this easy and get you started!
Before you can start uploading those awesome 360 images, you'll need to get into CoreLogic Symbility. It's pretty straightforward, but let's walk through the steps to make sure everyone's on the same page. Think of it as getting the keys to the kingdom of claims!
First things first, you'll need your login credentials. Hopefully, you have these handy! Head to the CoreLogic Symbility login page. Enter your username and password. If you're having trouble, there's usually a "Forgot Password" link to reset it. Make sure you're using the correct URL – bookmarking it can save you time in the future. If you're still locked out, reach out to your company's IT support or CoreLogic Symbility's support team directly. They can help you get back on track. For those in the automotive industry, CloudPano Automotive offers similar streamlined access for managing virtual showrooms.
Getting into the system is the first hurdle. Once you're past the login screen, a whole world of image management opens up. It's like getting through the front door before you can explore the rest of the house.
Okay, you're in! Now what? The dashboard is your home base. It might look a little busy at first, but it's designed to give you a quick overview of your projects and recent activity. Here are some common areas you'll want to check out:
Take a few minutes to click around and get a feel for where everything is. The more familiar you are with the dashboard, the faster you'll be able to get your work done. It's all about making your workflow as smooth as possible.
Before you even think about hitting that upload button in CoreLogic Symbility, there's some groundwork to do with your 360 images. Trust me, a little preparation here saves a lot of headaches later. Getting these steps right means your images will look their best and upload without a hitch.
First things first, let's talk about image formats. CoreLogic Symbility, like most platforms, has specific requirements for the types of files it accepts. Usually, you're safe with JPG or PNG, but it's always a good idea to double-check the platform's guidelines. Sometimes, they might prefer one over the other, or have size limitations. Using the wrong format can lead to upload errors or, even worse, images that don't display correctly. Nobody wants that!
It's a good practice to standardize your image format across all your projects. This consistency helps streamline your workflow and reduces the chances of encountering unexpected compatibility issues when working with different platforms or sharing files with others.
Image quality is super important, especially with 360 images. You want people to be able to zoom in and see details without everything getting blurry. Make sure your images have a high enough resolution to capture all the necessary detail. A good rule of thumb is to aim for at least 4096x2048 pixels. Also, keep an eye on the file size. Huge files can take forever to upload and might even get rejected by CoreLogic Symbility. It's a balancing act, but well worth the effort. For real estate professionals, a best 360 camera for real estate can make a huge difference in image quality.
Here are some quick tips for optimizing:
Before you start uploading, it's a good idea to get your files organized. This means making sure you have the correct files and that you haven't accidentally selected any duplicates or incorrect images. I usually create a separate folder on my computer with just the 360 images I'm planning to use for a specific project. This makes it easier to find them when you're browsing through your files in Symbility. Also, double-check the file names to make sure they're descriptive enough for you to easily identify them later. This will save you a headache when you're trying to organize everything after they're uploaded.
Consider these organizational strategies:
Alright, so you've got your 360 images all prepped and ready to go. Now comes the moment of truth: getting them into CoreLogic Symbility. It's not as scary as it sounds, honest. Just a few clicks and you'll be good to go. We'll walk through it step-by-step, so you don't miss anything.
First things first, you gotta pick out the images you want to upload. Don't just drag and drop everything in sight! Make sure you're only selecting the correct files you intend to use. It's super easy to accidentally grab a duplicate or an old version, and nobody wants that mess. A good trick is to put all the images you plan to upload into one specific folder on your computer. That way, you can just select them all at once, or pick and choose from a curated list. It saves a lot of headaches later on, trust me.
Okay, you've got your images selected. Now, where do you actually click? CoreLogic Symbility usually has a pretty clear upload button or section. It might be labeled "Upload," "Add Media," or even have a little cloud icon with an arrow pointing up. Once you find it, click it! Then, you'll likely see a window pop up asking you to browse for your files. Navigate to that special folder you made, select your images, and hit "Open" or "Upload." The system will then start doing its thing. Depending on how many images you're uploading and their file size, this could take a few seconds or a few minutes. Just be patient. If you're looking to share your 360 photos, check out Cloudpano's guide.
It's always a good idea to double-check your internet connection before starting a big upload. A stable connection means fewer interruptions and a smoother process. Nobody wants to get halfway through an upload only for it to fail because the Wi-Fi decided to take a nap.
So, the progress bar is at 100%, and it looks like everything went through. But don't just close the window and walk away! It's really important to confirm that all your images actually made it. CoreLogic Symbility should give you some kind of confirmation message, like "Upload Complete" or a green checkmark. After that, take a quick look at the uploaded files within the platform.
If anything looks off, or if an image is missing, don't panic. Try uploading just that specific image again. If the problem keeps happening, it might be an issue with the image file itself, like a wrong format or a corrupted file. In that case, you might need to go back to your original image files and re-export them or check their properties.
Once you've got all your 360 images uploaded and organized in CoreLogic Symbility, the next logical step is to get them out there. What's the point of having awesome visuals if nobody can see them, right? Sharing these images is pretty straightforward, and CoreLogic Symbility gives you a few different ways to do it, depending on who you're sharing with and what their needs are.
Creating shareable links is often the easiest way to distribute your 360 images. It's like giving someone a direct key to view your content without them needing to log into anything or even have a CoreLogic Symbility account themselves. You can usually generate a unique link for a single image or even a whole gallery of images. This is super handy for quick shares, like sending a preview to a client or a colleague who just needs to take a look. It cuts down on friction and makes the viewing process as simple as clicking a button. Think of it as the digital equivalent of handing someone a printed photo, but way more interactive.
While those shareable links are great for quick access, sometimes you need a bit more formality or context. That's where sending images directly via email comes in. CoreLogic Symbility typically lets you embed these 360 images or their links right into an email. This means you can write a personalized message, explain what the images show, or even attach other relevant documents. It's a more tailored approach, especially when you're communicating with clients who might appreciate a more guided experience. It also ensures that all the information related to the images stays together in one communication thread, which can be a lifesaver for record-keeping.
In today's world, everything talks to everything else, or at least it should. CoreLogic Symbility often plays nice with other software you might already be using. This could mean direct integrations with project management tools, customer relationship management (CRM) systems, or even other specialized image-sharing platforms. When these systems are connected, it really streamlines your workflow. Imagine being able to automatically push your 360 images from CoreLogic Symbility directly into a client's project folder in your project management software. This kind of integration means:
It's all about making your life easier and ensuring your 360 images are seen by the right people, in the right place, at the right time. The goal is to reduce any hurdles that might prevent someone from viewing your important visual data. The more accessible your images are, the more useful they become for everyone involved in the process. Consider how virtual tour software can further enhance this accessibility.
Sometimes, the error message might seem a bit cryptic, but it's still the first place to look. Don't just click it away; take a moment to read what it says. It could save you a lot of time trying to figure things out.### Resolving Format Compatibility IssuesOne of the biggest headaches is when your image format isn't playing nice. CoreLogic Symbility has specific requirements, and if your images don't meet them, you're stuck. Usually, it's best to stick to JPG or PNG formats. If you're using something else, you might need to convert it. There are plenty of free online converters that can help. Also, double-check the resolution and file size limits. If your image is too big, try compressing it without losing too much quality. For those looking to streamline their operations, consider how a profitable virtual tour business can benefit from efficient image management.### Contacting Support for HelpSometimes, you've tried everything, and nothing seems to work. That's when it's time to call in the pros. CoreLogic Symbility has a support team for a reason. Don't be afraid to reach out to them. When you do, be prepared to give them as much information as possible. This includes:
Having trouble getting your files online? Don't worry, it happens to everyone! Our guide on fixing common upload problems is here to help. You'll find simple steps to get your stuff uploaded without a hitch. Check out our website for all the easy fixes and get back to what you were doing!
So, that's the deal with getting your 360 images into CoreLogic Symbility. It might seem like a lot at first, but once you do it a few times, it gets way easier. Just remember to get your images ready, log in, and then put them where they need to go. If something goes wrong, don't sweat it. Just go back through the steps or ask for help. You'll get the hang of it, and soon you'll be sharing those cool 360 views like a pro. Happy uploading!
You can upload 360-degree images in common formats like JPEG and PNG. These are the most widely accepted and easiest to use.
To make your 360-degree images better before uploading, you can change things like brightness, contrast, and colors using simple photo editing programs. Make sure your pictures are clear and sharp.
If you can't find where to upload, check the main screen again or look for a help guide inside the program. Sometimes, it's just in a different spot than you expect.
To make galleries for your pictures, go to the section where you manage images. You should see an option to create a new gallery. After that, you can add your pictures to it.
Yes! You can easily share your pictures by sending links or emails right from the app. It's a quick way to get them to others.
If you have problems uploading, first check if your picture format is correct and if your internet is working well. If the issues continue, get in touch with customer support for help.

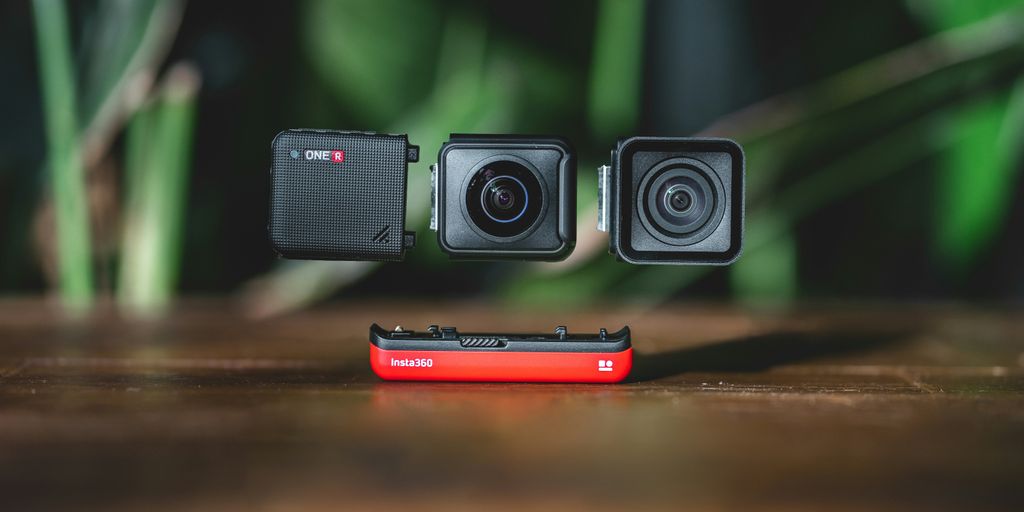
Compact, ready to go anywhere
Interchangeable lens that’s upgradeable
Dual 1-inch sensors for improved clarity and low light performance
Dynamic range and 6K 360° capture
360° photo resolution at 21MP

8K 360° video recording for ultra-detailed visuals.
4K single-lens mode for traditional wide-angle shots.
Invisible selfie stick effect for drone-like perspectives.
2.5-inch touchscreen with Gorilla Glass protection.
Waterproof up to 33ft for underwater shooting.

360° photo resolution in 23MP
Slim design at 24 mm thick
Built-in image stabilization for smooth video capture.
Internal 19GB storage for photo and video storage.
Wireless connectivity for remote control and sharing.

60MP 360° still images for high-resolution photography.
5.7K 360° video recording at 30fps.
2.25-inch touchscreen for intuitive control.
USB Type-C port for fast charging and data transfer.
MicroSD card slot for expandable storage.
.png)
.png)

Try it free. No credit card required. Instant set-up.


